Why Should I Consolidate Clips?
Before I begin the mixing stage of a production, I will likely spend some time editing the audio tracks that I am working with. This could be in the form of time alignment or the application of elastic audio procedures, clip gain and many other editing techniques that may be applicable depending on the desired outcome. These editing techniques will often require me to slice tracks.
Recommended Read: How to Normalize in Pro Tools
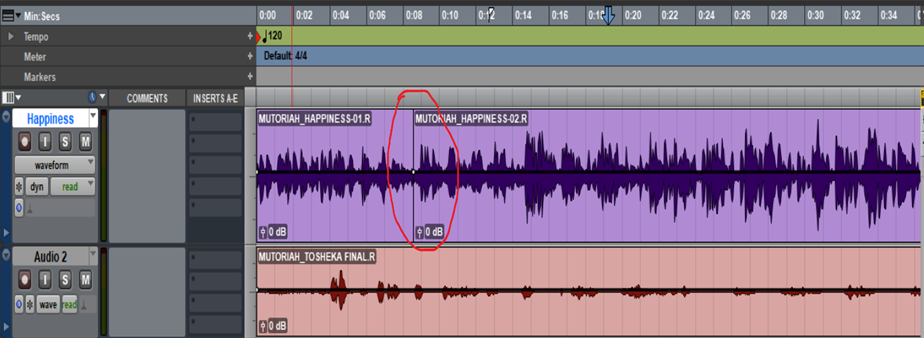
As we can see in the picture above, creating a slice also creates a new audio clip in this case, “MUTORIAH_HAPPINESS-01.R” and “MUTORIAH_HAPPINESS-02.R”. By the end of the editing process, I will likely have several such clips on the same track. During playback the CPU will have to scan all these clips and audio files in real time which can be quite taxing on my hard drive. To mitigate this, I can consolidate the all the clips in the track into one long clip. Consolidating clips is therefore highly recommended before I begin the mixing process or before sending tracks to another mixing engineer, other members of the production team.
Recommended Read: How to Nudge in Pro Tools
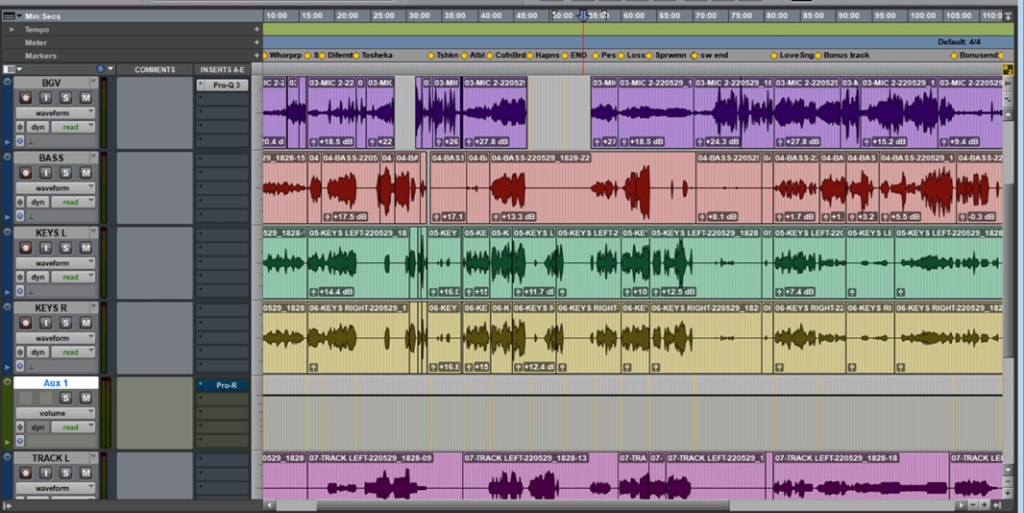
Secondly, if the session contains multiple tracks, each of which has been sliced into multiple clips, consolidating the clips in these tracks can help with the general neatness of the session. Below is an example of a session that has “unconsolidated” tracks.
How to Consolidate Clips
From the picture above, we can see that this session contained several tracks each having multiple clips. These could either be from existing clips being sliced, multiple takes being recorded on a track one after another or multiple clips being imported and placed on one track. These are the tracks I will be consolidating using the following steps.
Recommended Read: Using Pro Tools Beat Detective [Full Tutorial]
- To consolidate the clips, I first need to highlight the clips I want to consolidate. Keep in mind that only clips in the selected region will be consolidated. To highlight the clips, I simply click and drag the mouse pointer over the clips.
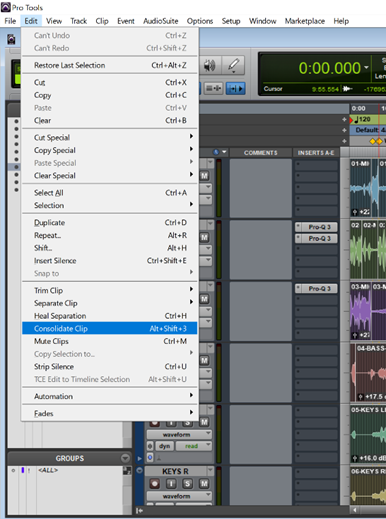
2. Now that the tracks have been highlighted I can consolidate the clips. To do so, I will click the “Edit” button on the top menu bar then click “consolidate clips”.
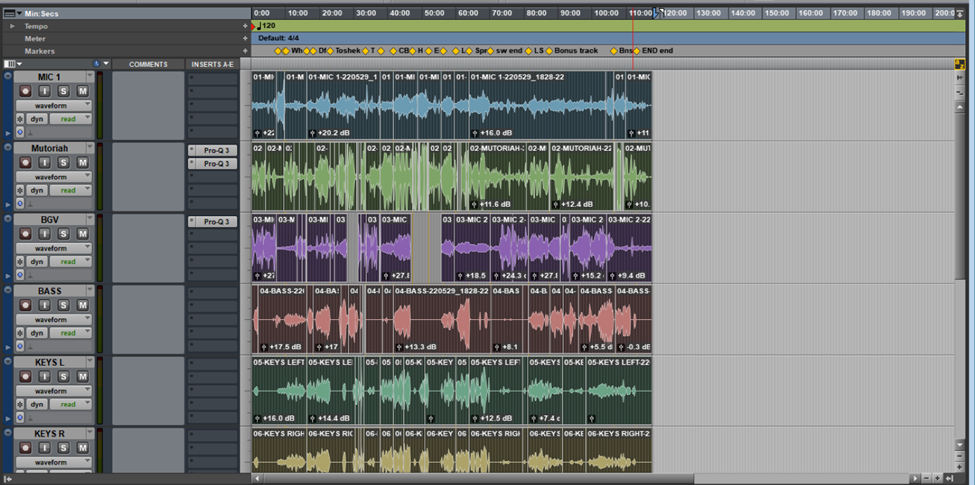
3. As seen above, I can use the keyboard shortcut “Alt+Shift+3” to consolidate clips after having highlighted them. Tracks with consolidated clips will look as follows.

Notice that each track now has one long clip instead of multiple clips.
5. While I can easily find the consolidated tracks in the project folder under the ”Audio Files” subfolder, I have the option of exporting the consolidated tracks to another, more easily accessible location such as an external hard drive. To do this, I first select the tracks I want to export by holding down “CTRL+SHIFT” and clicking each of the tracks I want to export. This will highlight the tracks in the edit window.
6. The names of the tracks I selected in the edit window are now also highlighted in the “clip list”
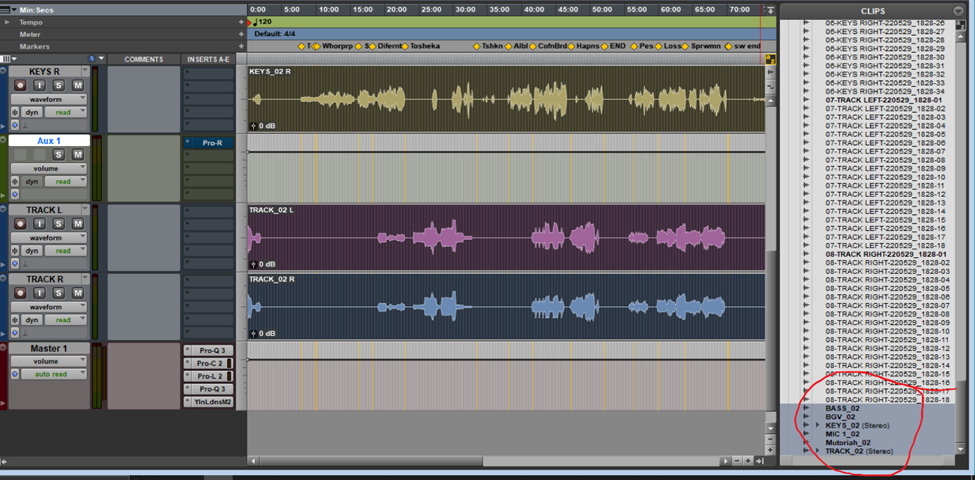
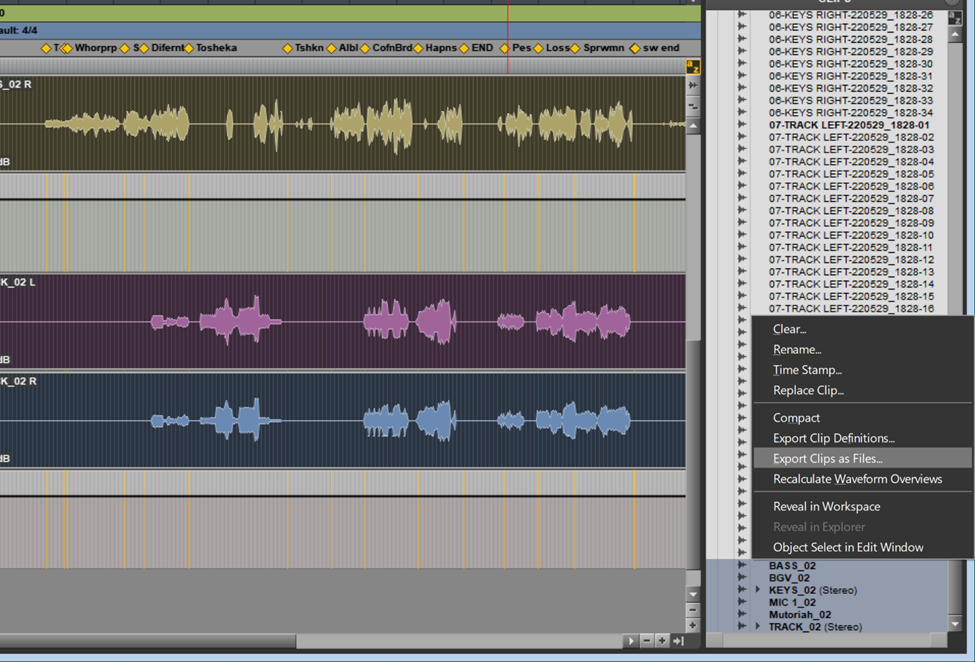
7. To export the clips, right-click one of the highlighted clips and select “Export Clips as Files”
8. In the export window that appears, I can choose where I want the consolidated tracks to be exported by clicking “choose” and browsing to the desired destination. By default, the tracks would be exported to the “Audio files” sub folder in the project folder. This export window will also allow me to select the file type, format, bit depth and sample rate of the tracks I end up with after the export.
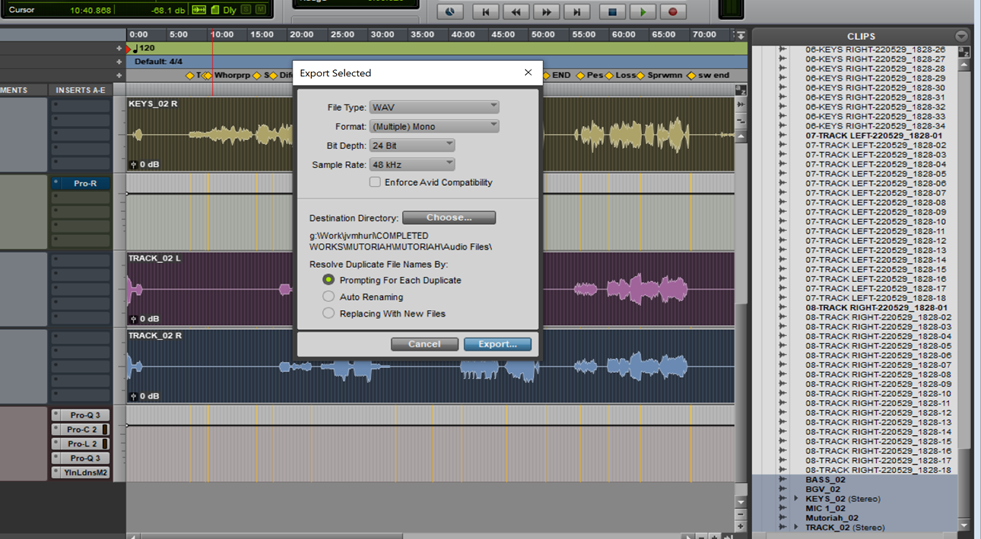
9. Finally, I click “Export” to save the consolidated tracks as audio files in the selected destination directory.
In summary, I consolidate tracks to save on CPU usage, to have a neat looking session, and to prepare tracks for export in case I need to send them to other people that I would be working with on a project with.

- Pro Tools Won’t Play [No Playback FIXED] - April 16, 2023
- No Sound in Pro Tools [FIXED] - April 16, 2023
- Pro Tools Not Recognizing Audio Interface [FIXED] - February 4, 2023
![Waves Plug-ins NOT Showing up in Pro Tools [FIXED]](https://ProRec.com/wp-content/uploads/2023/01/word-image-3980-1-180x180.png "Waves Plug-ins NOT Showing up in Pro Tools [FIXED]")
![Pro Tools Unable To Locate Hardware [FIXED]](https://ProRec.com/wp-content/uploads/2022/07/image-180x180.png "Pro Tools Unable To Locate Hardware [FIXED]")
")
