Sampling is an important art form in hip hop and electronic music. Often, you’ll hear some of your favorite childhood hits sampled in new music. You get a ton of creative potential when you can take an old sound and rework it for a different track rather than starting from scratch. It gives you unrestricted freedom to deconstruct melodies and make new ones.
Even without outboard gear like the MPC, you can still create, add and use unique samples in many of the major DAWs. FL Studio is one of those DAWs with a quick and intuitive workflow when it comes to chopping samples.
Recommended Read: How to Sample in FL Studio [Step by Step]
It may take some time and practice before you become the modern day J Dilla, but in this tutorial, I’ll show you how easy it can be.
Different Ways to Chop Samples in FL Studio
Playlist Tools
When I want to get right into it without loading any plugins, this is the easiest and most common method to chop samples.
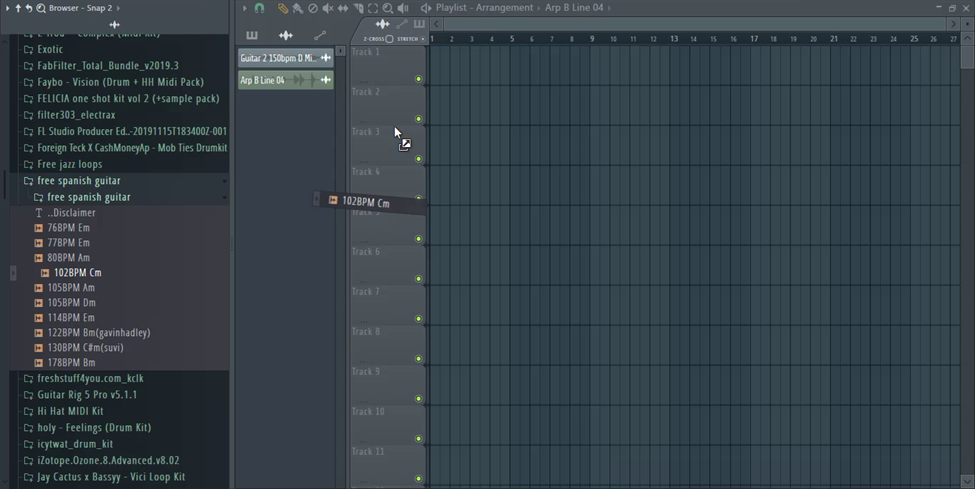
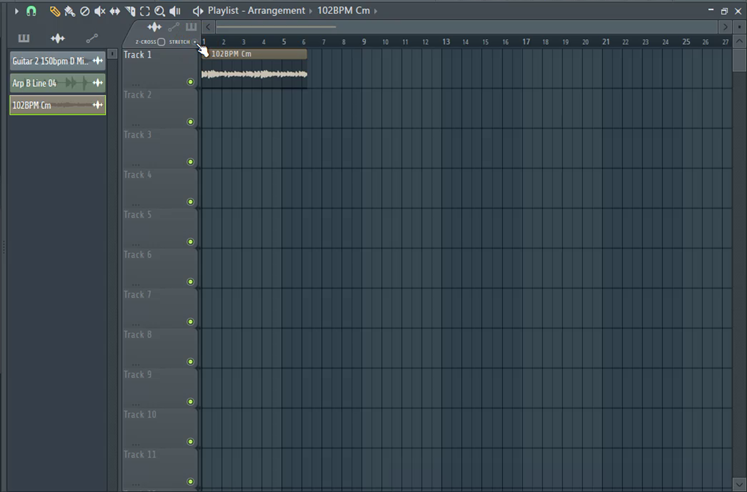
Just load your sample into the playlist view by dragging and dropping it from the left side browser in FL studio or from your File explorer.
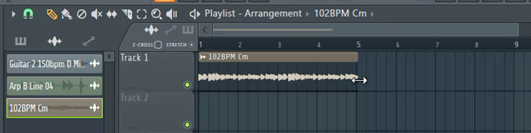
Your sample may not match the tempo. If you’re making music using the 4/4 time signature that is common with most pop music, your sample should ideally fit perfectly in a bar or more. Sometimes, it doesn’t.
When this happens, select stretch in the top-left toolbar and using the select tool, drag the end of the audio to fit 4 bars.
Stretching the audio might alter the pitch of the audio. This is purely dependent on the stretch mode. You might like it or not. If not, double left click on the audio files.
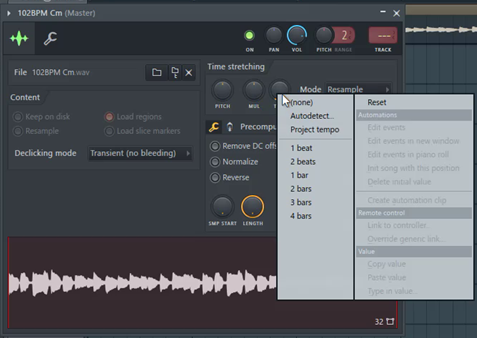
In the sample channel settings, go to the time stretching tab. You’ll see 4 controls.
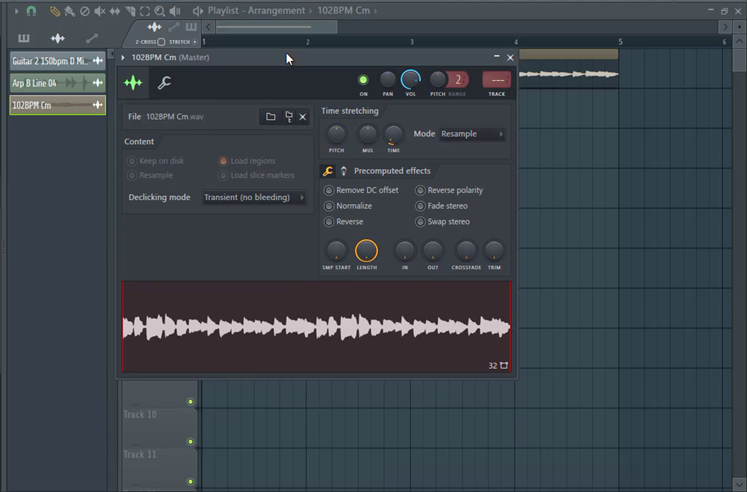
Pitch: This lets you change the pitch of the audio without affecting the length of the sample.
Mul: You can change the length of the sample using this knob.
Time: This determines the time taken for the sample to play. You can right click this knob and from the menu, select 4 bars to automatically stretch the audio.
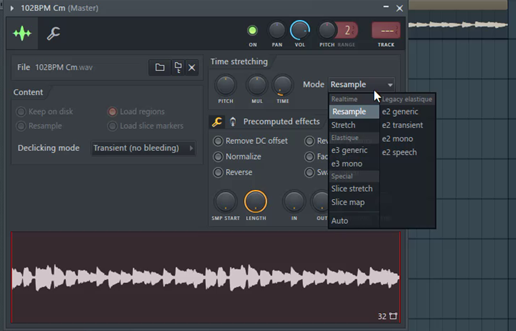
Mode: This allows you to change or maintain the pitch of the sample and its tempo.
From the stretch mode menu select e3 elastic to maintain the pitch of the audio.
Once done, select the slice tool from the icons on the Toolbar. You can also press Alt+C to activate it.

With this tool selected you can cut and split the samples as you like by clicking and dragging through the audio files.

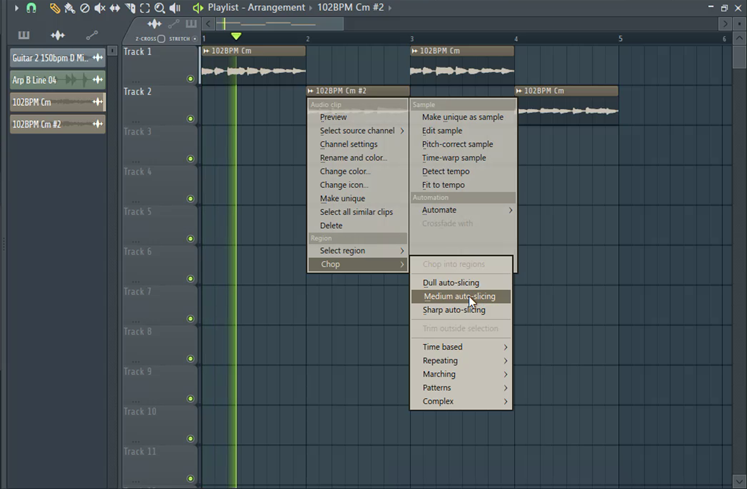
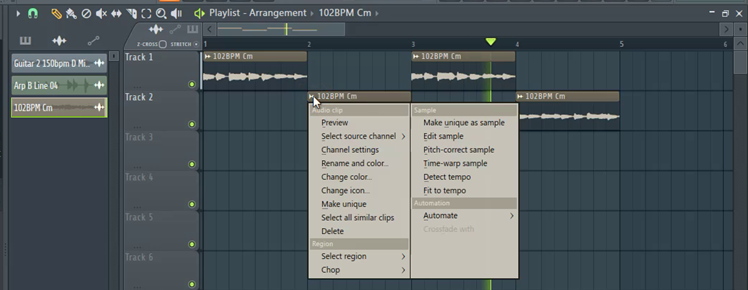
You can also cut the samples by clicking on the wave icon at the top-right of the audio file. Scroll to chop and select a cut pattern from the list of options.
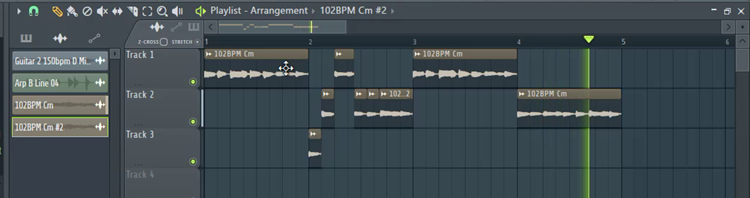
You can now rearrange the chopped samples.
To edit the cut samples separately, click on the wave icon and select ‘make unique’ or “make unique as sample” to save the cut as a different sample.
Slicex
Fruity Slicer and Slicex are native advanced sampler plugins that auto slice audio and assign the chopped pieces to a midi controller, starting from C5. You can even play the chops from the piano roll.
Recommended Read: FL Studio not Loading Samples [FIXED]
Slicex works especially well when chopping drum samples.
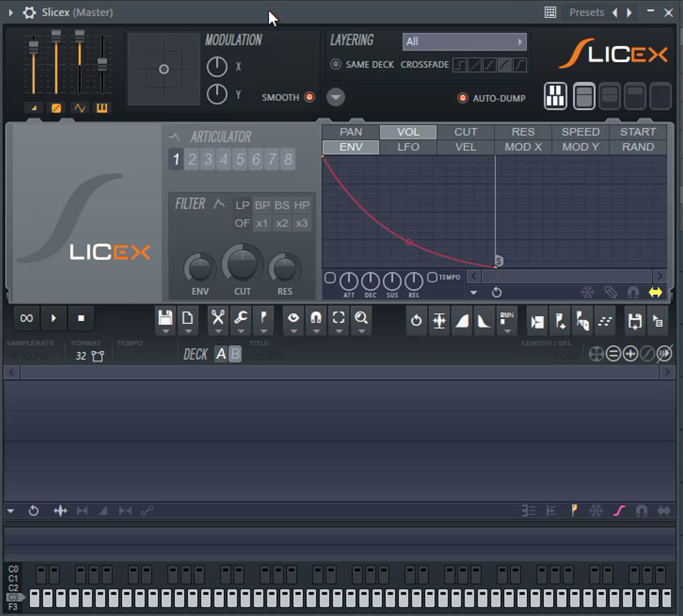
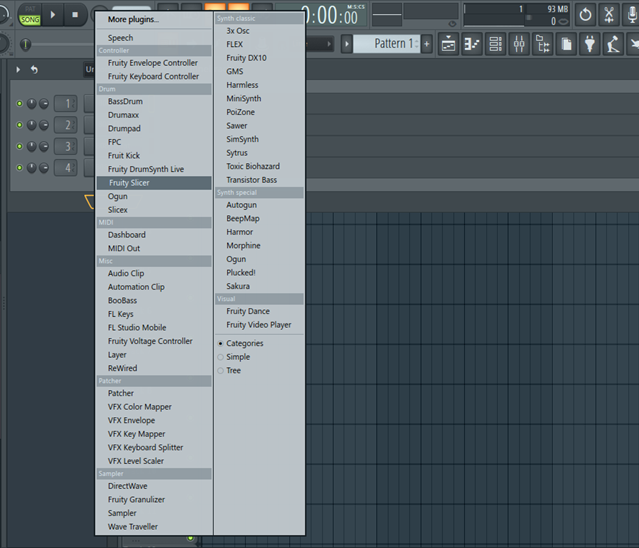
Load the plugin by clicking on the plus button on the channel rack and select ‘Slicex’

There are a couple of ways to load your sample into slicex.
- double left click on the gray slicex logo on the left.
- double left click on the empty wave editor.
- Drag and drop your sample from the browser.
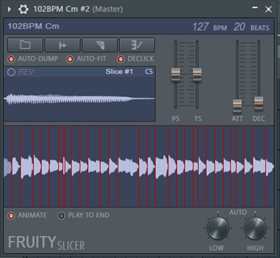
Slicex automatically slices the audio into regions.
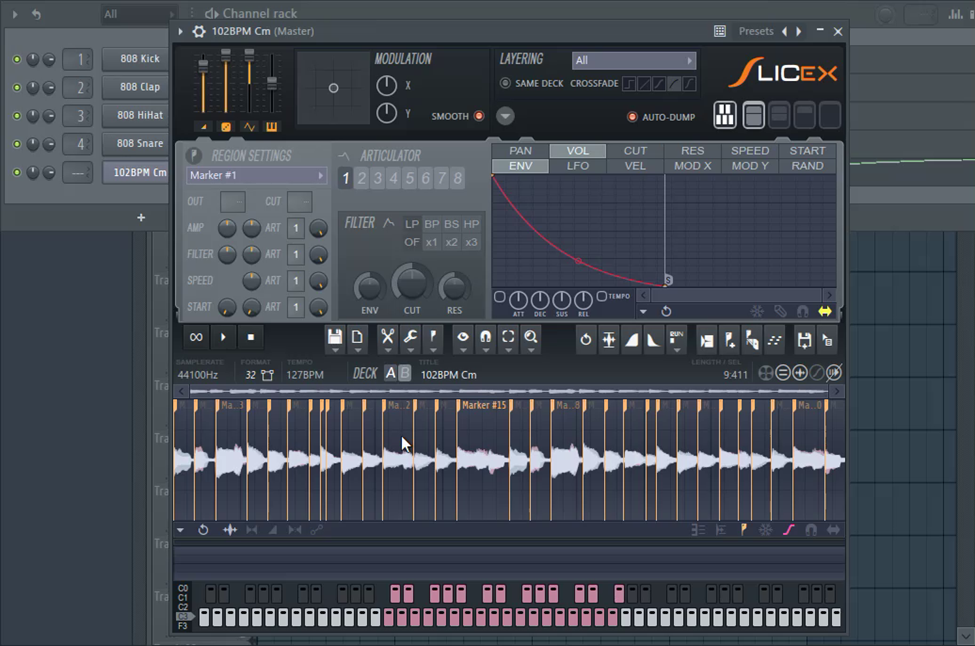
To customize the cuts, click on a marker on the audio editor to move it.
To add more cuts, highlight the part of the audio that you like.
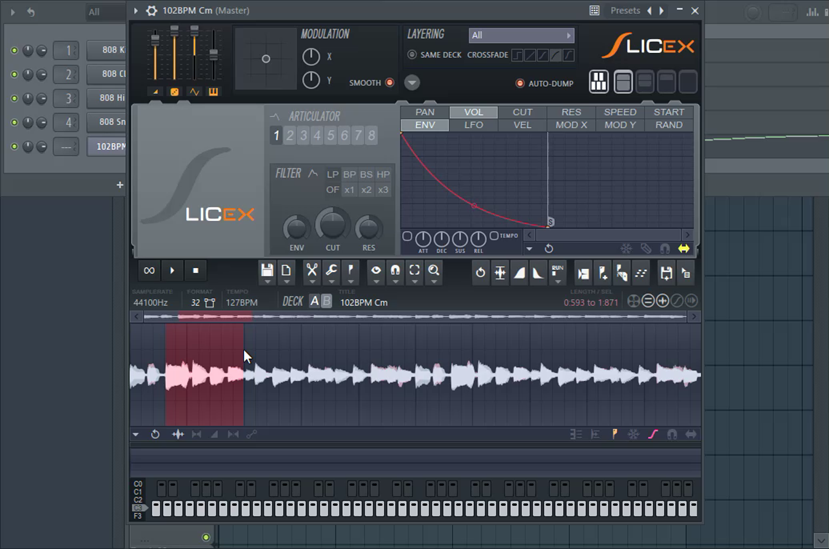
Go to the regions menu. Select ‘add region’. Type a name for your region and press enter.

To remove a cut, right click on a marker and select ‘delete’.
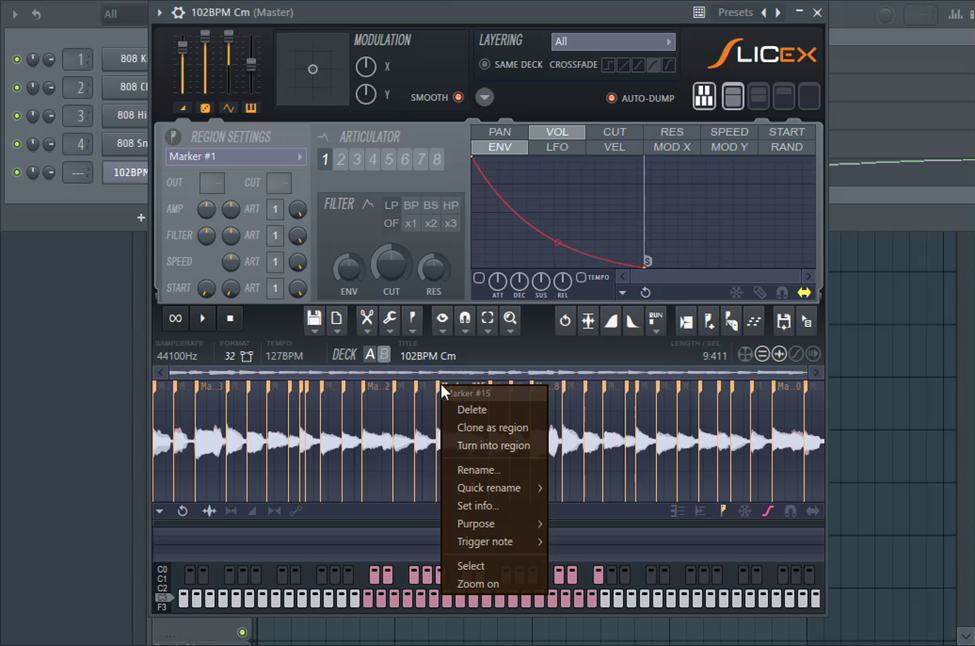
To remove all the cuts, double left click on the audio to highlight it all, the click on the regions icon and select ‘delete’.

Fruity Slicer
Add your sample to the playlist view.
Double left click on it to open the Sample Channel settings.
Right click on the wave form and select, ‘Open in new Fruity Slicer channel’.

You can also add Fruity Slicer to the channel rack by clicking on the plus button at the bottom right.
Load your sample by dragging and dropping it into the empty waveform editor or clicking on the folder icon and importing the sample from your browser.
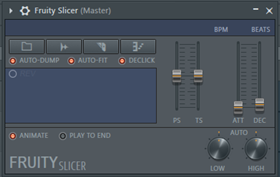
You can edit the slice algorithm by clicking on the razor icon.
Unlike Slicex, you cannot edit the cut regions manually.
Edison
Making chops with Edison is similar to making them with Slicex.
Open Edison by clicking the audio editor icon on the FL studio toolbar.

Next, drag and drop the audio from the browser. If your audio is already on the playlist, double left click it to open the channel settings. Right click on the waveform and select ‘edit in audio editor’
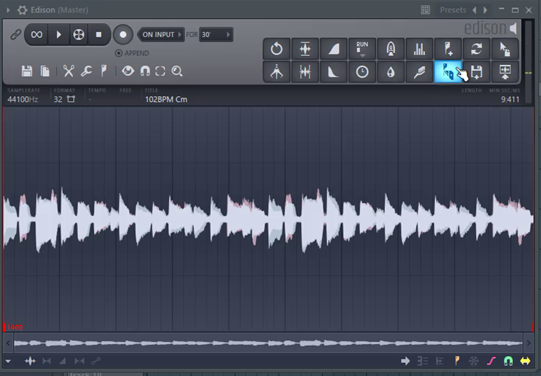
Click on the box cutter icon to automatically slice the audio. By default, the audio will be sliced according to the transients.
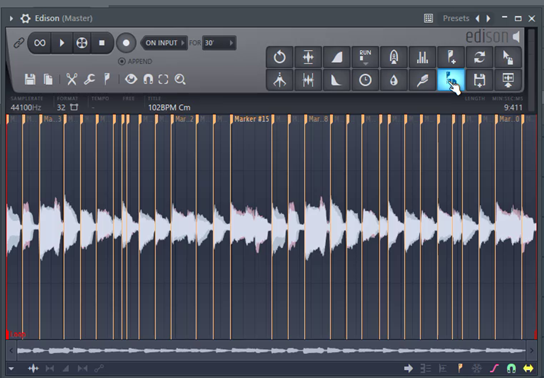
Do the same thing as you would in Slicex if you want to customize the cuts.
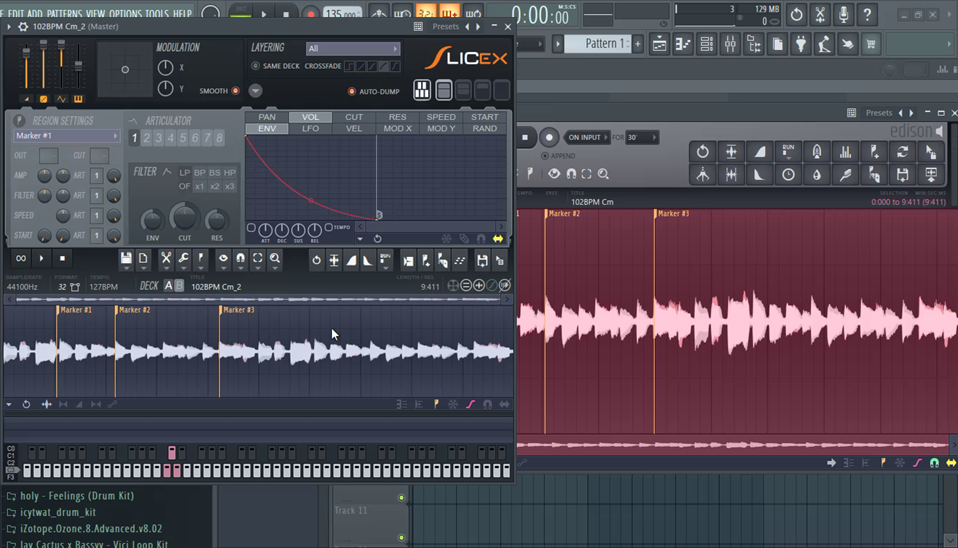
Once done, we now load the sliced audio into a sampler plugin like Slicex so that we can play the cuts from the midi. To do this, add Slicex to the channel rack.
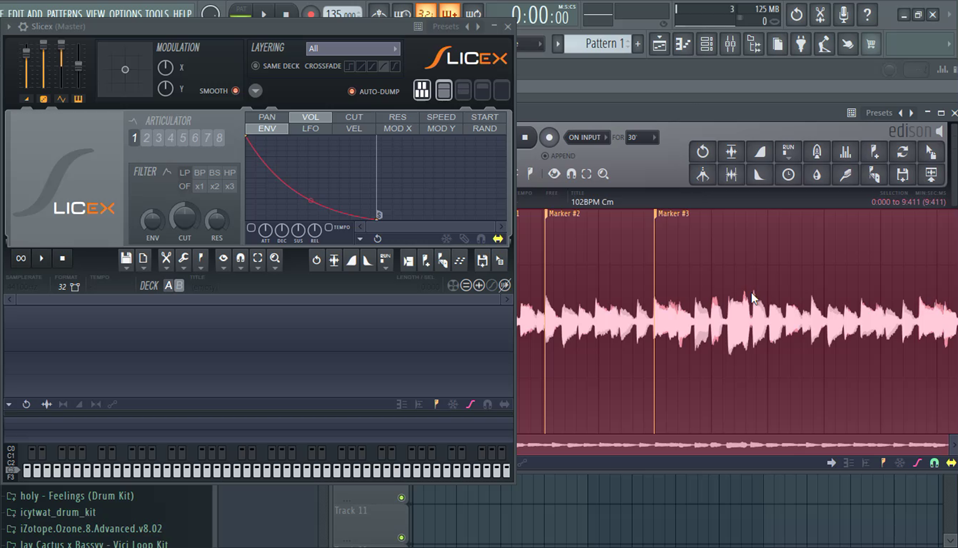
Select the audio regions and drag and drop them to the empty wave editor in Slicex.
Conclusion
We chop samples to get some interesting drums, chords and melodies. When you come across that amazing loop, you now know how to chop and resample in FL studio.
Recommended Read: How to Remove Drums from a Sample in FL Studio
Sampling in FL studio is quite easy even without installing extra plugins. Fruity Slicer and Slicex are very powerful chopping tools. You can also just cut the samples in the playlist views. Depending on your circumstances, any or all of these methods can be of use.

- FL Studio Tempo Changes When I Press Play [FIXED] - January 14, 2023
- How to Speed up / Stretch Sample in FL Studio - January 14, 2023
- How to Find / Detect Tempo BPM in FL Studio - September 30, 2022
![How to Sample in FL Studio [Step by Step]](https://ProRec.com/wp-content/uploads/2022/09/image-250-180x180.png "How to Sample in FL Studio [Step by Step]")

![FL Studio not Loading Samples [FIXED]](https://ProRec.com/wp-content/uploads/2022/09/image-103-180x180.png "FL Studio not Loading Samples [FIXED]")
