Pitch refers to the area in the audible frequency spectrum that a sound occupies. In music production, pitching or repitching complex audio or MIDI samples affects the key of the samples. This technique can be used creatively, to create desirable modulations, or correctively, to make your samples match the key of your production.
You can change the pitch of a sample in Ableton using the following methods:
- Using the Clip Editor (Audio samples only) – this is the primary pitch-changing technique in Ableton, very simple to execute.
- Using a Sample Editor (Audio Samples only) – Ableton comes with two pitch editors, Simpler and Sampler, I will display the technique using Simpler.
- Pitch Automation (Audio and MIDI) – This is a highly creative technique, also very fun to use. Although the execution is similar for both MIDI and audio samples, the automation parameters are titled differently for each use case.
- Using Plug-ins (Audio and MIDI) – For audio samples, you will primarily use audio effects plug-ins (Nectar 3 in this demonstration), and for MIDI samples, this change of pitch is done inside the instrument plug-in (in this demonstration, I will use the Emulator II V)
- The piano roll (MIDI samples only) – you can use the piano roll to see your MIDI notes and change the pitch.
Repitching audio samples is a fairly straightforward process. You can even find the best pitch for your productions by ear. MIDI samples, on the other hand, require a little music theory knowledge. Although you may alter them by ear, it isn’t recommended if you’re looking for consistent results.
Let us get started!
Changing Pitch of Audio Samples
Changing the pitch of audio samples is a simple and intuitive process. As mentioned earlier, you do not need any prior music theory knowledge. You can find the best pitch for your production simply by ear and the emotion the new pitch invokes. Here is how you change the pitch of audio samples:
Clip Editor
This is the most straightforward way to change the pitch of your audio samples. Do this by:
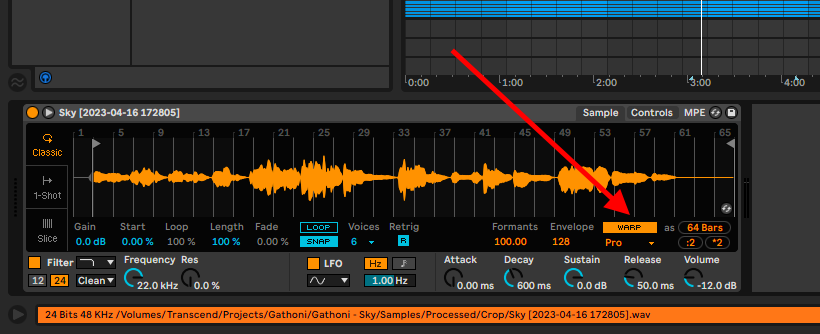
Step 1: double-click your audio sample to open the sample editor.
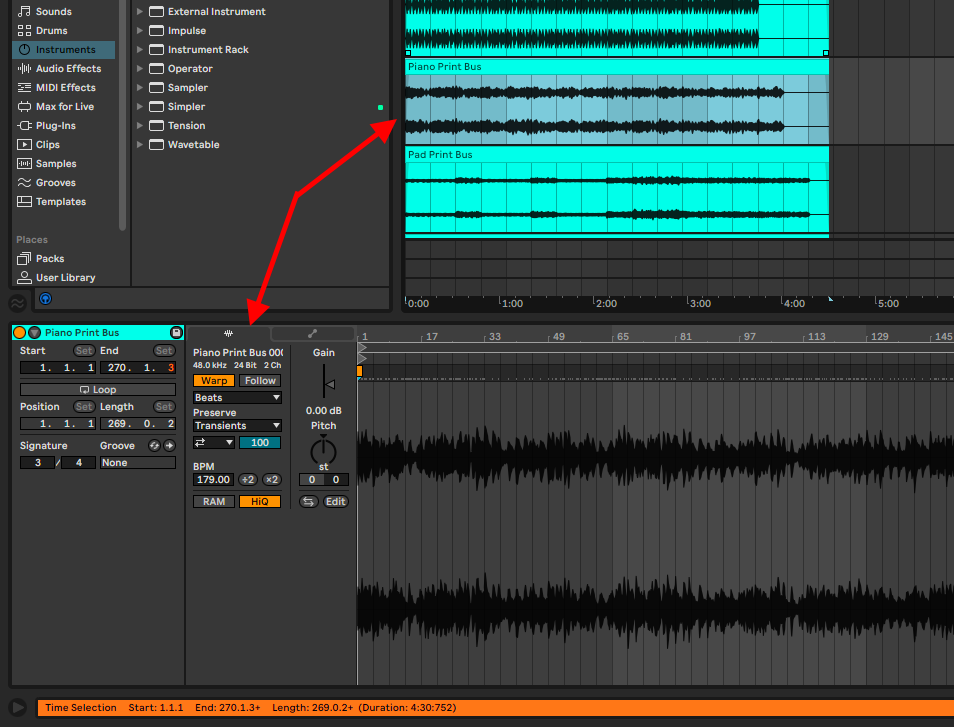
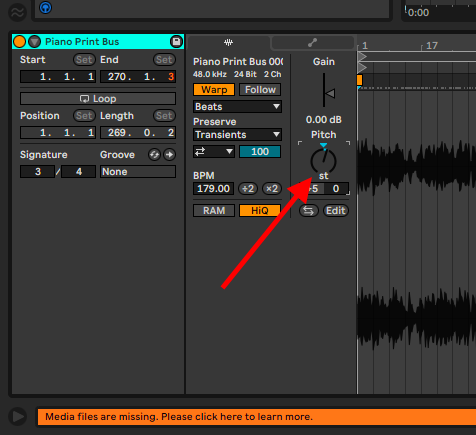
Step 2: use the pitch control knob to change the pitch of your sample.
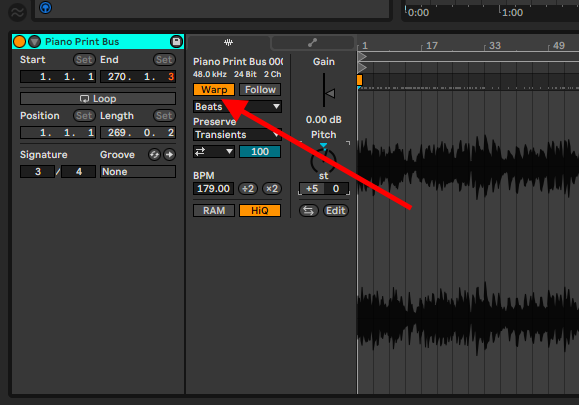
Caution! Be mindful of the warp function in the clip editor because if your sample is not warped, the length and speed of your sample will be skewed.
Simpler Editor
Using one of Ableton’s sample editors allows for several control options. One of these controls is the pitch control. For this demonstration, I will use Ableton’s native sample editor, Sampler.
Step 1: load the Simpler plug-in or your chosen sample editor into a MIDI track and load your sample.
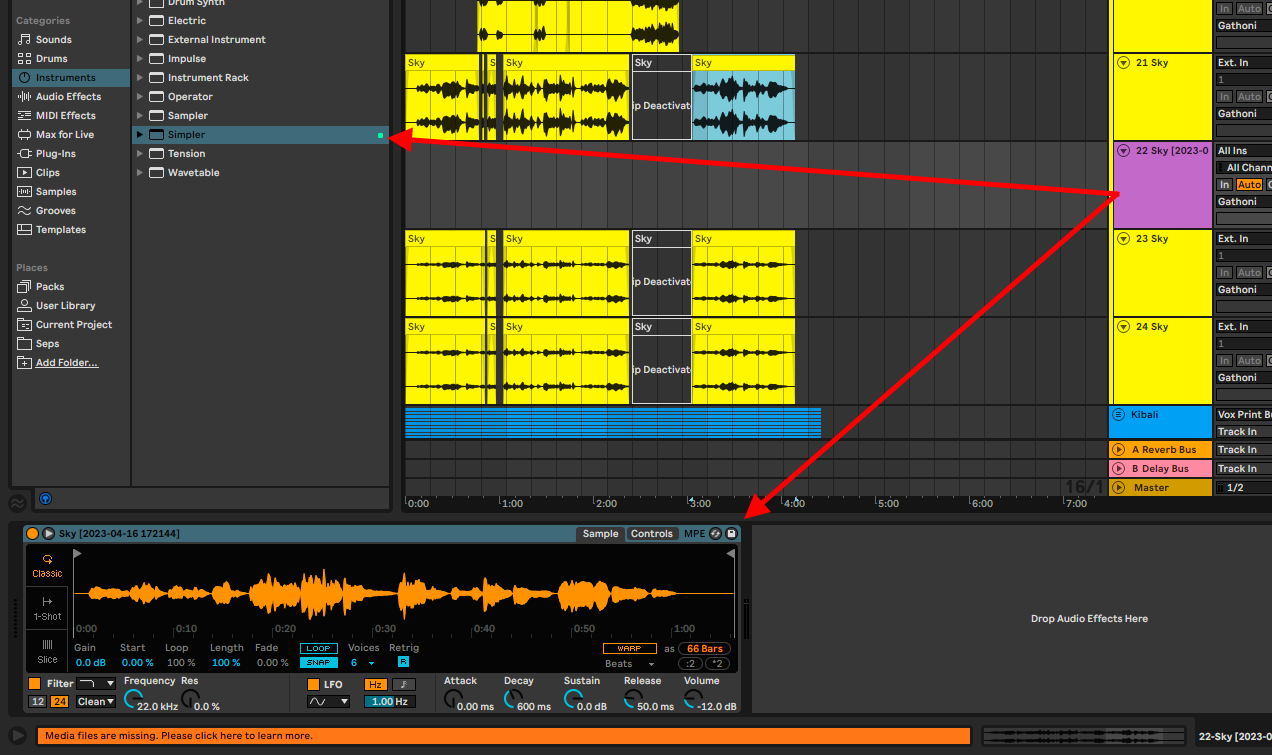
Now you will notice that every note you play on your MIDI controller has a different pitch to it. Note! If you don’t warp your samples, you will notice the same issue of time stretching as the clip editor technique.
Tip! If you want to know more about warping audio, check out my sample editor tutorial.
Pitch Automation
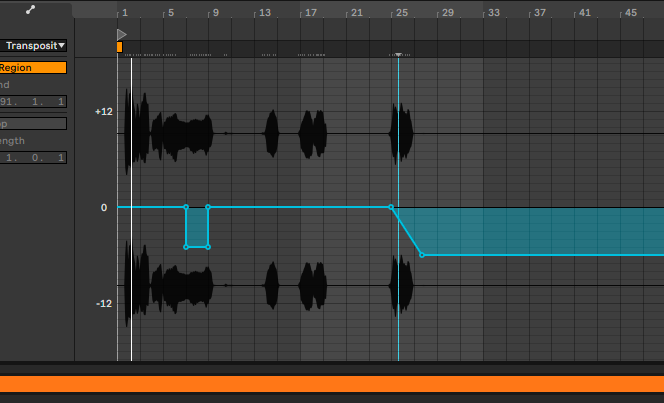
This is by far the most dynamic pitch-changing technique for audio samples. I use this to make the singing effects at the end of songs, or at some point in the sample. This is how you do it:
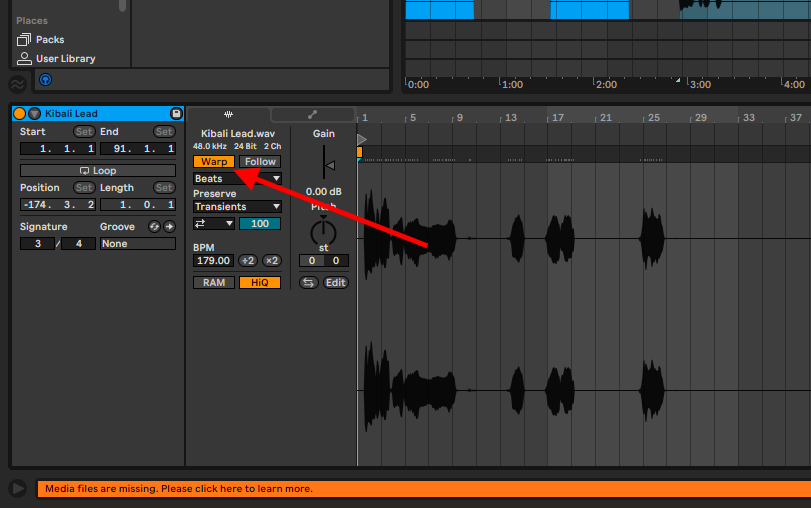
Step 1: Open the clip editor and make sure your sample is warped.
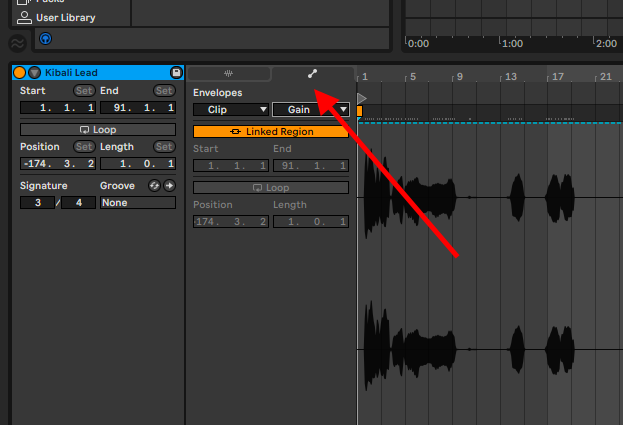
Step 2: Open the envelope automation window in the clip editor.
Step 3: Select the ‘clip’ option in the first drop-down menu and select the transposition parameter control.
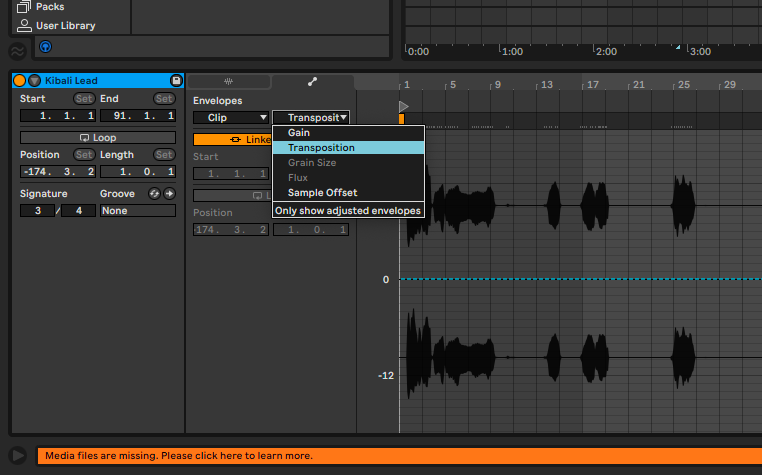
Step 4: now create fixed or logarithmic automation by pressing ‘B’ on your keyboard to toggle between the pencil or selector tools respectively.
Audio Effects Plug-in
You can also change the pitch of an audio sample by using an effects plug-in. Note that this technique can also be used for MIDI samples, but in my case, I normally use this technique to create vocal harmonies.
Step 1: load the plug-in into your track. In this case, I will be using the Nectar Plug-in.
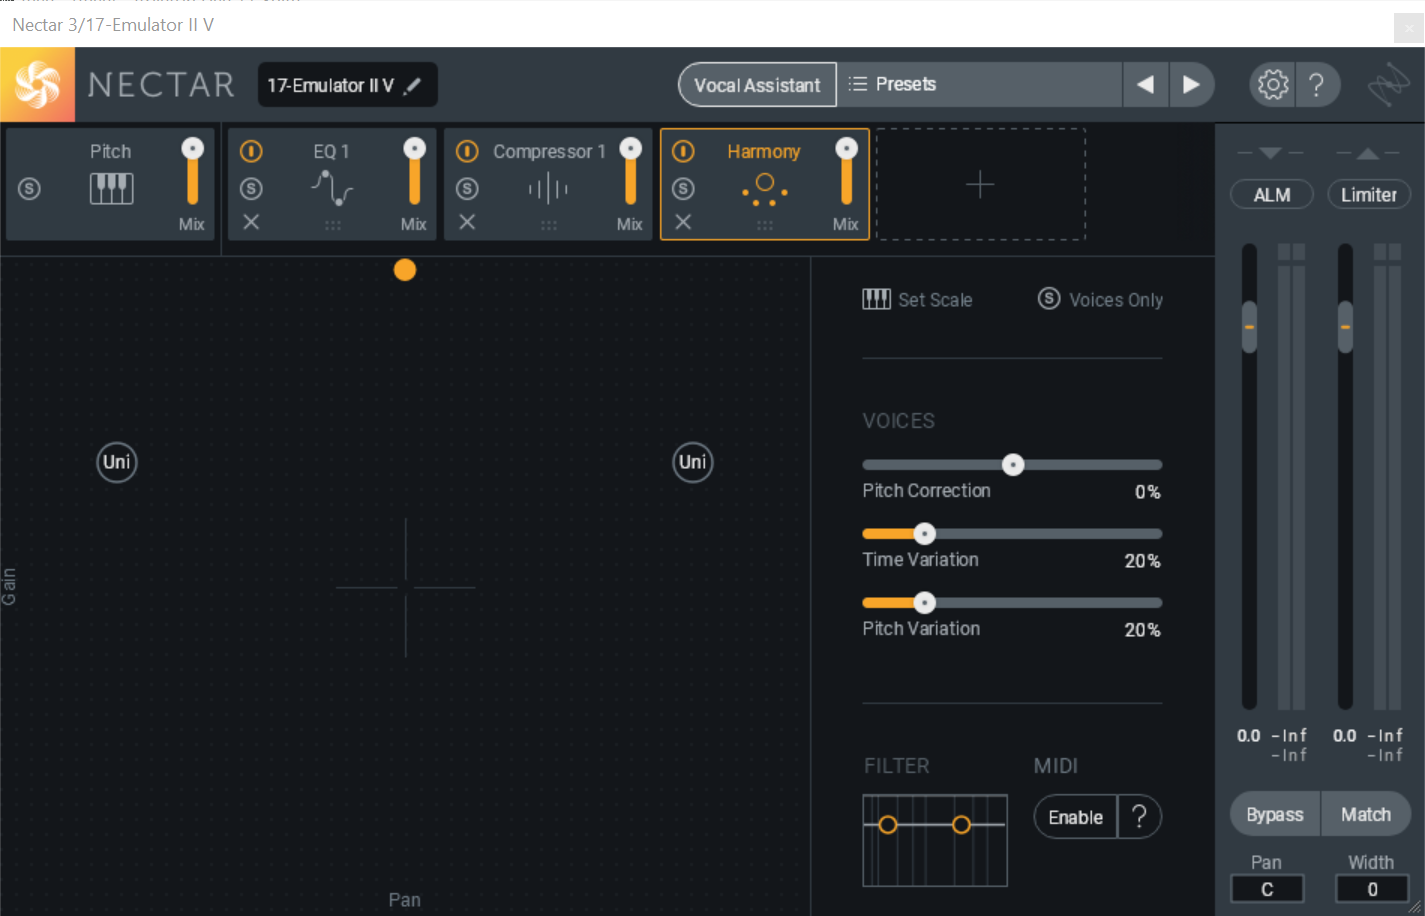
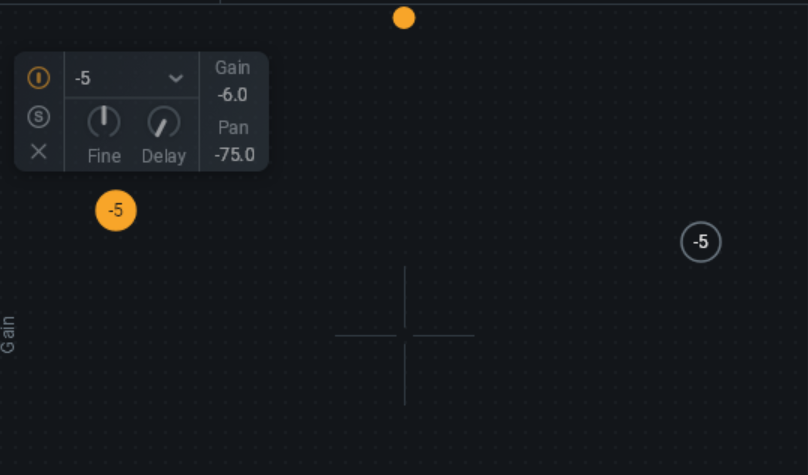
Step 2: identify parameters that can change the pitch of your audio playback. In this case, Nectar has an artificial harmony creation tool called Harmony. Go ahead and make the desired edits.
Changing Pitch of MIDI Samples
Out of the three MIDI sample techniques, only one requires you to have basic knowledge of music theory. Nevertheless, you can alter the pitch of MIDI samples by ear and feel how these changes fit into your productions.
The Piano Roll
This technique allows you to control the pitch of specific notes. Note that if you alter the pitch of a specific note in a chord, you might end up either changing the key of your MIDI sample (minor or major) or the chord type (diminished, suspended etc). With this in mind, this is how you execute this technique:
Step 1: Double-click on your sample to open the piano roll.
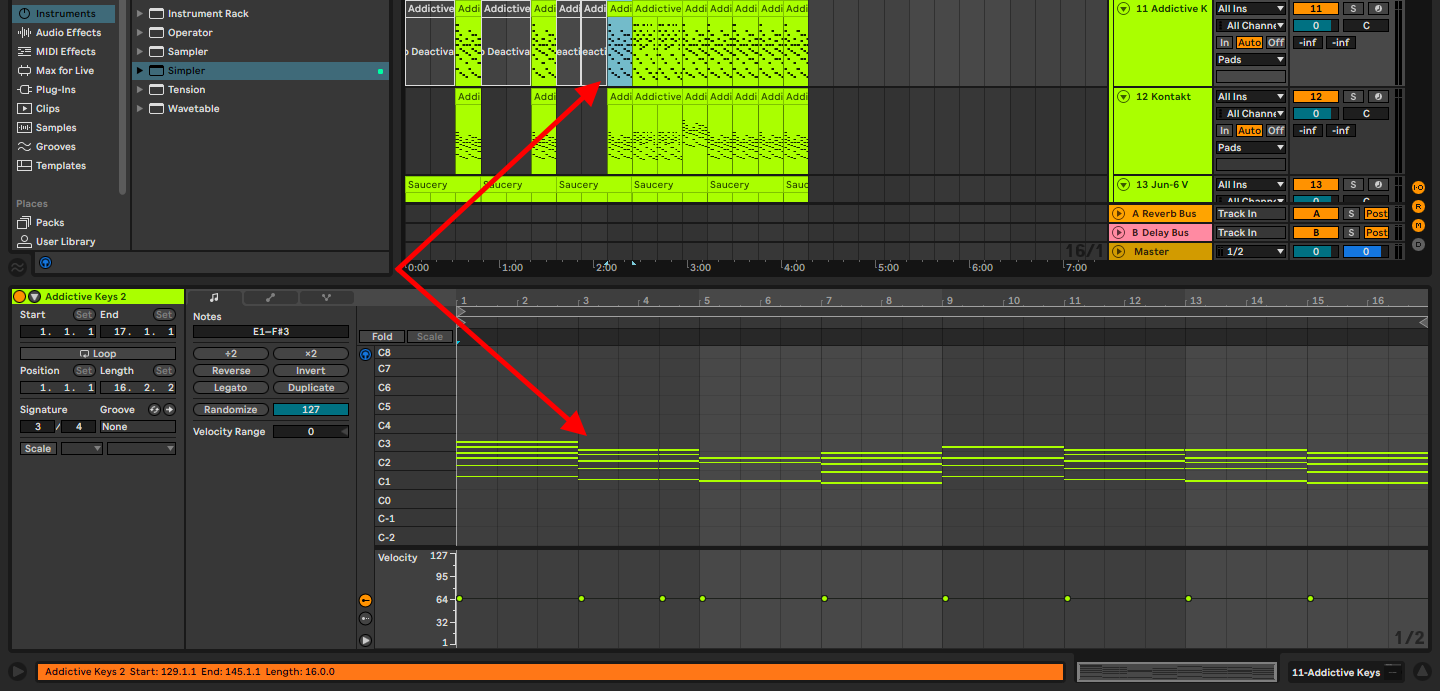
Step 2: Select the note(s) you want to repitch.
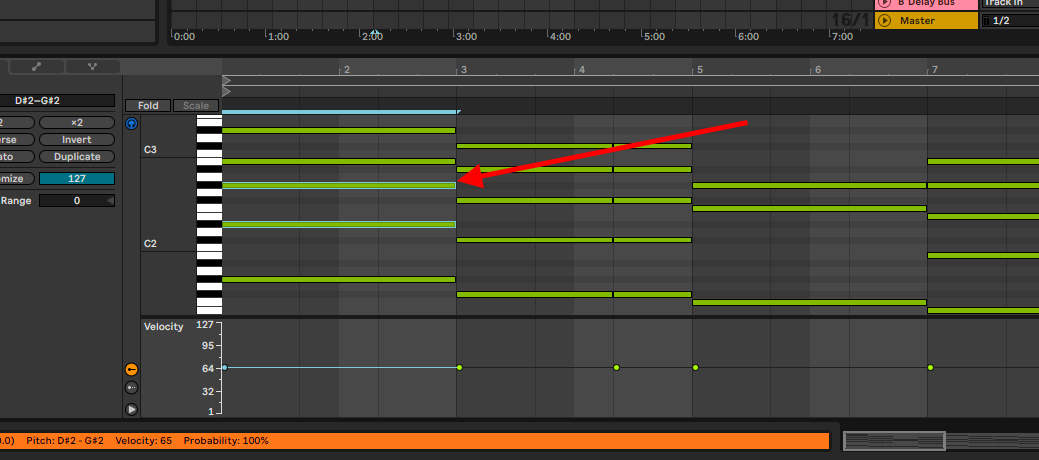
Step 3: now use the up and down arrow keys on your keyboard to change the notation and overall, the pitch of your chords.
Pitch Automation
Pitch Automation is as dynamic for MIDI samples as it is for audio samples. You will find that the controls are named differently, but still function the same way. This is how you execute this technique:
Step 1: Open the clip editor by double-clicking your sample and selecting the automation controls window.
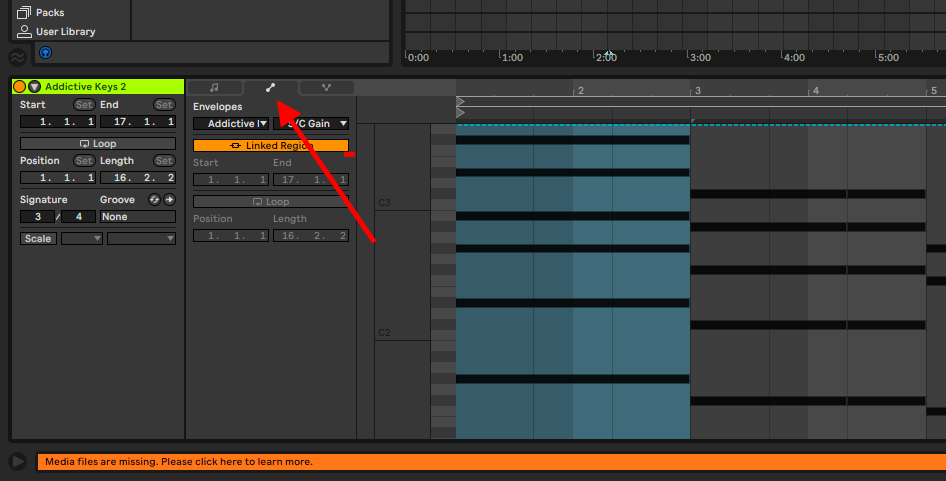
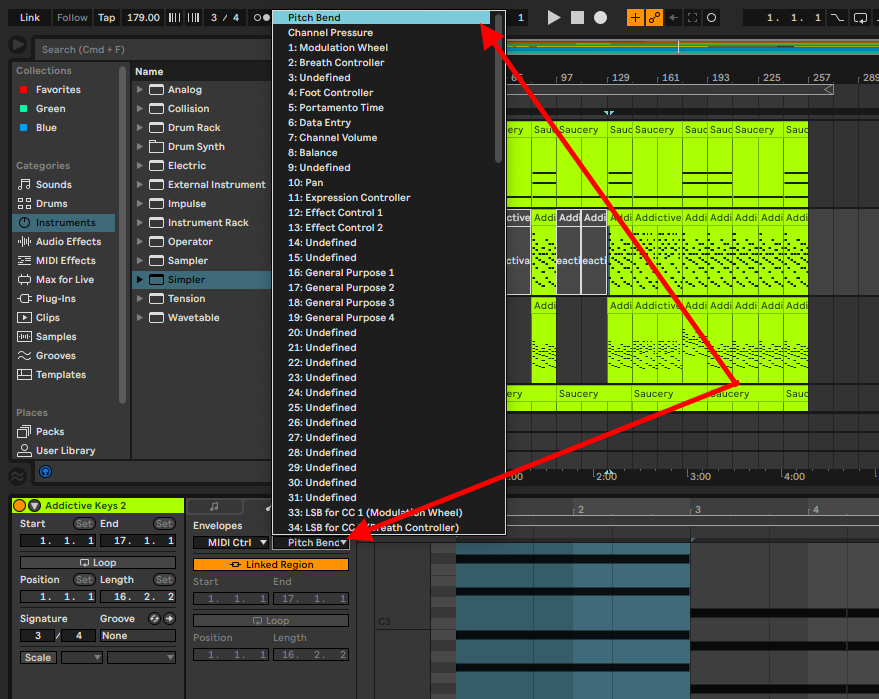
Step 2: under envelope control parameters, select the MIDI Ctrl option in the first drop-down menu, and pitch bend in the second.
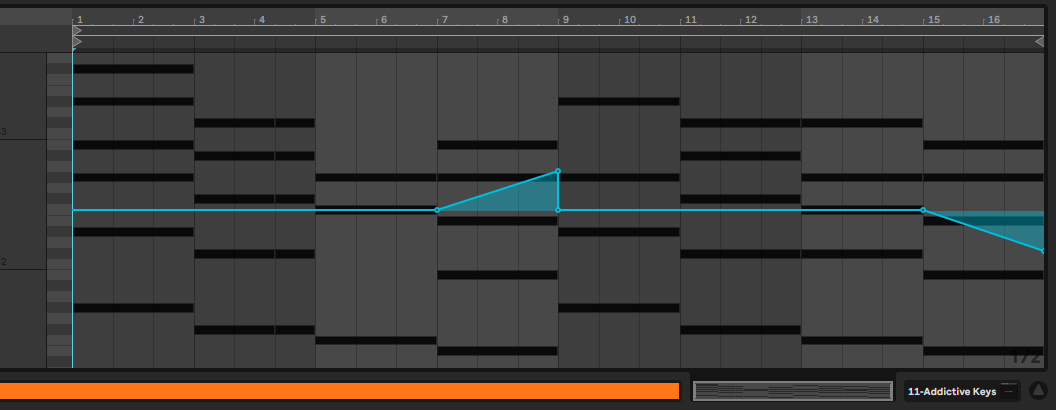
Step 3: create pitch automation.
Plug-in Instruments
With this final technique, you won’t essentially need any music theory knowledge as long as you have a good ear for frequencies that work well together.
Some plug-ins have pitch-changing parameter controls, and they’re named differently across different plug-ins. In some cases, you’ll see them labeled as detune, repitch, retune, pitch, or transpose, and they may even be integrated into other controls such as an octave control. You will need to check the plug-in you’re working with to understand where these controls are.
In this example, I am using the Emulator II by Arturia where the pitch-changing control is titled ‘transpose’.
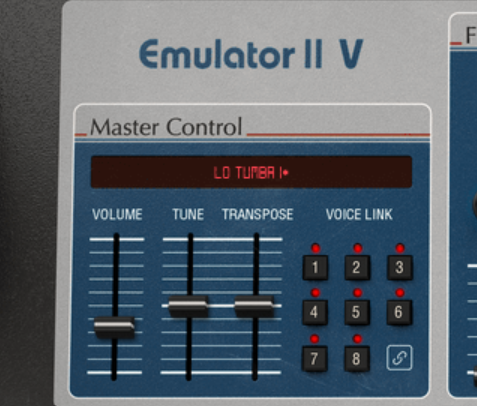
You can change the pitch of your MIDI sample by simply changing the values of this parameter control.
Tip! You can also change the pitch of your audio or MIDI sample when recording using a MIDI controller, that is if your controller comes with a pitch modulation wheel. When recording MIDI samples, these pitch modulations can be edited in the envelope automation option present in the clip editor. However, if you’re recording into an audio track, your pitch modulation will get printed along and it won’t be possible to edit it after.
Final Thoughts
Changing the pitch of your sample can take your productions to the next level. Whether sampling or resampling, these techniques can be used creatively or correctively, to create harmonies, or match your samples to your production. Have fun!
- How to Use Ableton Live’s Arpeggiator? - September 18, 2023
- How to Use the Piano Roll in Ableton Live + Shortcuts - September 18, 2023
- Ableton Arrangement View (Optimization & Usage) - September 16, 2023


