How you choose your tempo markedly defines and influences your project’s genre as well as the feel of your project.
For example, if you are a house music producer, you will generally produce in the 155 – 130 BPM range. If by default your tempo is 120 BPM, by going down to ¾ speed at 90 BPM, you will find your song more emotional, tranquil, or ‘deep’. If you double your tempo or simply increase it, your song will sound more energetic, and suitable for a live show to get your audience pumped up and excited.
Recommended Read: How to Change Tempo in Ableton Without Warping Audio or MIDI
You may also change your song’s tempo mid-song to create more dynamism and a ‘wow’ factor. You can do this by automating your tempo in Ableton. You will also find the need to automate the tempo for your live performance, or demonstration. This means that you can automate your tempo to suit production or performance.
The Two Main Ways to Automate Tempo in Ableton
There are 2 main ways you can automate tempo in Live. These can be done in the ‘mix’ or ‘arrangement’ view. You can do this in these ways:
1. Arrangement view: this will suit you if you are producing and want to switch tempo mid-song to make your song sound interesting.
2. Session View: this technique will suit your live performance, or if you are teaching or demonstrating in an educative setting to quickly switch between scenes.
Here is how you shall go about it:
Arrangement View Automation
As mentioned, this technique is primarily a production-based technique to make your productions more dynamic and captivating but you can also use this technique in your performance. You may use these techniques to switch tempo more creatively, as well as switch genres mid-song. If you are working in a live performance setting with multiple songs lined up in your session, you can change the tempo in between songs so instrumentalists or performers can stay in tempo though the tempo changes between songs. Here is how you go about tempo changes through this technique:
Step 1
Switch to arrangement view, with the mix view and arrangement view toggle
Step 2
Select your master track and activate the automation view
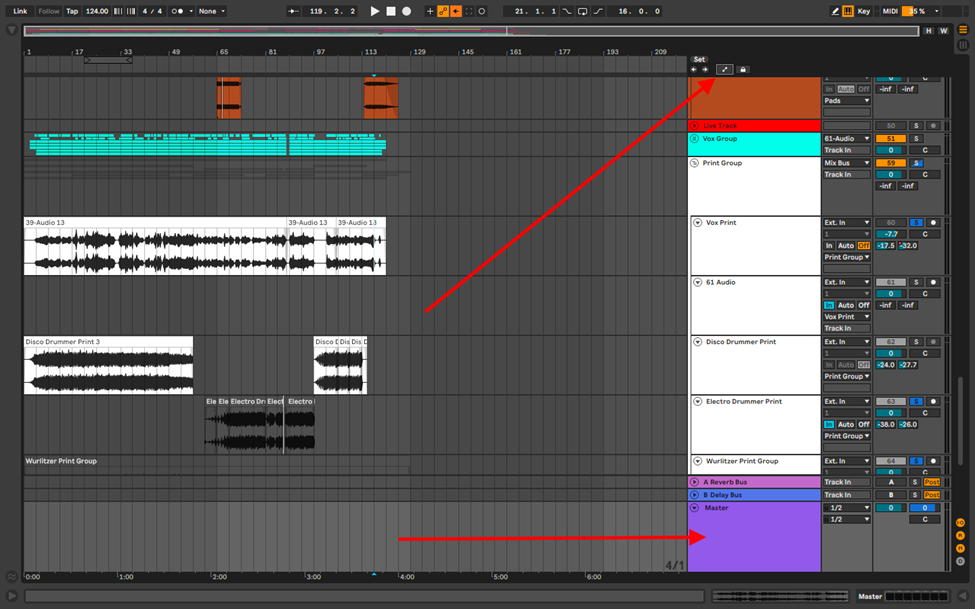
This will enable a few automation options on your master track. By default, Ableton has the general automation options set to your mixer. If you have plugins and audio effects loaded, you will see the automatable features of your loaded effects or effects racks listed.
In the selectable automatable feature, the tempo is your default automatable feature.
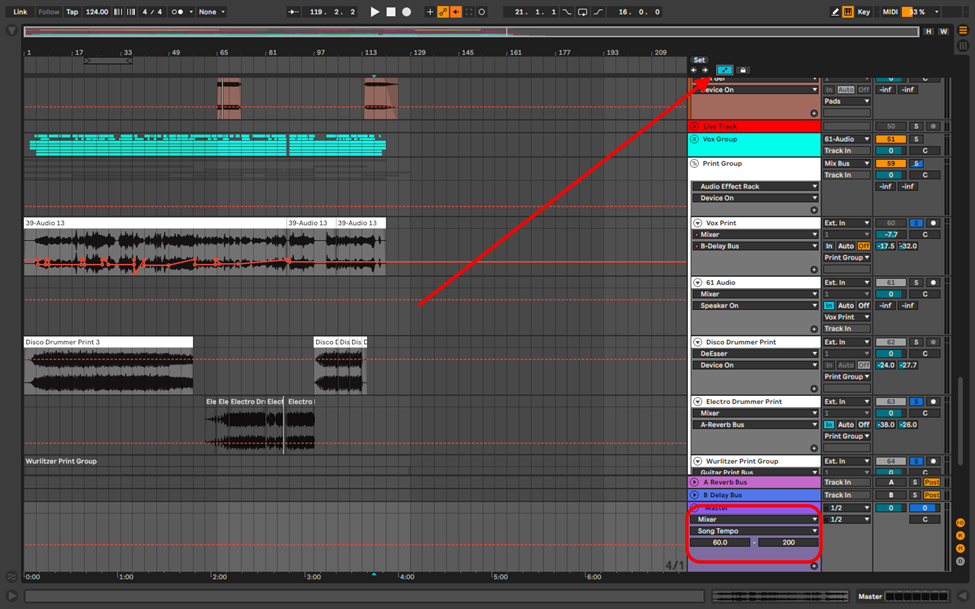
Once you have activated the automation view, you will find that the tempo automation range will generally be between 60 – 200 BPM.
Step 3
Once you enable this feature, press B on your computer (Windows or MacBook) to activate the; pencil or selector mode for automation. Here is what these options mean.
- Pencil mode – this will allow you to edit your automation bar by bar, depending on your grid separation setting.
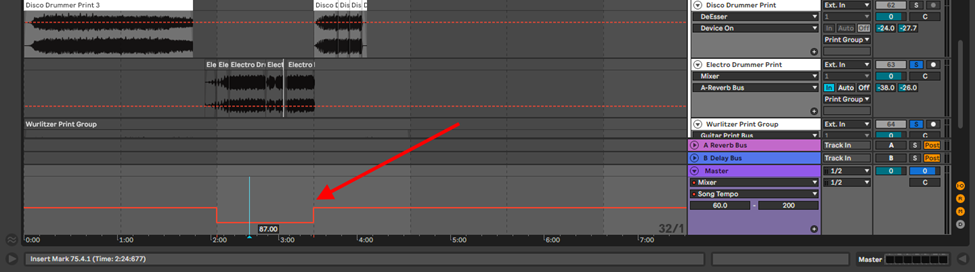
- Selector mode – this mode will allow you to make automation changes over time by creating automation nodes
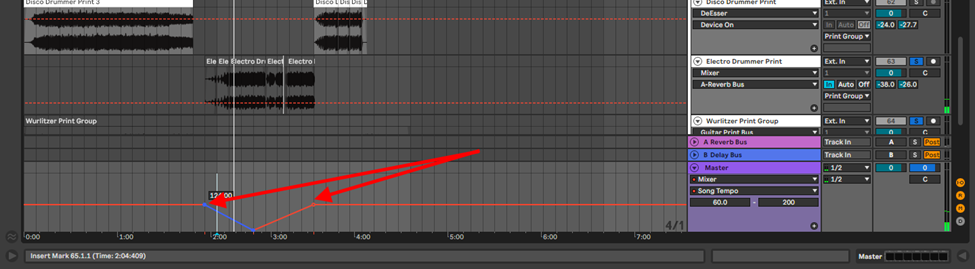
This mode will allow you to make automated changes less drastic
Session View Automation
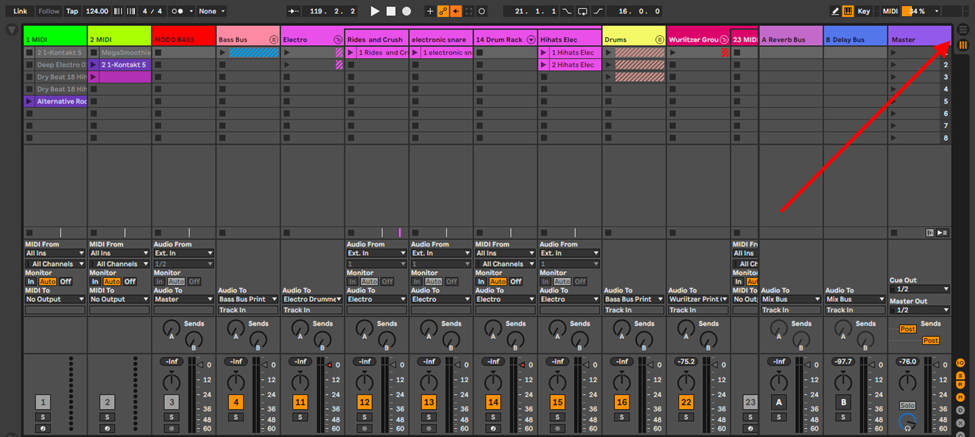
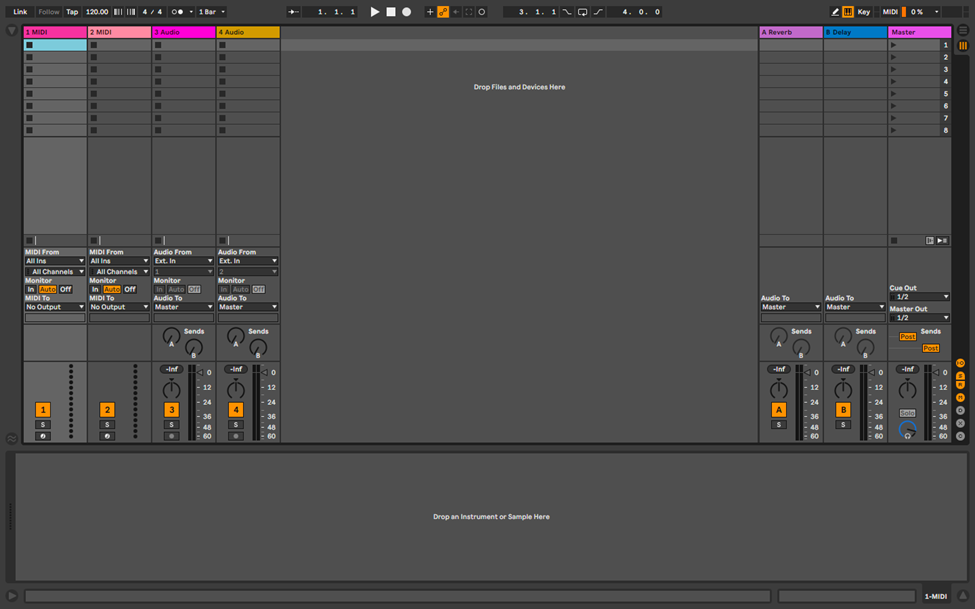
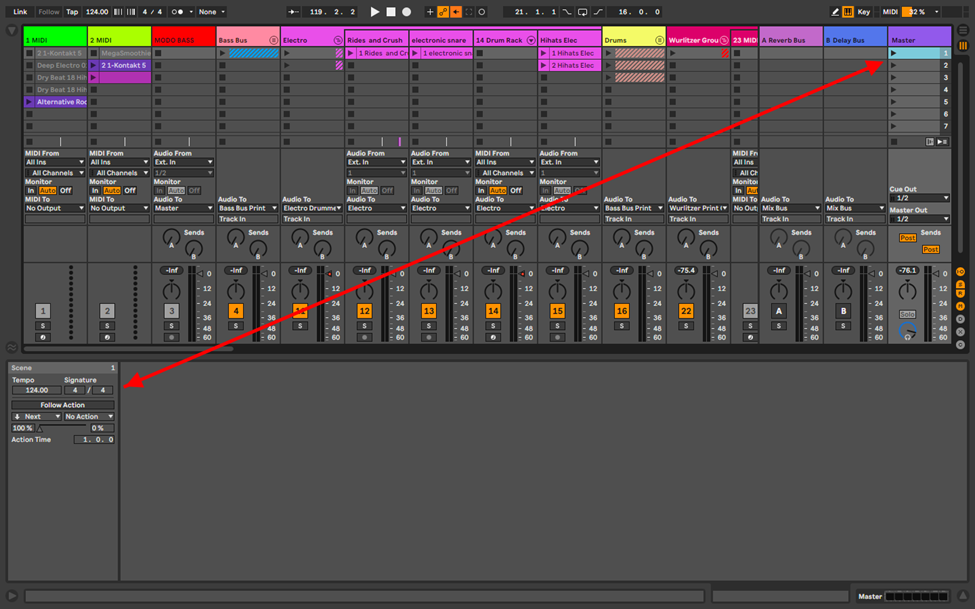
In this mode, you will find utility when performing or in an educative demonstration environment. Ableton by default will open in the session view and shall look like this.
You can now automate tempo change in Live, given you have audio or midi clips loaded or recorded. Here is how you will go about automating tempo in Live with this technique:
Each scene will play at the project’s set tempo. Here is how you can automate your tempo changes in this view scene by scene.
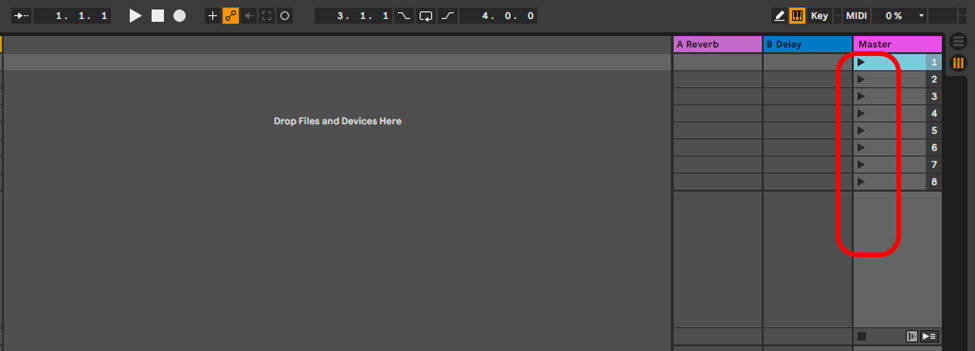
Step 1
Right-click on your master track, choose which, and select rename.
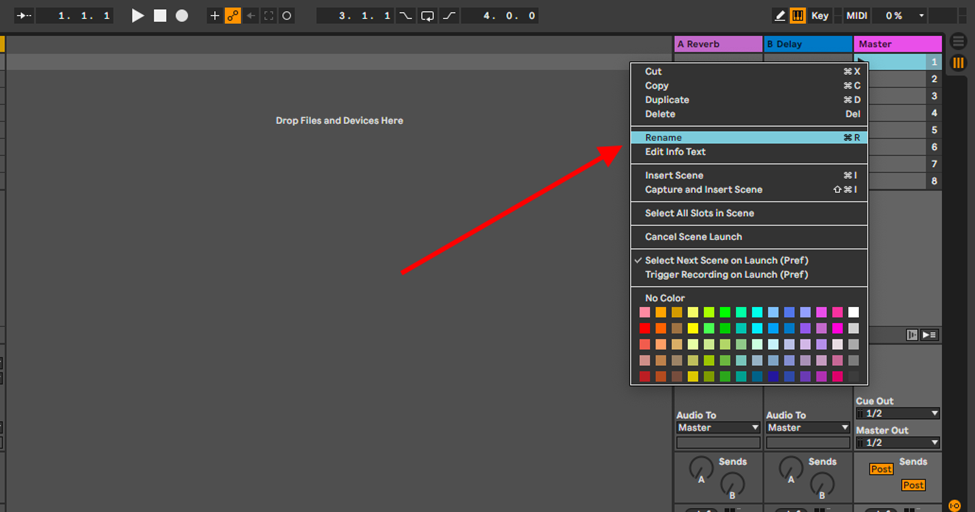
Step 2
When you rename the scene, you will see the scene highlight, and now you can type in your preferred tempo changes on your keyboard
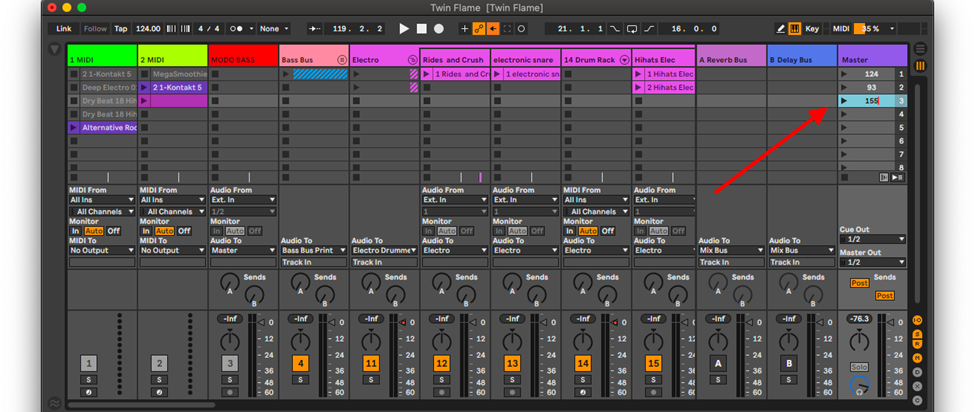
Whenever you play any of these scenes, the scenes will play at the tempo you have typed in.
Step 3
Now here comes the automation. Select your clip and choose how it will behave when activated when composing, or any scene on the master bus when you have multiple clips already loaded.
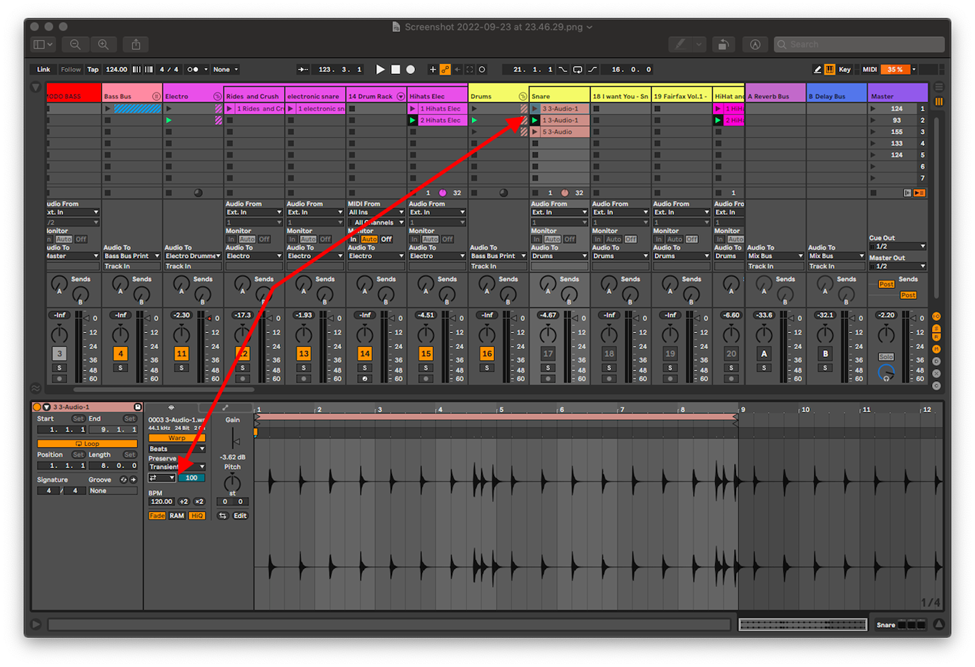
Step 4
Double click on the scene or clip to activate the scene editor view
Step 5
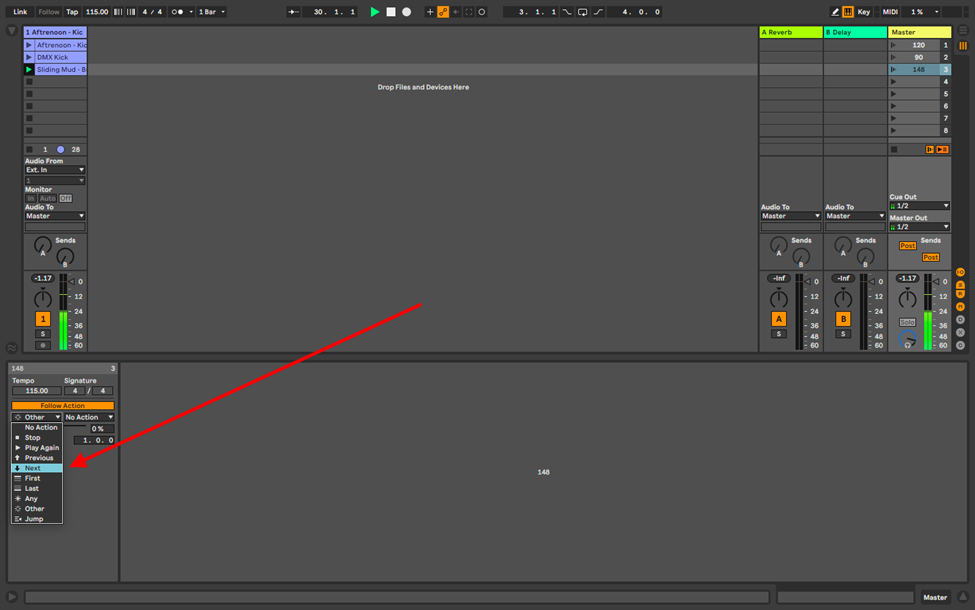
In the mode, choose how Ableton’s algorithm will play the clips. Now activate the Follow Action function.
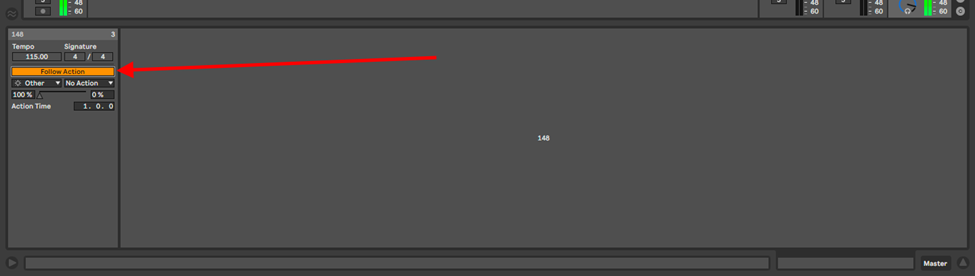
Step 5
Now choose how each scene behaves when you play it. You can choose to let the playing scene play the next, previous, first, last, random, to end, any, other, etc.
Conclusion
There are 2 ways to automate tempo in Ableton Live. They both suit performance and educative demonstrations. The arrangement automation technique will suit arrangement modifications in production and live performances when working with more than 1 song. The session view is better while in a live performance but can also be used in production to create motifs or to inspire ideas for mid-song changes. Have fun!
- How to Use Ableton Live’s Arpeggiator? - September 18, 2023
- How to Use the Piano Roll in Ableton Live + Shortcuts - September 18, 2023
- Ableton Arrangement View (Optimization & Usage) - September 16, 2023
![Ableton Could not Decode Video File [FIXED]](https://ProRec.com/wp-content/uploads/2023/08/haali-media-splitter-180x180.png "Ableton Could not Decode Video File [FIXED]")
![Ableton Not Recognizing Audio Interface [FIXED]](https://ProRec.com/wp-content/uploads/2023/06/audio-interface-connections-with-ableton-180x180.png "Ableton Not Recognizing Audio Interface [FIXED]")

