Introduction
Volume is a measure of how loud a sound is. It is a key element that we look at whenever we record or produce. We perceive loudness and softness differently, but some cases are clear-cut. A nightclub is loud and a whisper is soft. If you are watching a movie with these a scene with conversations having these two you might need to change the volume. The party scene might be loud from the music. The whispering parts might require you to add the volume up to hear what the actors are saying.
For a layman, these are just but enough adjustments that they will make. Some people will have a more intricate approach. You can make changes to how your audio sounds using numerous settings one being a change to your volume settings on the likes of Spotify and Apple Music by using the equalization effects. These are the cases of a consumer, what about the person editing or producing audio files?
Producers will aim to avoid imbalances in the recording unless the imbalance is needed. For a fictional podcast, I will record someone with a low level to give an impression that they are far from the scene. Most times, producers ensure that all sounds are perfectly captured so that there exists no variation. They ensure the faders on the console are set right and the microphone placement is done right.
This article however looks at cases where you already have audio with low or high volume and you need to adjust it in Adobe Audition. It will also look at correcting imbalances in an audio level that exist in a single file. First, here is a look at an audio file with a constant level from start to finish but the volume is either too loud or low and you want to make adjustments.
Adjust Audio – (Increase / Decrease)
To adjust the audio import the file. Once imported, select the part that you need to make an adjustment of the volume. If it is the whole file, no need to make selections as the changes will be just applied.
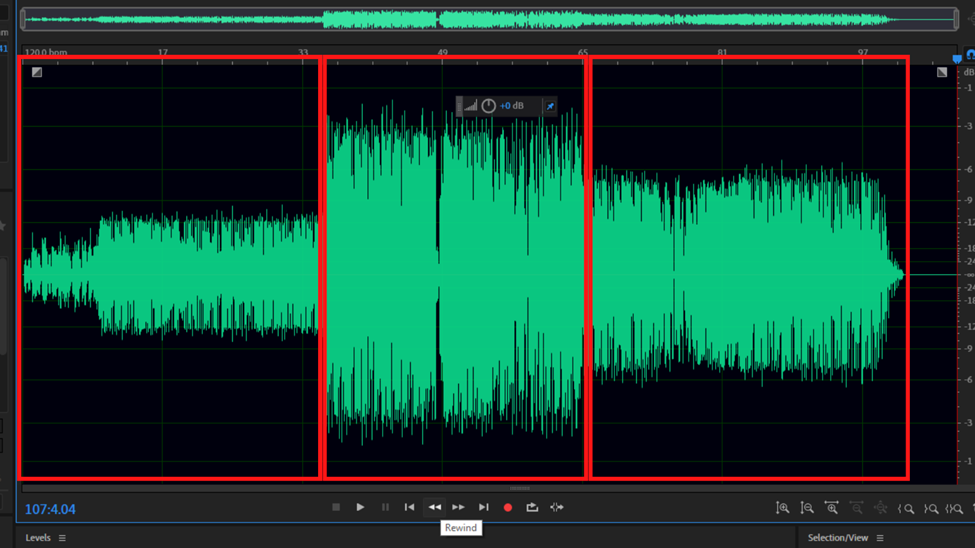
On top of your waveform, there exists a rectangular feature with a nob, a graph, and a pin. Right in the middle of the nob and the pin, there exists a 0 dB number. This feature is known as the Heads Up Display. This is sometimes abbreviated as HUD.
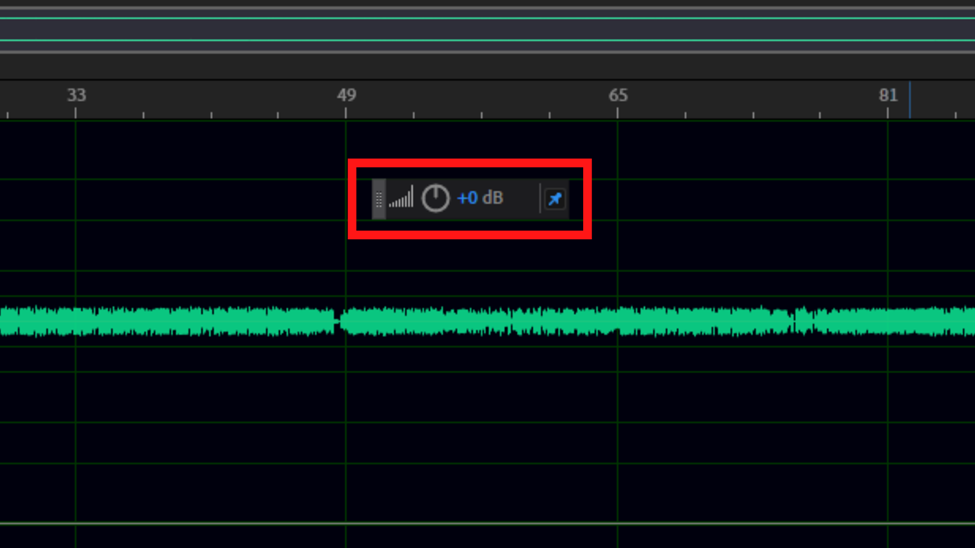
Hover your mouse over this feature and the mouse pointer will turn into a double-headed arrow. To increase the volume drag it to the right and to decrease it drag it to the left.
Recommended Read: Adobe Audition Mono to Stereo and Stereo to Mono
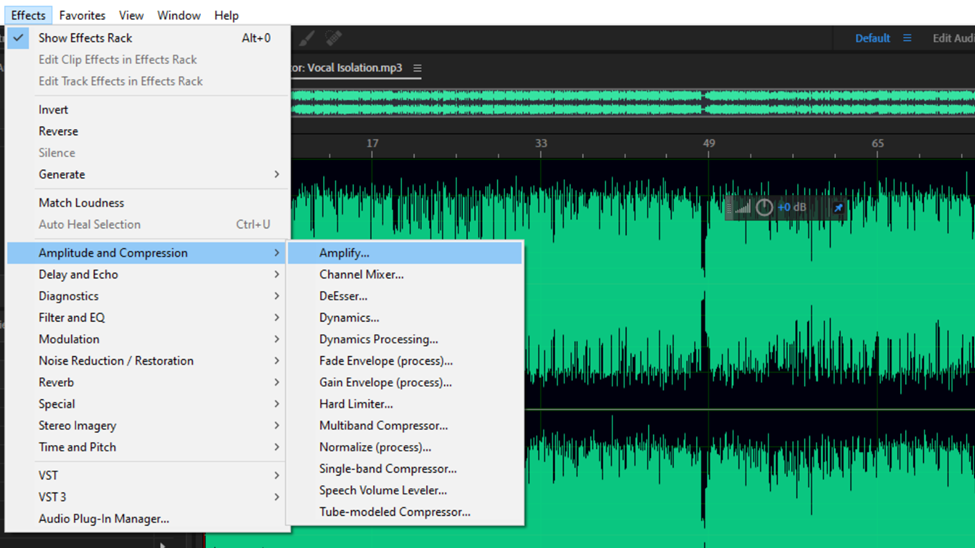
Alternatively, you can amplify the audio file by using the amplify effect. To get to this effect, click on Effects in the menu tab. From the dropdown list, hover your mouse over the Amplitude and Compression option. This will open a new list. In this list click the Amplify option.
This will open the amplify dialogue box.
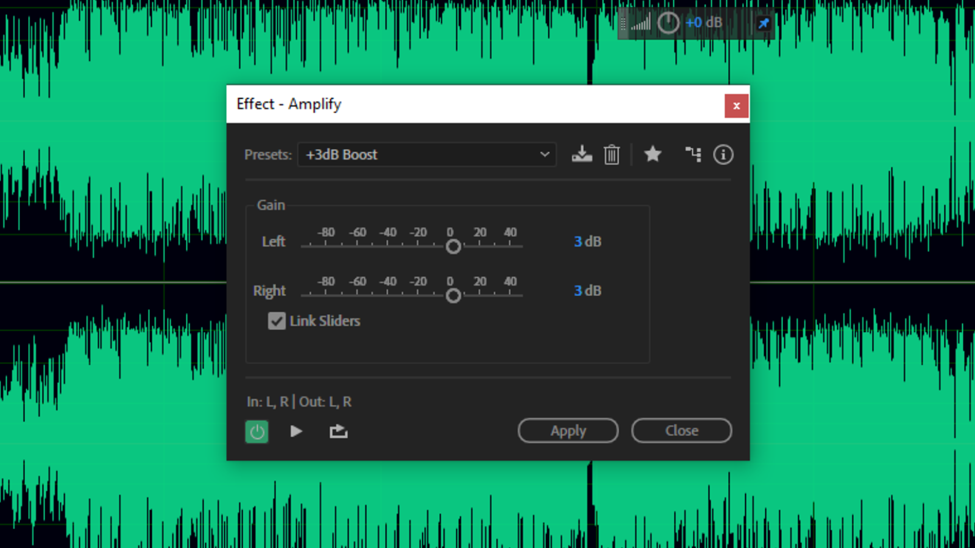
This box allows you to adjust the volume of the left or right channel independently or as one. Since you want to apply an increase or a reduction of the volume evenly, always ensure the Link Sliders box is checked. This makes sure that any dB boost or cut is applied evenly.
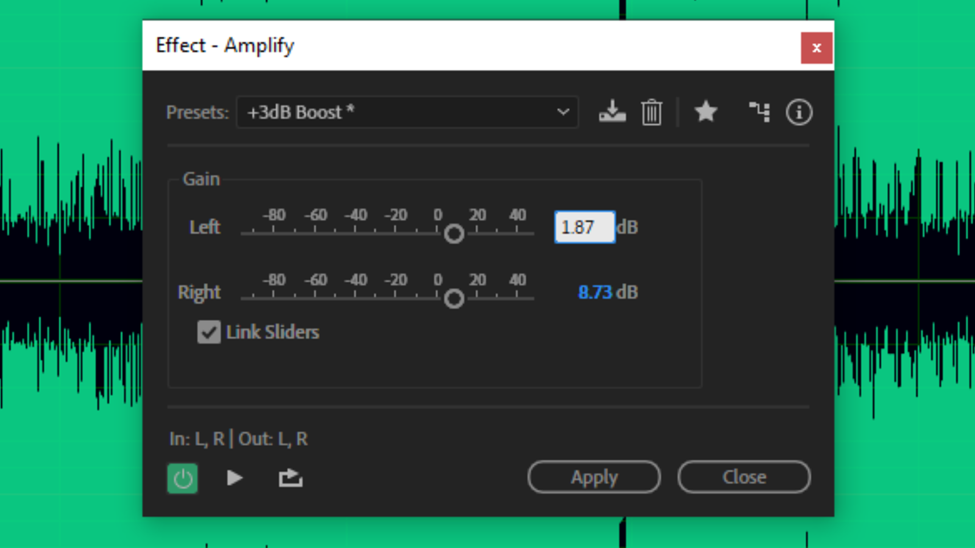
For precise volume change, you can type in the amount. For instance, if I want to boost the audio by 1.87 dB, I will just click on the dB figure on the right of the slider and key in the desired number.
For gradual increment or reduction, you can adjust the sliders either to the left or right while listening back to how the volume adjustment is being applied.
Lastly, in the Presets entry, there are a number of available settings that you can use. They are grouped into two; presets that boost the audio and presets that reduce the volume. This is ideal when you are aiming for uniformity. For instance, when recording you end up with different files with different volume variations. Therefore, you will pick one preset to work with so that all your files have similar volumes.
Once you are done click Apply.
Volume Leveling
This process is aimed at giving your audio a consistent volume from start to finish. This is beneficial in cases where parts of your audio had a lower volume, other parts had a higher volume and some parts were recorded with the right level. Therefore volume leveling aims at correcting these imbalances. The difference between leveling and volume adjustment described in the previous section will be addressed in the conclusion of the article.
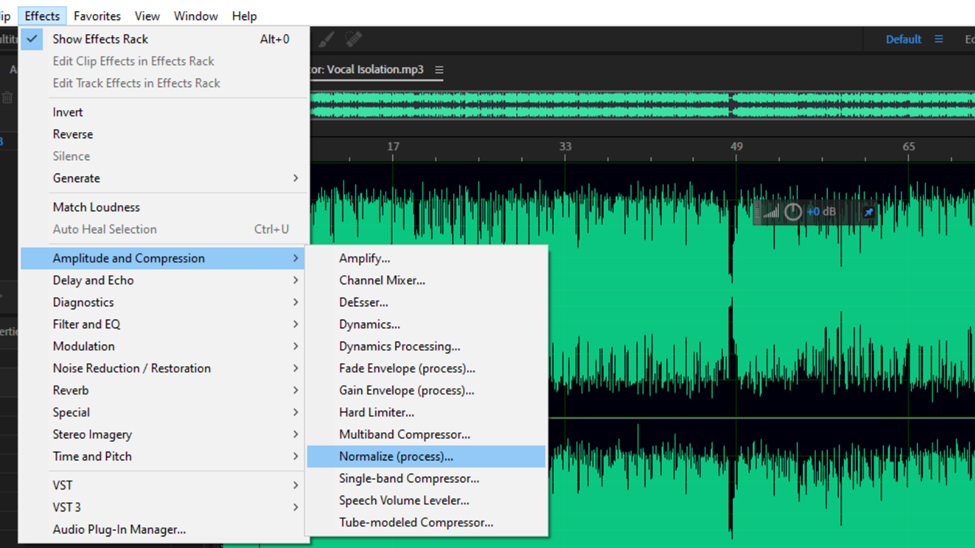
In Adobe Audition when you apply the volume leveling effect you are normalizing the track. there is a dedicated effect for this in the effects menu. Click the effects option In the menu tab. Next, hover your mouse pointer over the Amplitude and Compression option to open a new dropdown list. In this list click on Normalize (Process).
In the Normalize pop-up box, you can apply this effect in form of a percentage or by dB.
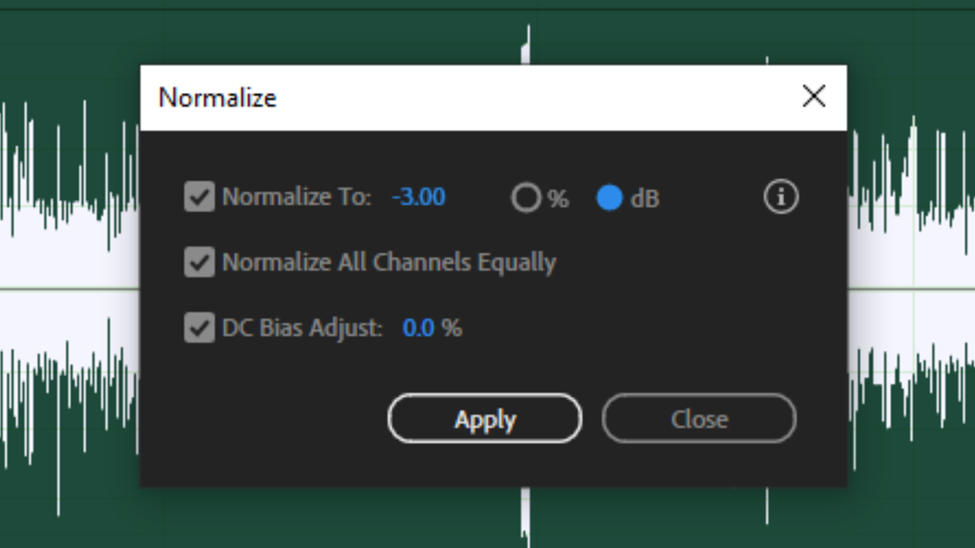
The DC Bias Adjust allows you to center the waveform. A lower percentage below 0 will push the waveform further below the red line. A higher figure will push it above the middle red line. Always ensure it is set at zero.

Conclusion
Let us say three people: A, B, and C were recording at the same time. Their audio levels varied.
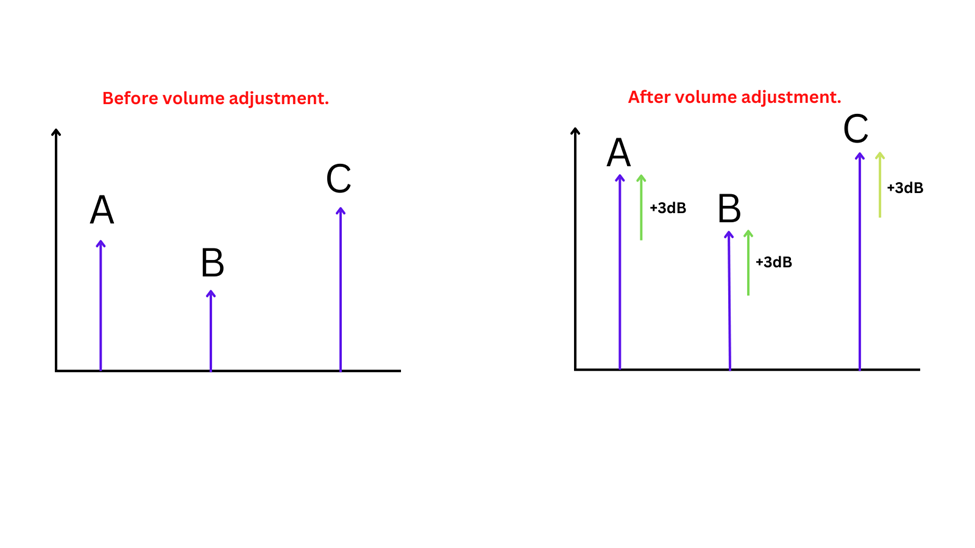
The above image is a visual representation of a change in the volume of an audio file. It is an increment of the audio by 3 dB. Notice that each speaker’s voice gets a boost of 3 dB hence the lowest voice still remains the lowest but becomes more audible. In the first part of this article, the process of adjusting the volume described is ideal when your recorded audio was balanced perfectly and you are looking to reduce or increase it. If imbalanced the louder signals will be distorted and you will also increase the room noise. Below is a volume leveling presentation.
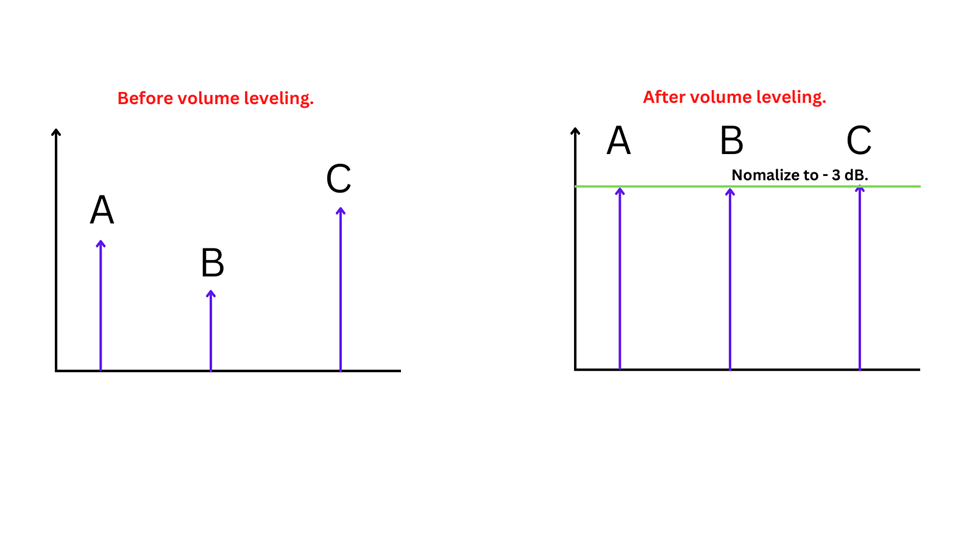
Nomalizing adjusts the audio level to a certain peak that you set. When applied to an audio file it corrects the imbalances that result from the inconsistent levels throughout the file.
The process in the first section of this article: Adjust Audio – Increase and Decreasing Volume can also be used to achieve volume leveling. Although the process might be tedious and not as perfect as going with the normalizing procedure. All you need to do is make a selection of the variations independently and increase the volume using the heads up display.
Having an understanding of these two processes is key as you will know when to use each in their times of need and not use them interchangeably.
![Adobe Audition MME Device Internal Error [FIXED]](https://ProRec.com/wp-content/uploads/2022/09/image-112-180x180.png "Adobe Audition MME Device Internal Error [FIXED]")

![Adobe Audition Record Button Greyed Out [FIXED]](https://ProRec.com/wp-content/uploads/2022/09/image-20-180x180.png "Adobe Audition Record Button Greyed Out [FIXED]")

 Volume in Adobe Audition + Volume Leveling)