The other day I was helping a friend set his computer up. He wanted to record a piano performance with a MIDI controller. However, when we tried hooking up a piano virtual instrument (VSTi) and play through it, the whole thing was out of sync and there was noticeable latency. The higher the tempo went, the more disoriented the whole thing became.

I knew I wanted to get this right. I have been in similar situations before and I know there are basic signs when the system has too much latency for comfortable monitoring and recording.
There are a few solutions within and outside of REAPER that can help troubleshoot MIDI latency issues. I will walk you through my process, and hope that it helps you get things going like it did for me!
What is MIDI Latency in REAPER?
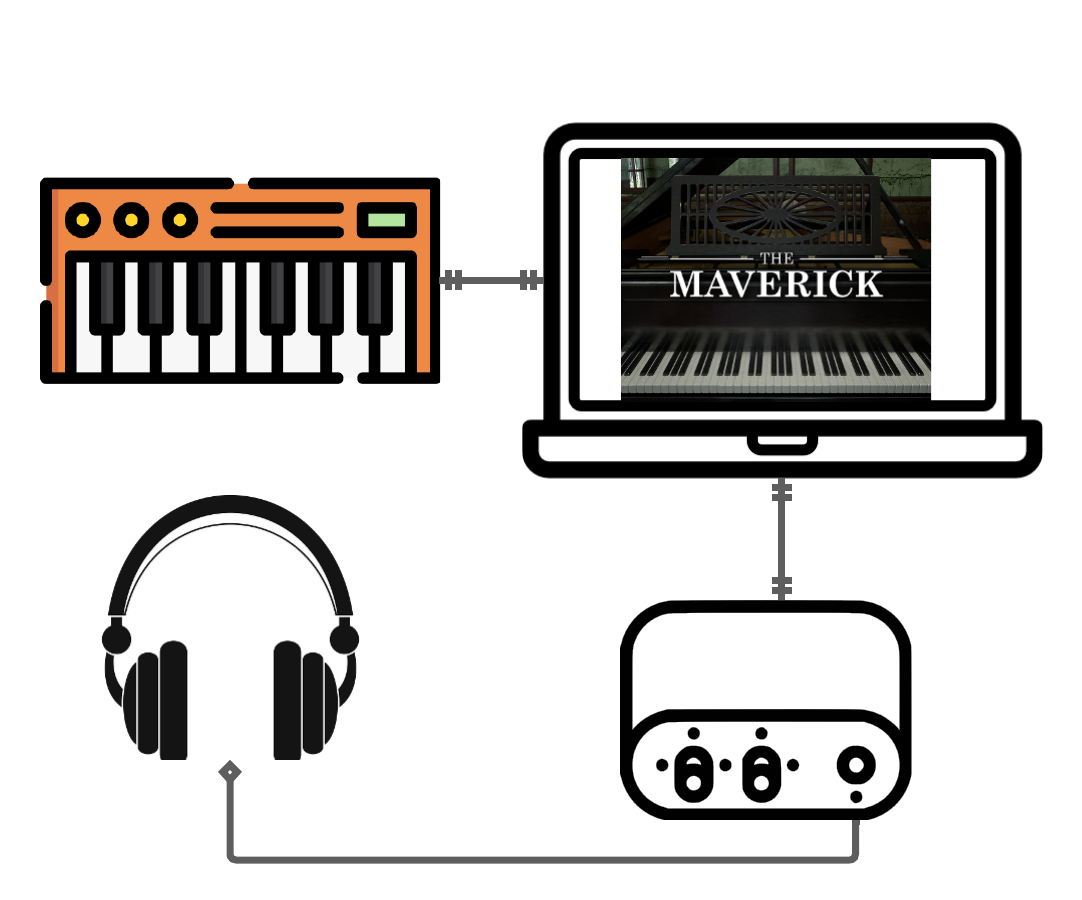
First, it’s essential for you to understand the concept of MIDI latency. In this context, latency is the time it takes for a MIDI note to go through a few different processes.
First, it goes to your machine, through your interface DAC, and then into REAPER. It is then interpreted by the VSTi which loads the corresponding note from disk into REAPER. Finally, the note goes comes out through your interface outputs (converters), and you hear it on your headphones or speakers.
If you want to learn more about handling latency in a live monitoring situation, check out this article.
Tips for Reducing MIDI Latency in REAPER
Now that you understand the concept of MIDI latency, here are a few things you can do to minimize it to an acceptable level.
Dedicated Audio Interface
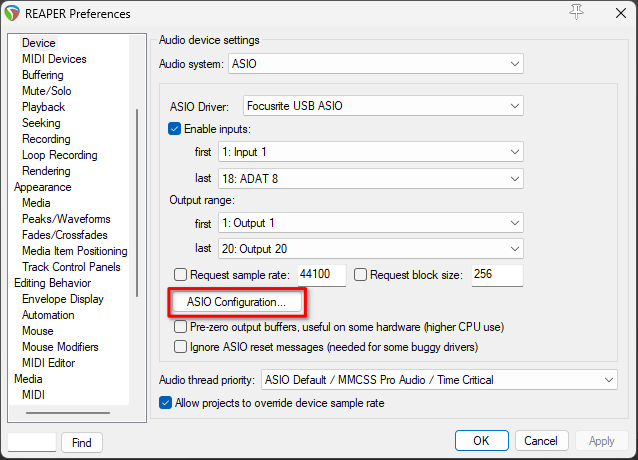
Whether you’re a hobbyist or a professional musician, if you want to record, you need an Audio Interface! They are pretty cheap, and can be purchased for as low as $50. Always use a proper audio interface with its corresponding audio driver. You can set up your Audio device in the REAPER preferences.
Computers are not meant to handle real-time audio right from the get go, so if you don’t use an interface, you will probably need to find another solution that doesn’t involve REAPER.
If you want to learn more about audio interfaces and their settings, take a look at this article about interfaces, sample rate and buffer size.
Check Your MIDI Device
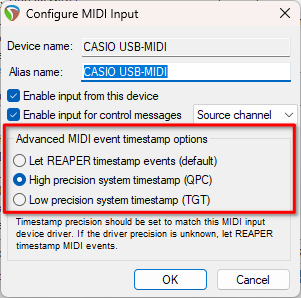
In the REAPER preferences, below the Audio device settings, you can modify how REAPER interacts with your particular MIDI controller.
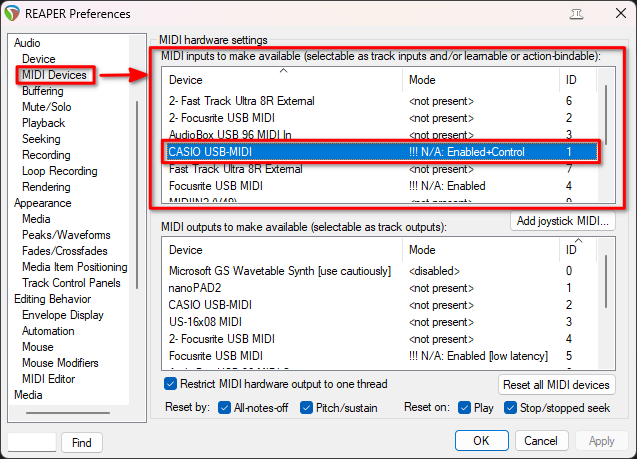
Make sure that your MIDI device is enabled, and try the different timestamp options on the panel. These have helped me get more consistent (MIDI device) behavior, especially when recording.
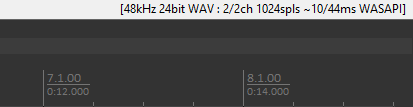
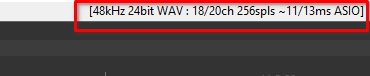
Get That Buffer Size Low
Having a good audio interface and a MIDI device well set up are not enough for low-latency MIDI monitoring, the key to monitoring yourself properly is having a low Buffer size. This statement is true for monitoring audio, but it is even more important when you’re trying to monitor yourself while playing a MIDI device through a Virtual instrument.
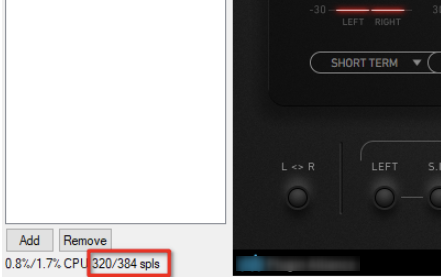
Keep in mind that Virtual instruments rely on pre-recorded audio samples that need to be read from elsewhere in your Disk. They will never feel as responsive as the instrument you’re trying to emulate, unless your Buffer size is really low. To get this right, you will also need a good modern CPU with sufficient RAM and a fast SSD drive.
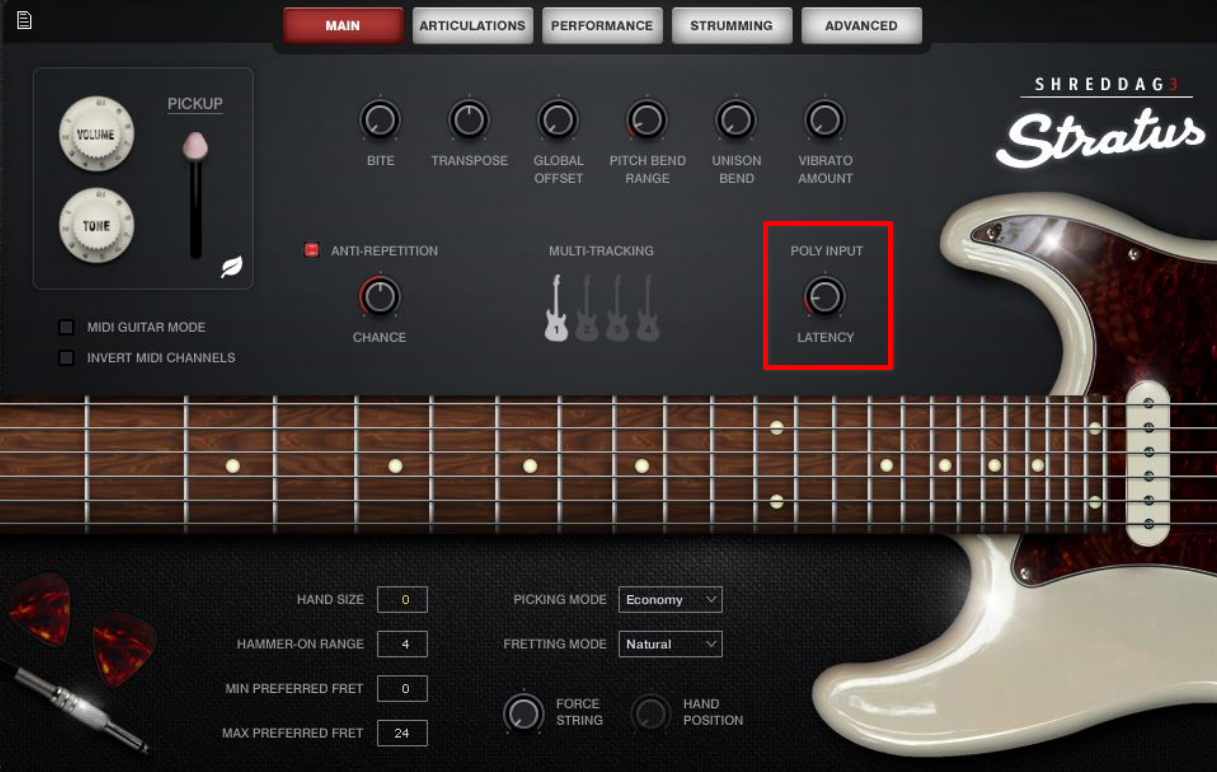
Using the Right Plug-ins
Virtual instruments are usually made to give you zero latency, but there are some Virtual instruments or Instrument libraries with features that are meant only for MIDI playback and not live monitoring, so they will introduce latency. Check your manuals for these kinds of features.
Always remember to avoid any plug-ins that use heavy Pre-delay compensation, most pitch shifter related plug-ins, or processes intended for mastering intended such as Ozone will do this. You should always bypass them while monitoring yourself or while recording.
Final Words
To be honest, this kind of routing and workflow is not for everyone. But if you get this right, it will open up a plethora of Virtual instruments, especially if you are a keyboardist or a composer. This was my major intention behind helping my friend set up his controller, and it is also the main reason for creating this article. The setup is always the most crucial part. You have all your gear but if you’re not setting it up correctly, you will always have latency issues. I hope I have helped steer you in the right direction, and you now have a better understanding of what’s happening under the hood! Good luck with your recordings and feel free to check out more of my writings in the REAPER section!

- Mixing in REAPER [ULTIMATE Guide!] - September 18, 2023
- How to Record in REAPER (Guitar & Vocals) - August 2, 2023
- Writing MIDI Drums in REAPER - July 3, 2023
")


