One of the most frustrating things with regard to sampling and tempo in Ableton Live can be the warping function. Keep in mind that this feature is very helpful when snapping your audio samples to the tempo of your live set. If you look at How to Sample and Resample in Ableton Live, you will notice that when I discuss sampling with audio, warping is one of the key steps you shall have to consider when sampling.
Recommended Read: How to Automate Tempo in Ableton
Ableton has different sampling algorithms to suit different types of samples. Be it harmonic, melodic, percussive, or much more complex audio waveforms. For a breakdown of the different warp algorithms and their case uses, please read the Ableton Sample Editor Tutorial.
I shall focus on audio samples when changing tempo in this tutorial because MIDI samples will easily snap to your project tempo and change seamlessly when you change tempo mid-song. On the other hand, audio samples require a little more attentiveness when changing the tempo, concerning warping.
As mentioned earlier, if you are not proficient with warping samples in Ableton, you can bypass warping your samples, and even go further to make sure Ableton follows your sample’s tempo. You can even disable the warping function to allow you to change the tempo of your session effortlessly.
How to Change Tempo in Ableton Without Warping Audio or MIDI
There are 3 ways you can change the tempo in Ableton without warping your samples. These include:
- Disable Auto-Warp Long Samples – this technique will make Ableton not warp samples past a certain length, allowing you to change tempo with warping disabled
- Lead and Follow Commands – this technique will make Ableton follow the tempo of the track with the lead function activated and you will not need to warp your sample
- Disable Warping – this technique will simply disable warping, and therefore you can carry out your tempo changes without worrying about your samples warping
Before jumping into this tutorial, I highly recommend that you read the How To Change Tempo in Ableton Live tutorial to provide you with context for this tutorial.
Here is how you go about changing tempo on Ableton Live without having to warp your samples:
Disable Auto-Warp Long Samples
This technique will switch off warping for all samples past a certain length. What a ‘long sample’ is, is not specified by Ableton, but what you can expect is that Ableton will warp loops or samples that have no lengthy sections of silence and will not warp songs or significant song passages with this feature activated.
Here is an example:
A long sample, for example, a song, will not be warped with this feature activated:
On the other hand, a short loop will be warped:

Here is how you go about disabling the auto-warp feature in Ableton:
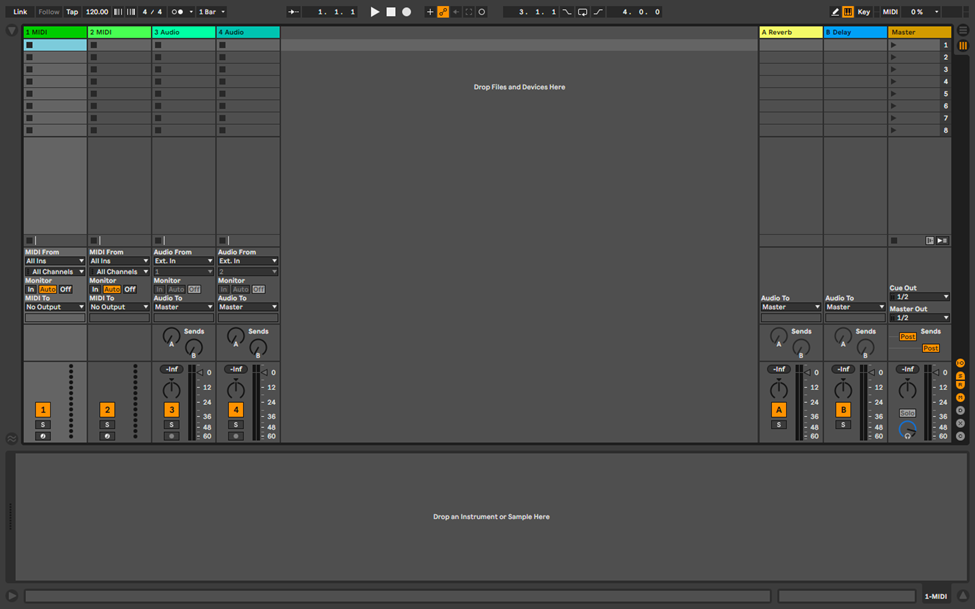
Step 1
Open a new live set. It is best to start on a live set because if you have samples loaded in your session, this feature will not affect them.
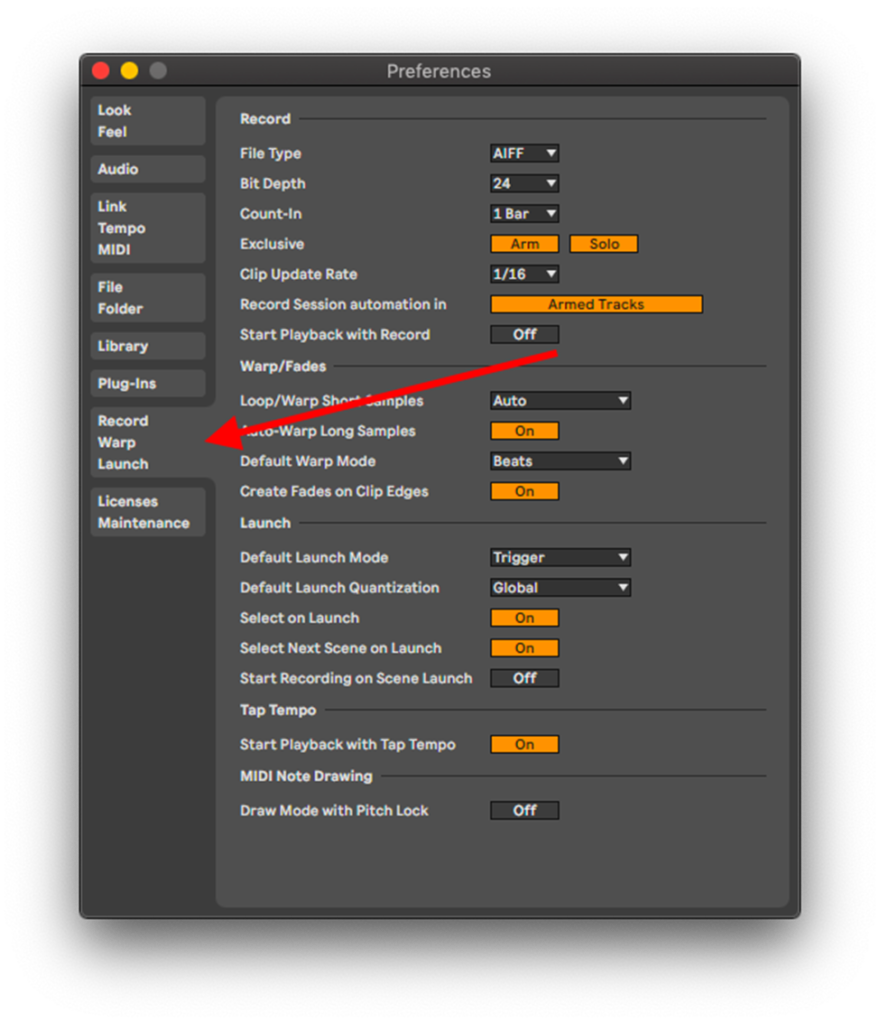
Step 2
Now go to your preferences and select the Record, Warp and Launch window.
Step 3
Now disable the Auto-Warp Long Samples feature.
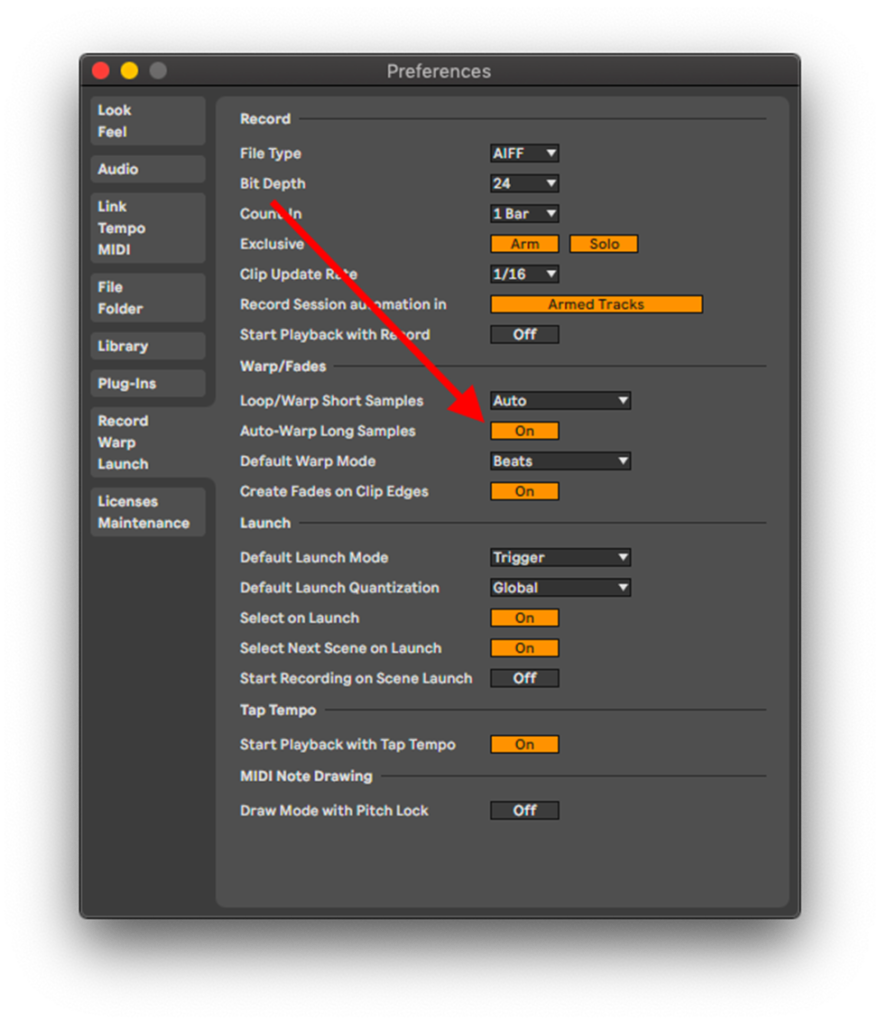
Note that with this feature, you can change samples without having to warp your audio sample. I advise that with this feature off, you will have flexibility in composing around the long sample, however, if you need to change your tempo, have a look at the 6 ways on How To Change Tempo in Ableton Live.
Lead and Follow Commands
This technique will provide you utility when file-sharing samples. Let us say you are collaborating with another producer or performer using Ableton. This technique will help you avoid warping mishaps in your session by making Ableton follow the tempo and tempo changes on the sample you are sharing. Here is how you go about this:
Step 1
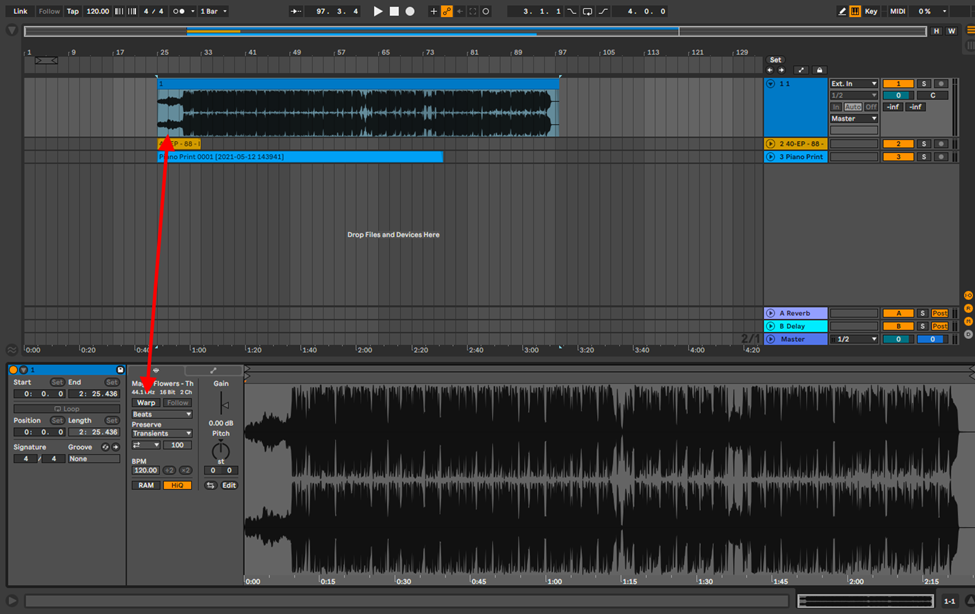
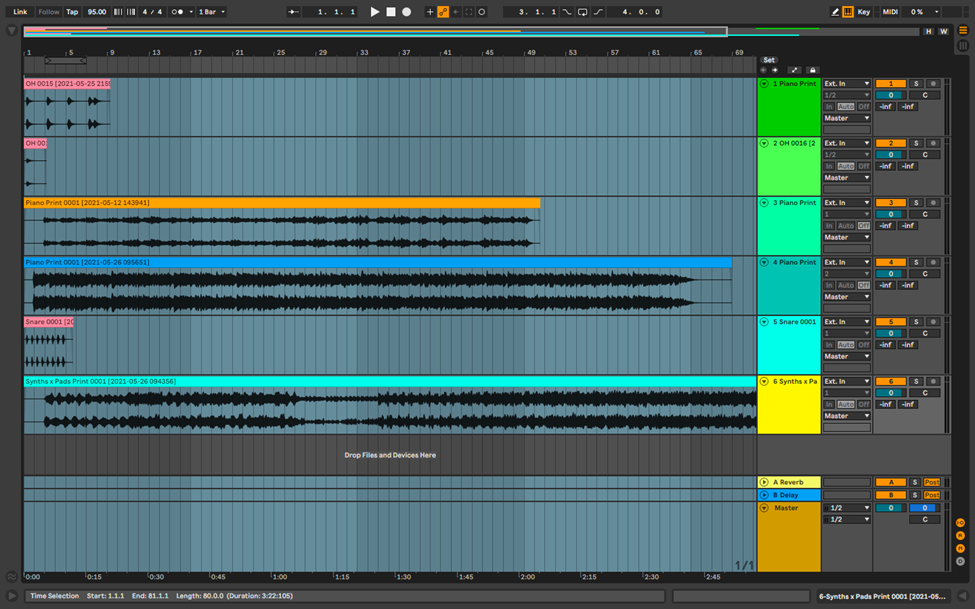
Load your sample on Ableton in the arrangement view.
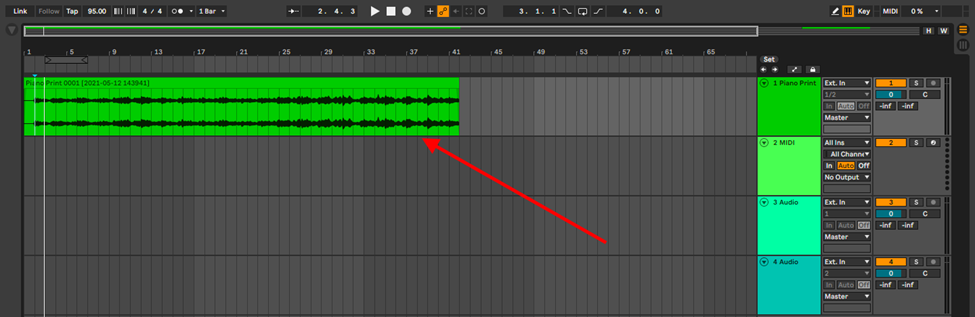
Step 2
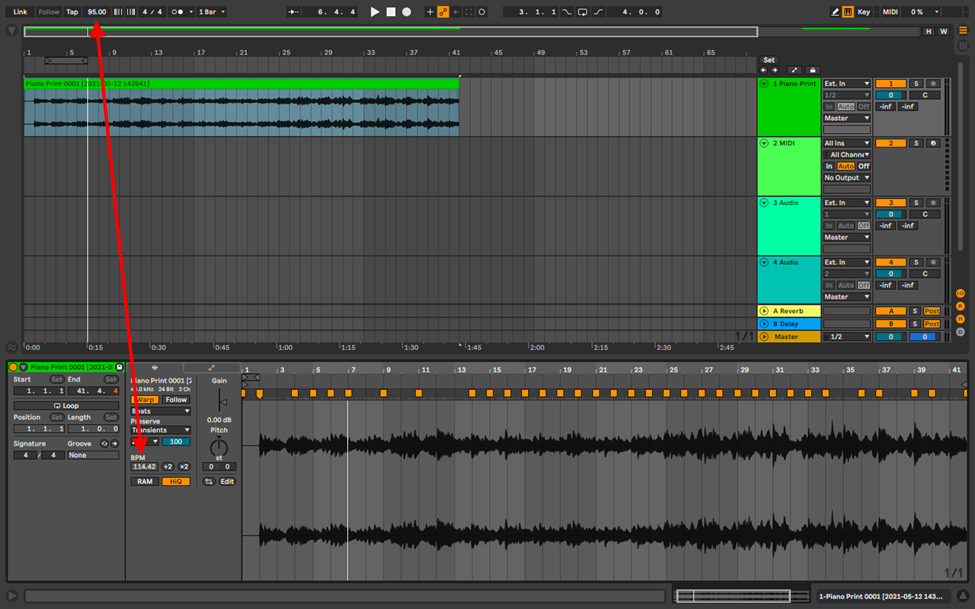
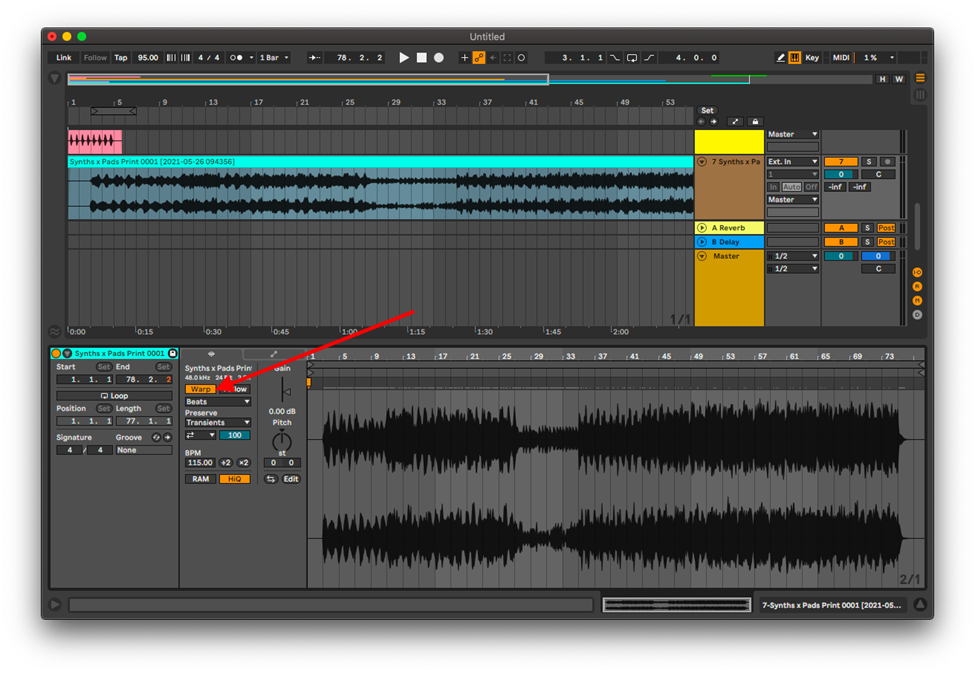
Your sample is by default warped and does may not match the tempo you want to work in, either playing slower, faster, or completely off tempo. You can fix this using the Lead/Follow toggle.
Step 3
Activate the Lead function and Ableton will change tempo to match your sample without you needing to warp your sample
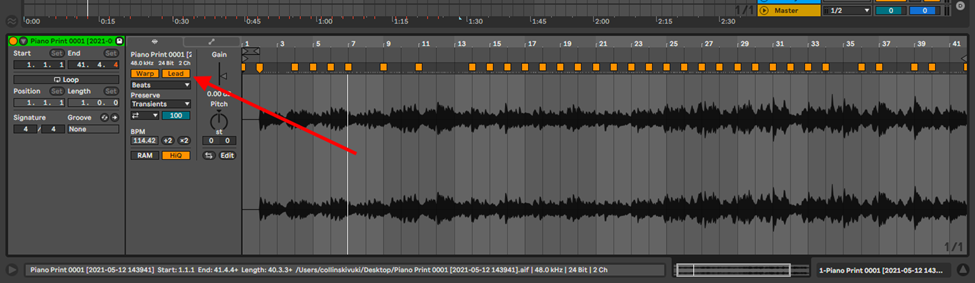
With the Lead function activated, you will see that you cannot change Ableton’s session tempo as long as the lead sample is active
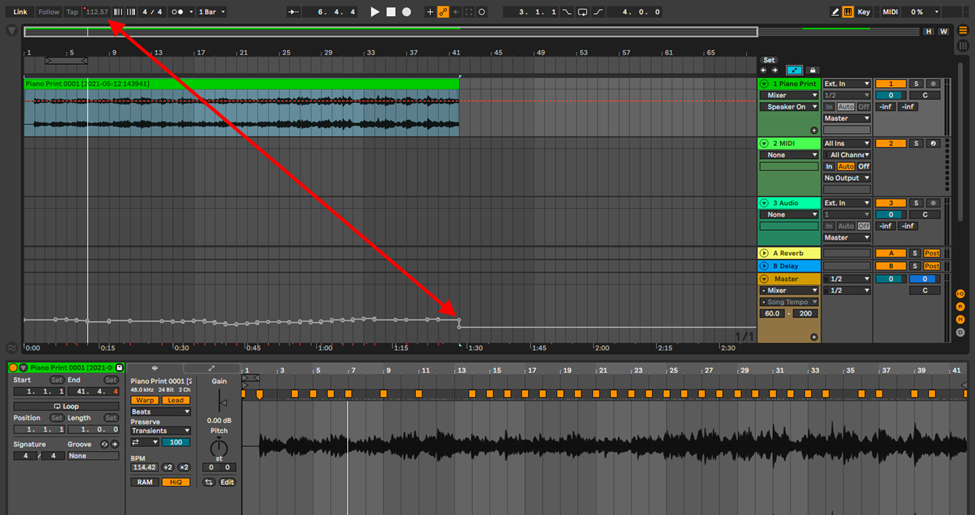
I highly recommend that you use a sample that has distinctive transients so that Ableton will keep a consistent tempo throughout your project. This sample may be rhythmic, melodic, or percussive because harmonic samples tend to be more dynamic in performance.
Disable Warping
This final technique is much more cumbersome, and if you need to use it, you must ensure that your samples are all in the same tempo upon import if working with more than one sample. Deactivate the warping function in all your samples individually. Once done, you can easily change your tempo without worrying about warping. Here is how you go about this technique:
Step 1
Import your samples into the arrangement view
Tip
You can import all your samples at once and save time importing by highlighting them in your folder.
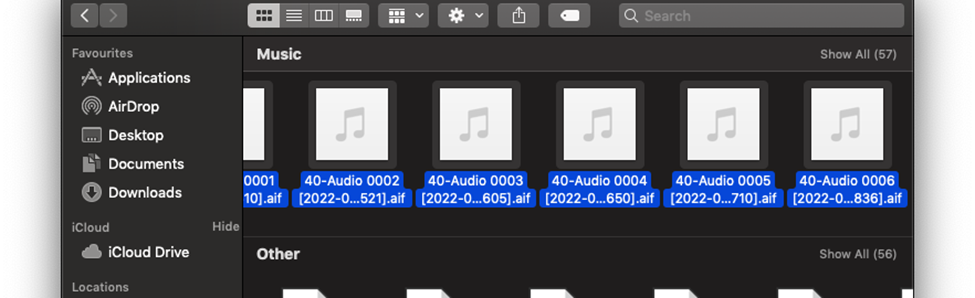
Now hold down Cmd on MacBook or Ctrl on Windows when dragging and dropping them into your session
Step 2
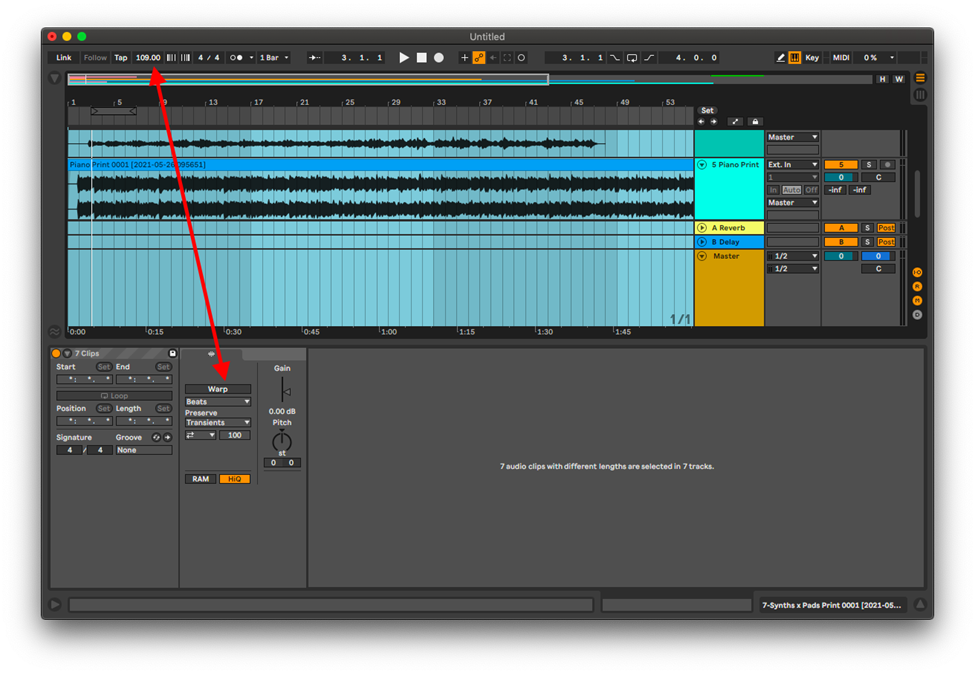
Highlight your sample and disable warp
Tip
You can skip unwarping your samples one at a time by selecting one sample, then pressing Cmd + A on MacBook or Ctrl + A on Windows, and then deactivating the warp function
Step 3
Change your tempo as you please
Conclusion
Warping is a double-edged sword. It can provide you great utility when matching your samples to your session. Furthermore, Ableton’s warping algorithms will help you a lot when working with different kinds of audio samples. The Lead and Follow Technique is largely my favorite tempo-changing technique when I collaborate with other artists or producers. It is fast and efficient in my opinion, nevertheless, all these techniques listed have their case uses. I recommend that you experiment, as well as mix and match these techniques for your productions and live performances to create your very own custom workflow. Have fun!
- How to Use Ableton Live’s Arpeggiator? - September 18, 2023
- How to Use the Piano Roll in Ableton Live + Shortcuts - September 18, 2023
- Ableton Arrangement View (Optimization & Usage) - September 16, 2023


 + Shortcuts")
")