Introduction
Often times when we record we get imbalanced intonation with some parts being louder than other parts. Compression is used in such cases to make the audio balanced. The difference between the loudest and softest parts of an audio recording is known as the Dynamic Range.
When the compressor effect is used in reducing the dynamic range, the primary intent is to amplify the softer parts without worrying about amplifying the louder regions to an extent that sounds in these regions will end up being clipped.
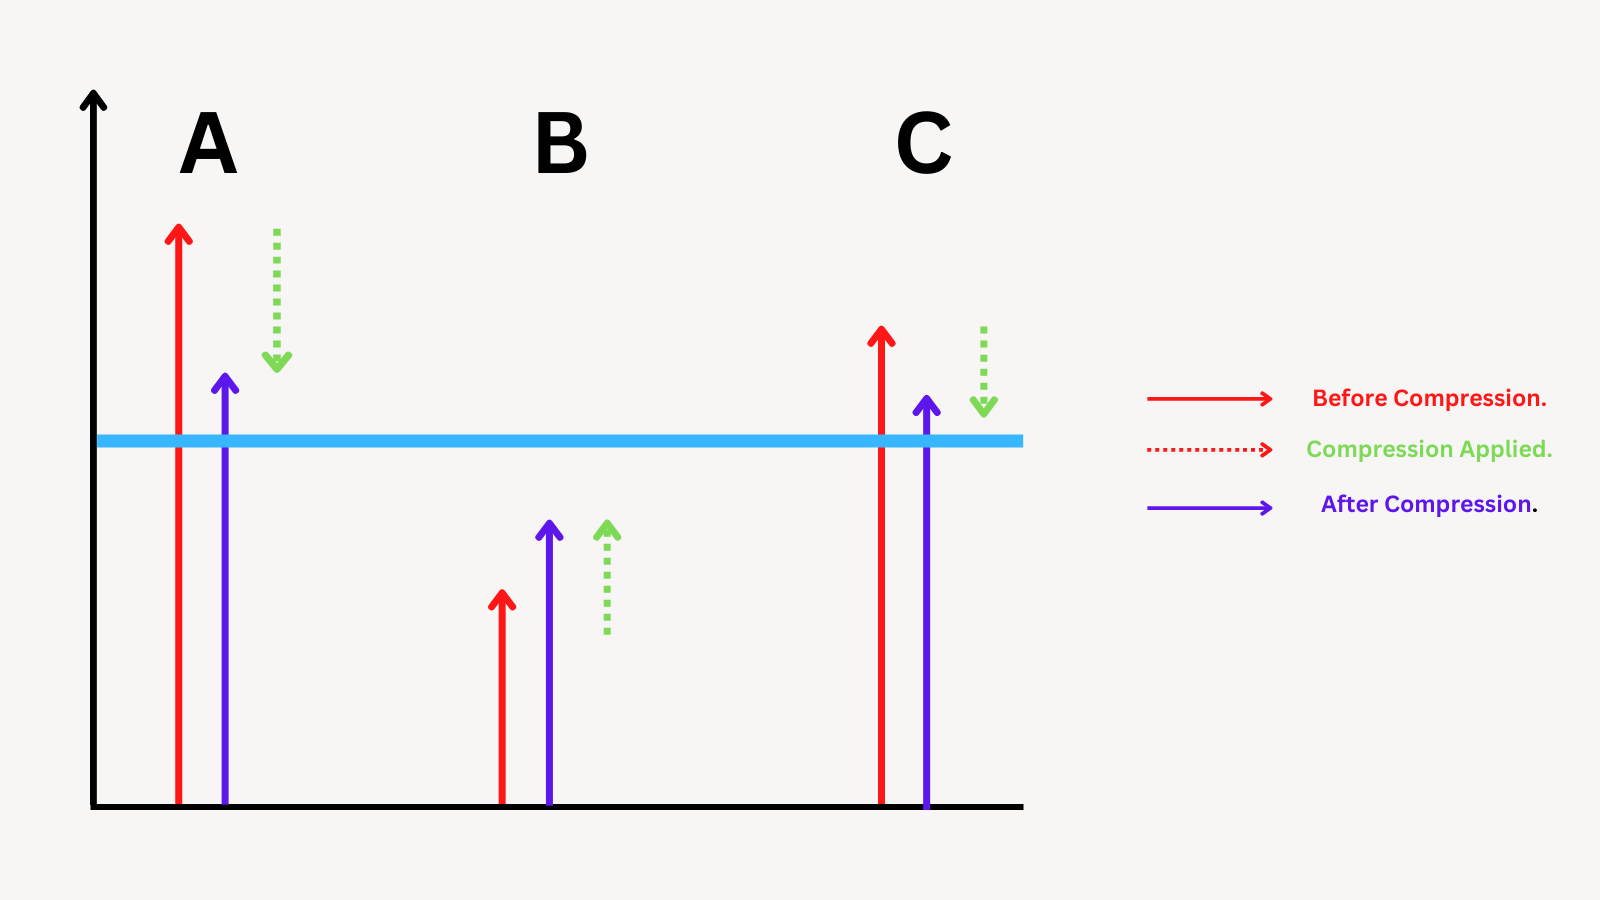
In the image below the first audio signal A, is way louder past the threshold represented by the blue line. After compression, it is reduced. The same for C. B is low, and after compression, it becomes a bit louder.
Whenever we record an underlying factor we need to pay attention to is the average sound level of a waveform. Obscure sounds should not exist in the midst of clear sound signals. The average sound level which is how loud your sound is is known as RMS – Root Mean Square. The best vocal compressor settings will give you an ideal average sound level for your vocals.
This article will look at how to use compression and the best settings to use in editing vocals.
How To Compress Vocals
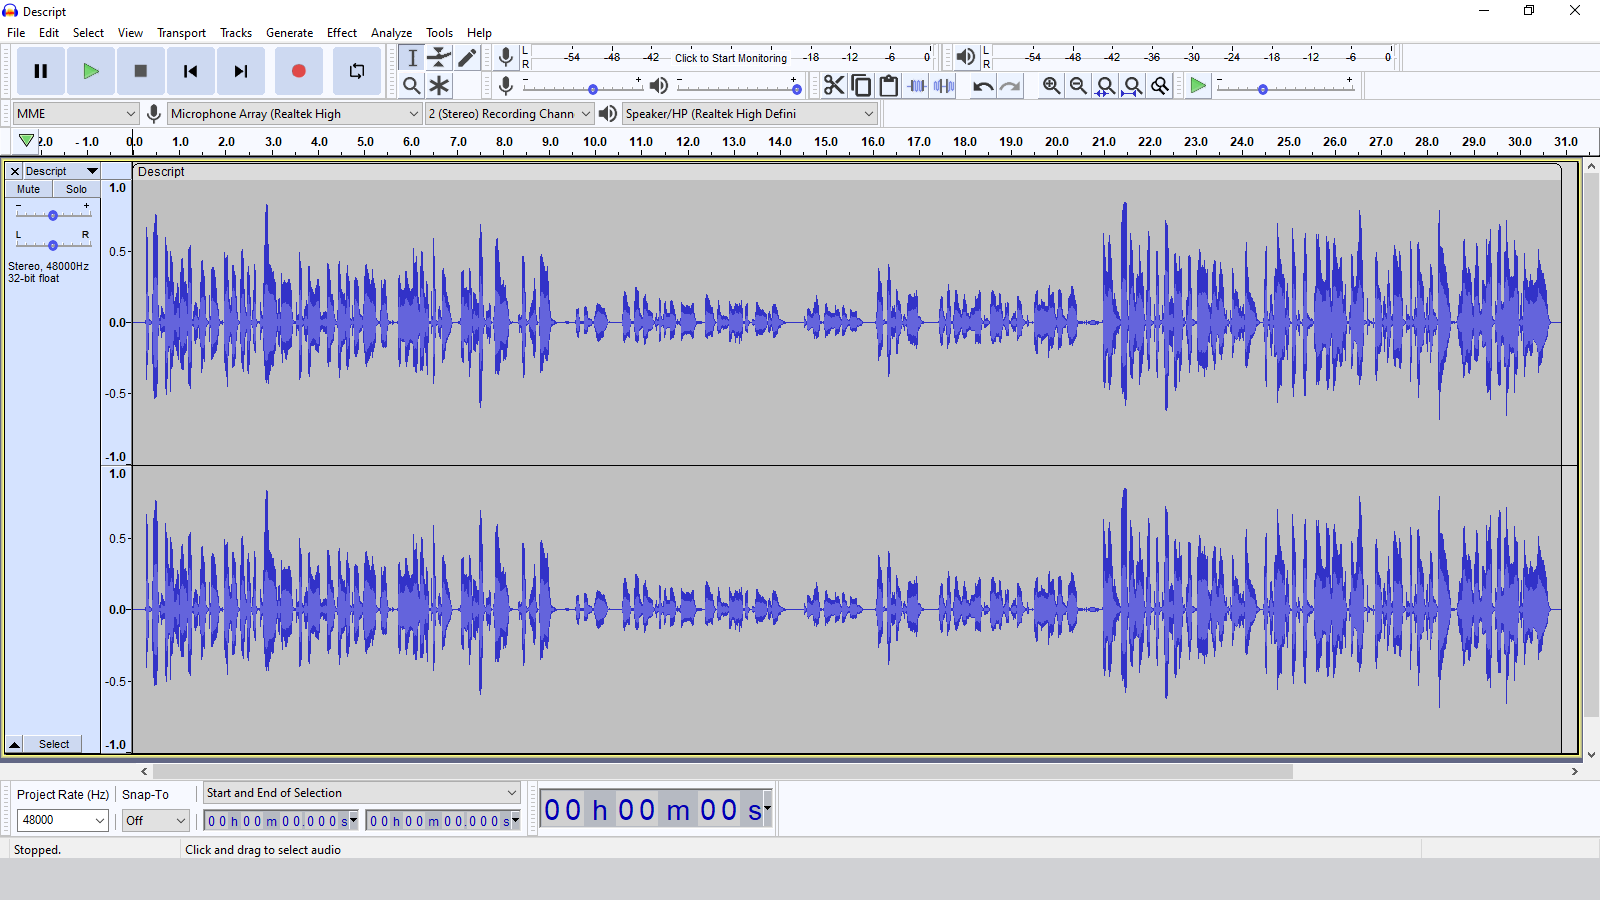
Import the audio into Audacity. From the image below, you can see the inconsistency within the audio by looking at the waveform. In the middle section, the level dipped and came back up towards the end.
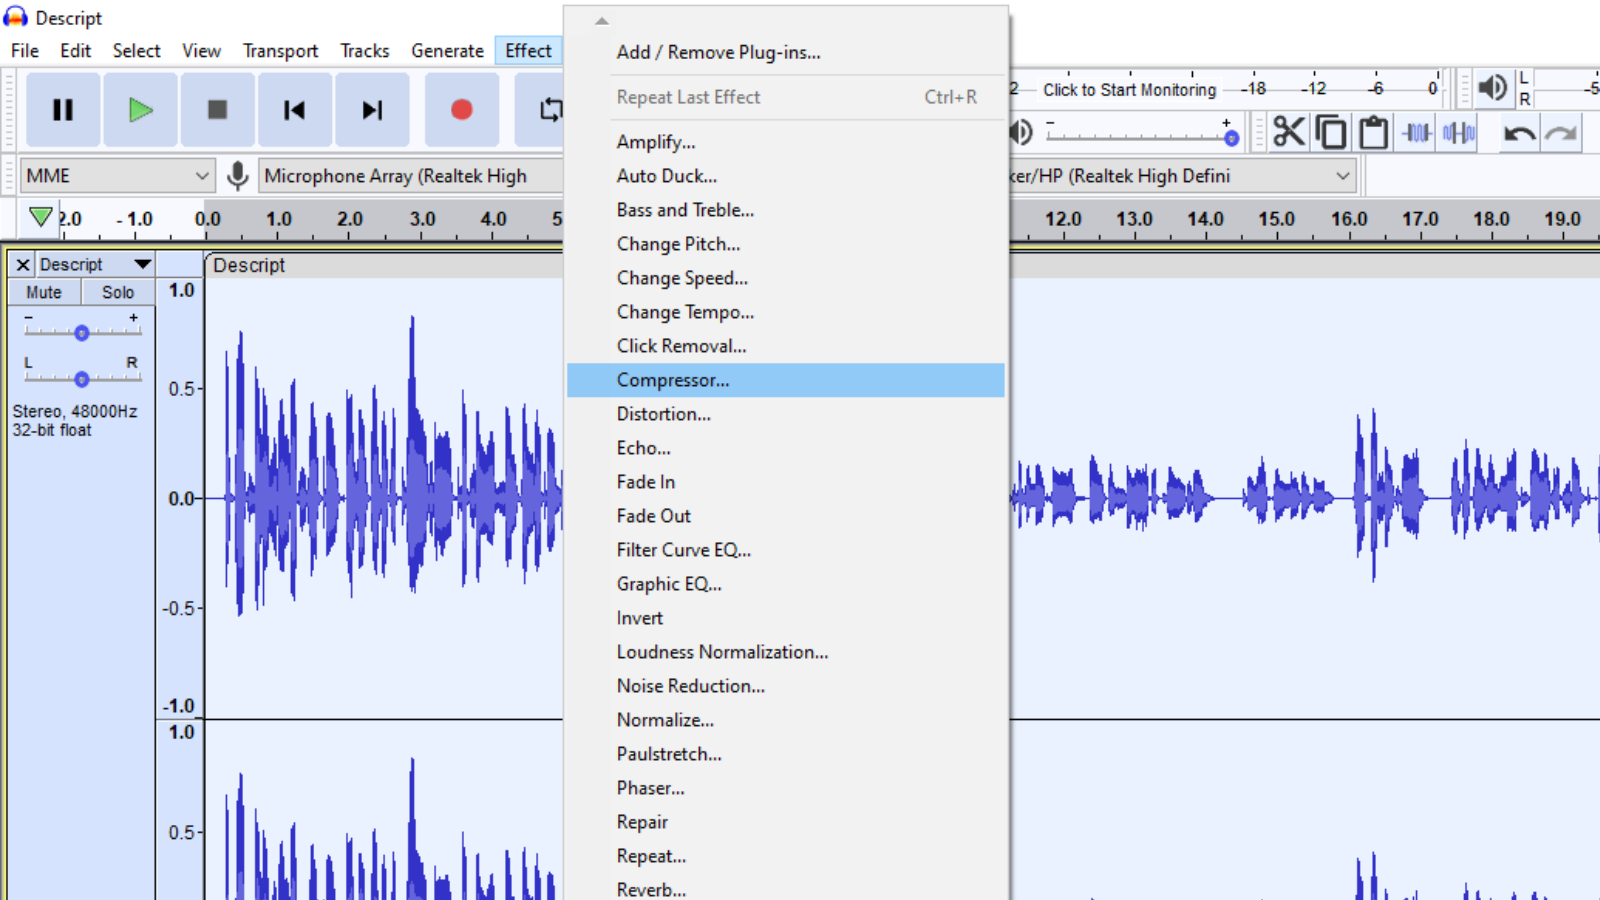
Double-click on the waveform to select all of the audio. Click on the Effects option in the menu tab. From the drop-down list that pops up click on the Compressor option.
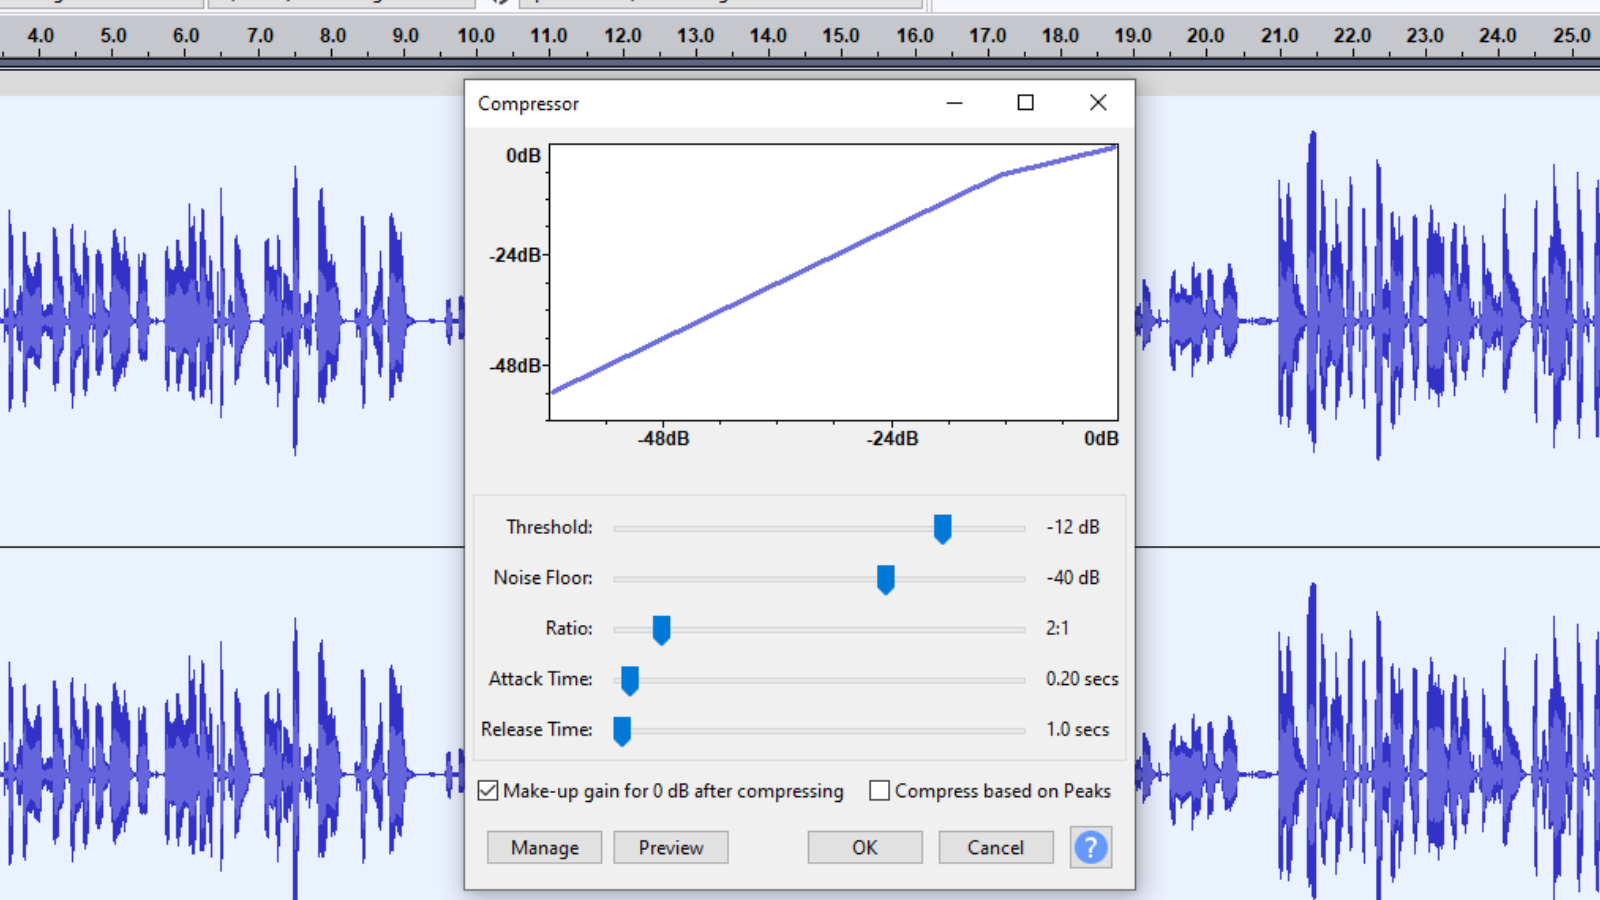
Clicking on this option will open the Compressor pop-up box in the image below.
To apply a compression change you need to tweak the sliders below the graph and press OK to apply the changes. The next section covers the best vocal compression settings for Audacity.
Best Settings
Before getting to the sliders, you ought to know what the graph stands for. This visual representation is there to visualize the dynamic range – The difference between the loudest and softest parts in the audio recording that you are working on. The horizontal axis is for the input level while the vertical axis is for the output level. Therefore as you make adjustments to the sliders this graph will be changing as well.
There are five sliders in the compression pop-up box that will be addressed independently. These five sliders are – Threshold, Noise Floor, Ratio, Attack Time, and Release Time.
Additionally, I will look at the two checkboxes after the sliders which are Make-up gain for 0 dB after compressing and Compress based on Peaks.
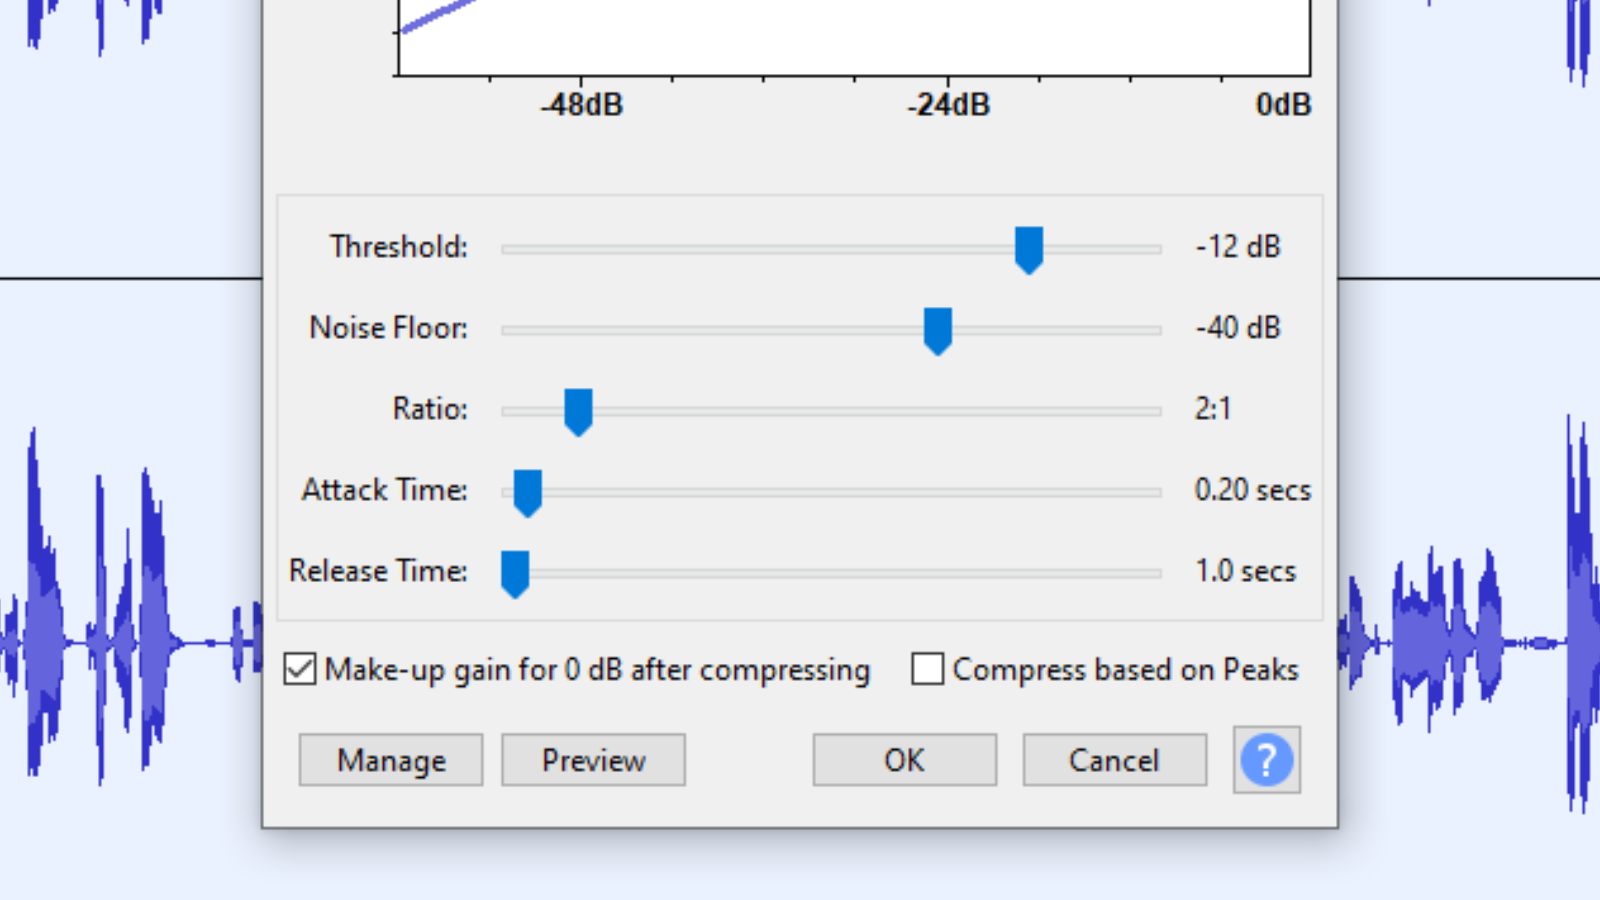
Threshold – This slider is used to input the maximum level that compression is applied. From the image above any sounds beyond -12 dB will be compressed.
Whenever I record I aim for a -18 dB which is the ideal dB level to record at. Since sound fluctuates I also do have a range for the peak and the minimum level my sounds can fall in. These are -10 dB and -24dB respectively. With this information, my recommendation would be to set this slider at -12 dB but you can have it at -15dB max. Sounds beyond this range start to distort.
Noise Floor – Noise floor is the noise that is normally present within your audio. It is usually every nuisance and unwanted sounds like the whirling fan, hums from equipment, and traffic that exists in the background. This slider is used to gate such sounds preventing them from being amplified when you amplify softer regions in your audio. Without this slider, you will end up increasing the levels of the less loud regions of the audio as well as increasing the level of the noises within the recording.
To get the ideal figure to use because noise varies from one recording to another look for a part within the recording with a pause. Play the said region and check the playback level meter.
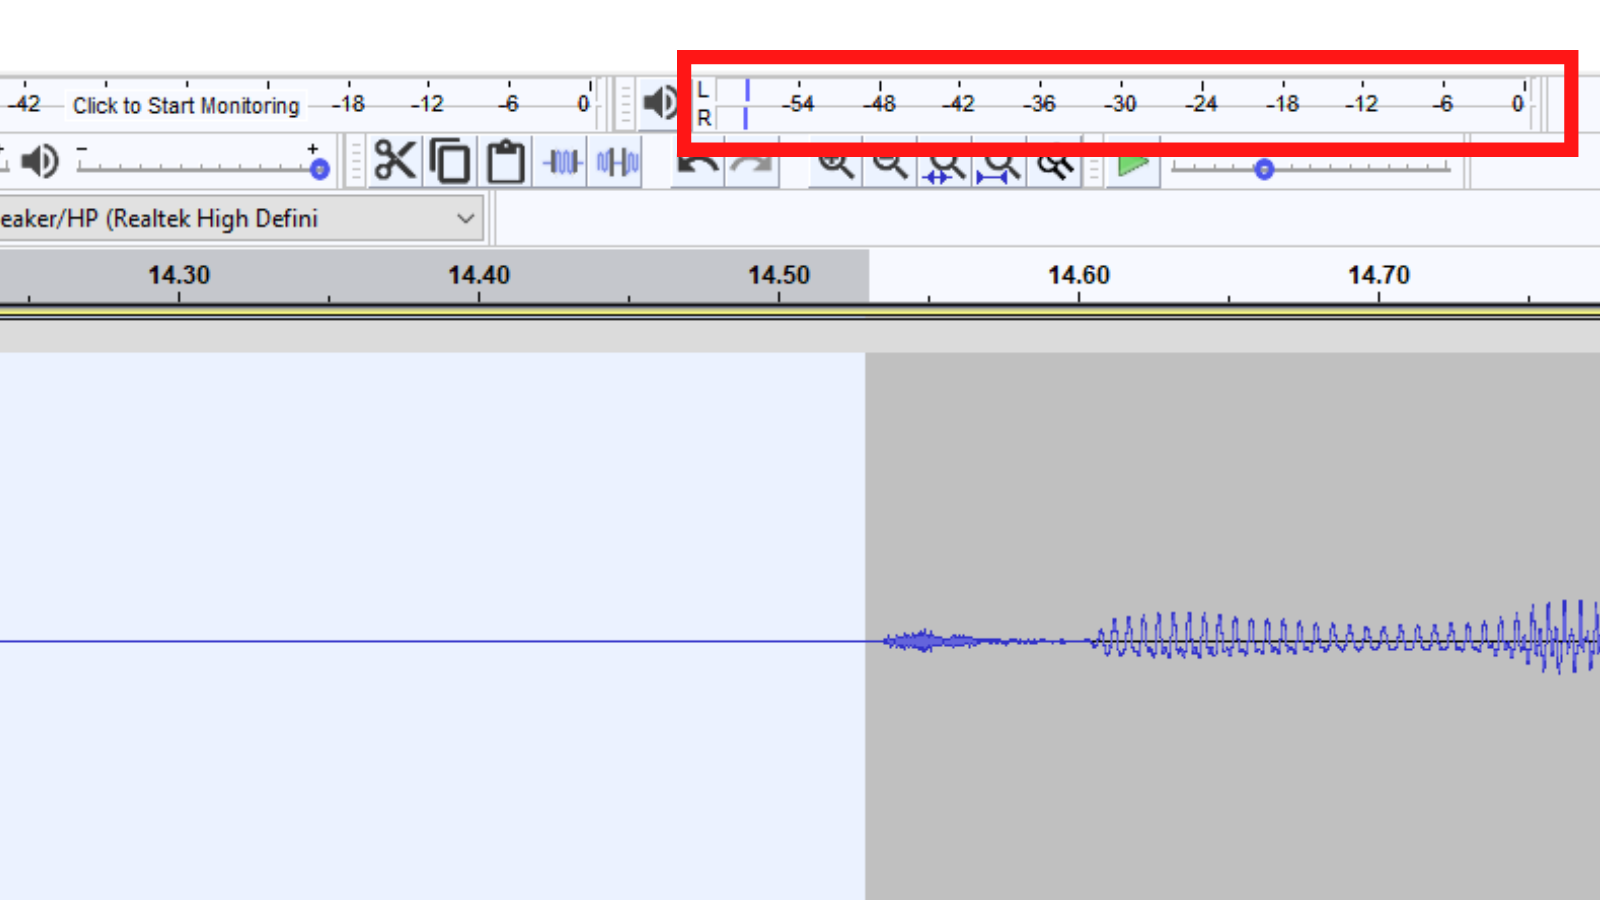
Notice the two blue lines for the left and right channels. Whenever you play audio and pause these lines will appear. They always indicate the loudest level of the part played. Therefore if you played a part with no speech it will show you how loud the noise is. In my case, the noise is about -57dB. So to properly gate it I will set this slider at -55dB to deal with any sounds below it.
Ratio – This slider is connected to the threshold slider. In my threshold slider, I did set it at -12dB but some sounds will go beyond this level.
The ratio slider comes in to reduce such signals that go beyond the limit set. A ratio of 2:1 is ideal as the sounds beyond the threshold set are cut in half. If a part of my audio surpasses the -12dB limit by an extra 2dB, this will be halved leaving the audio to surpass the limit by just 1dB.
Attack Time – The variation within your audio can be sudden or have a slow transition. This slider allows you to have a seamless application of this effect. When one is listening back and suddenly the audio transitions from a quiet level to a louder level and the compressor has a fast response to this sudden change it will be obvious and noticeable to the listener.
Therefore set a higher value which represents a longer transition cut process that will not be easily noticed by the listener. A short attack time is a quick response that is set by a lower value. I would suggest going for a 1.0 – 1.5 sec attack time range.
Release Time – This slider is geared towards solving the issues within the quieter regions. As audio transitions from louder parts that surpass the threshold to quieter regions, there is normalcy is regained at that instant. The setting was manipulating loud sounds but now since the sounds are not loud it sort of takes a back seat.
Just like the attack time slider, this slider deals with time. A long time which I will recommend will have parts of your audio become inaudible as it will take time to get the transition done as sounds get back to normal. But there are cases where audio transitions from loud parts to shorter quieter parts. In such cases, we cannot afford to use a longer time as the audio will sound strange.
Use a 1.0 – 1.5 sec time range to get the compressor effect releasing the volume back to normal anytime the sound level drops below the threshold set.
The information above is the ideal settings for vocals that you use when adjusting the five sliders.
Note that you can always make further adjustments and not be confined to the figures provided to get customized results that work well for your situation.
Now let us have a look at the two checkboxes.
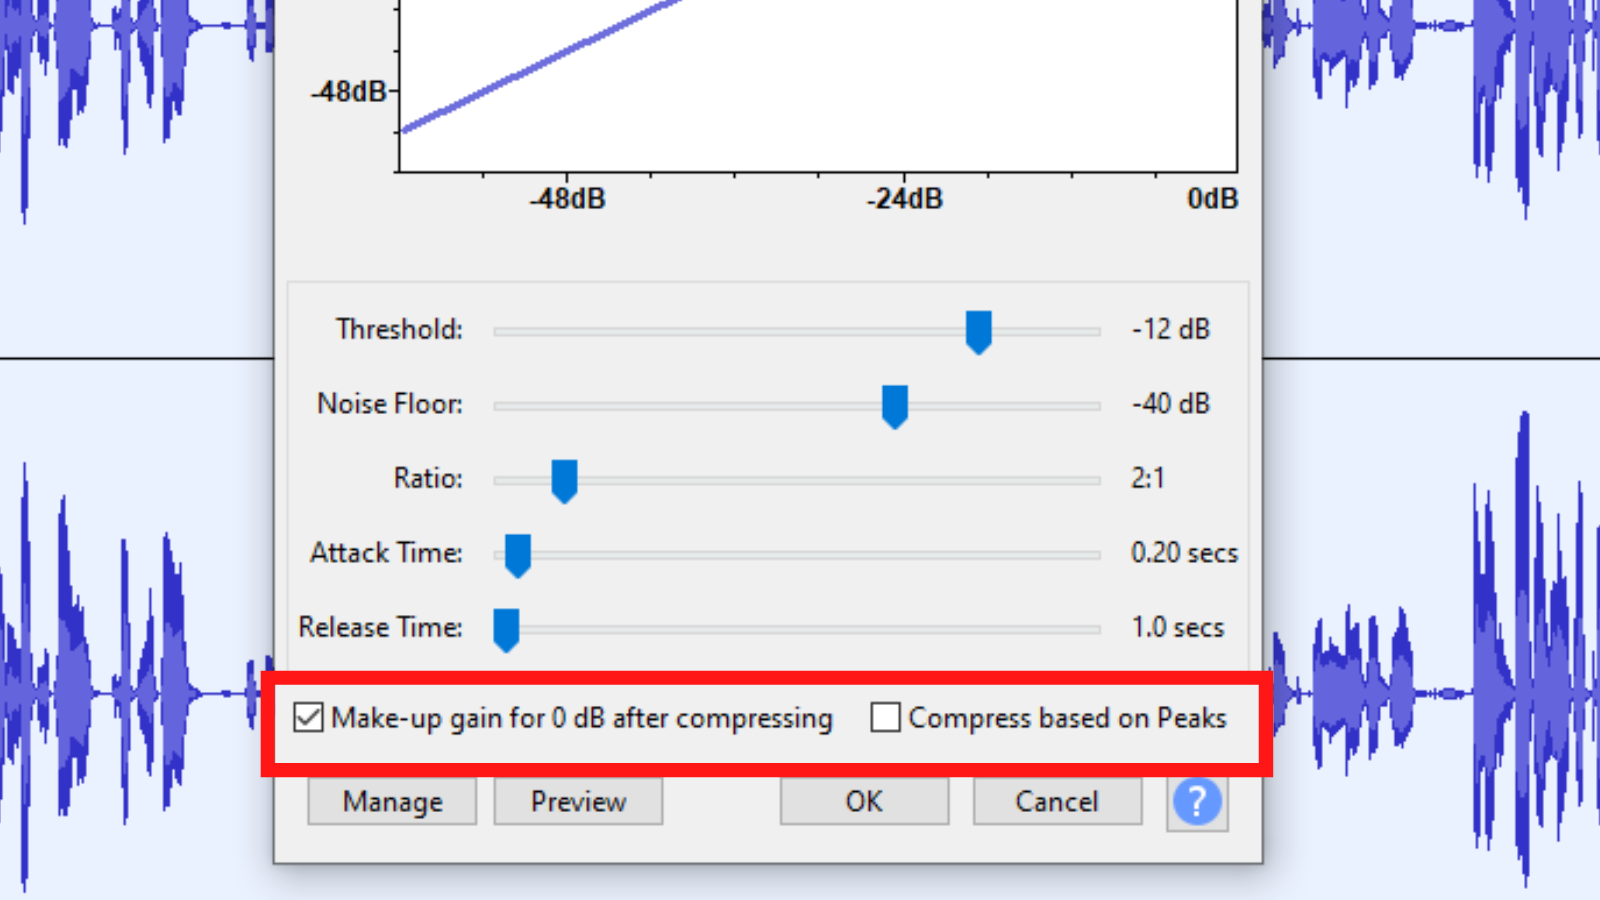
Selecting the make-up gain for 0 dB after compressing the checkbox will ensure that after you apply the compression effect the audio is amplified to a peak of 0dB. Launching the compressor pop-up you will realize that the default choice is this and this option will be best for most of your editing needs.
The next checkbox is Compress based on Peaks is used to amplify louder sounds that surpass the threshold steadily than the ones below the threshold.
Conclusion
Compression effects are used to change dynamics. Audacity does a really great job at making such alterations. An example is how natural your audio sounds with the attack time and release time sliders.
In audio editing, there are numerous effects that fall under the category of amplification and compression. This article has provided you with a detailed procedure to get rid of that imbalance in intonation and amplify your audio in the process.


