Whenever we record we aim for the best audio quality for our video files. This article will outline some of these processes that will make your vocals sound great. In the article, I will categorize the processes into two categories. The first one features processes that you do before you start recording and the second one features post-production processes that you do after recording.
Best Settings Before Recording
Before hitting the record button in Audacity pay attention to these settings and precautions.
- Ideal surroundings – With this make sure there is no noise in the area where you are doing your recording.
- Good audio gear and the right connections – To get good audio quality do not compromise on the equipment being used. Always go for good and professional equipment. In addition, make sure the connections are okay avoiding wrongly or loosely connected cables which will bring about noise in your recording.
Within the software have a quick glance at the sections highlighted in the image below.
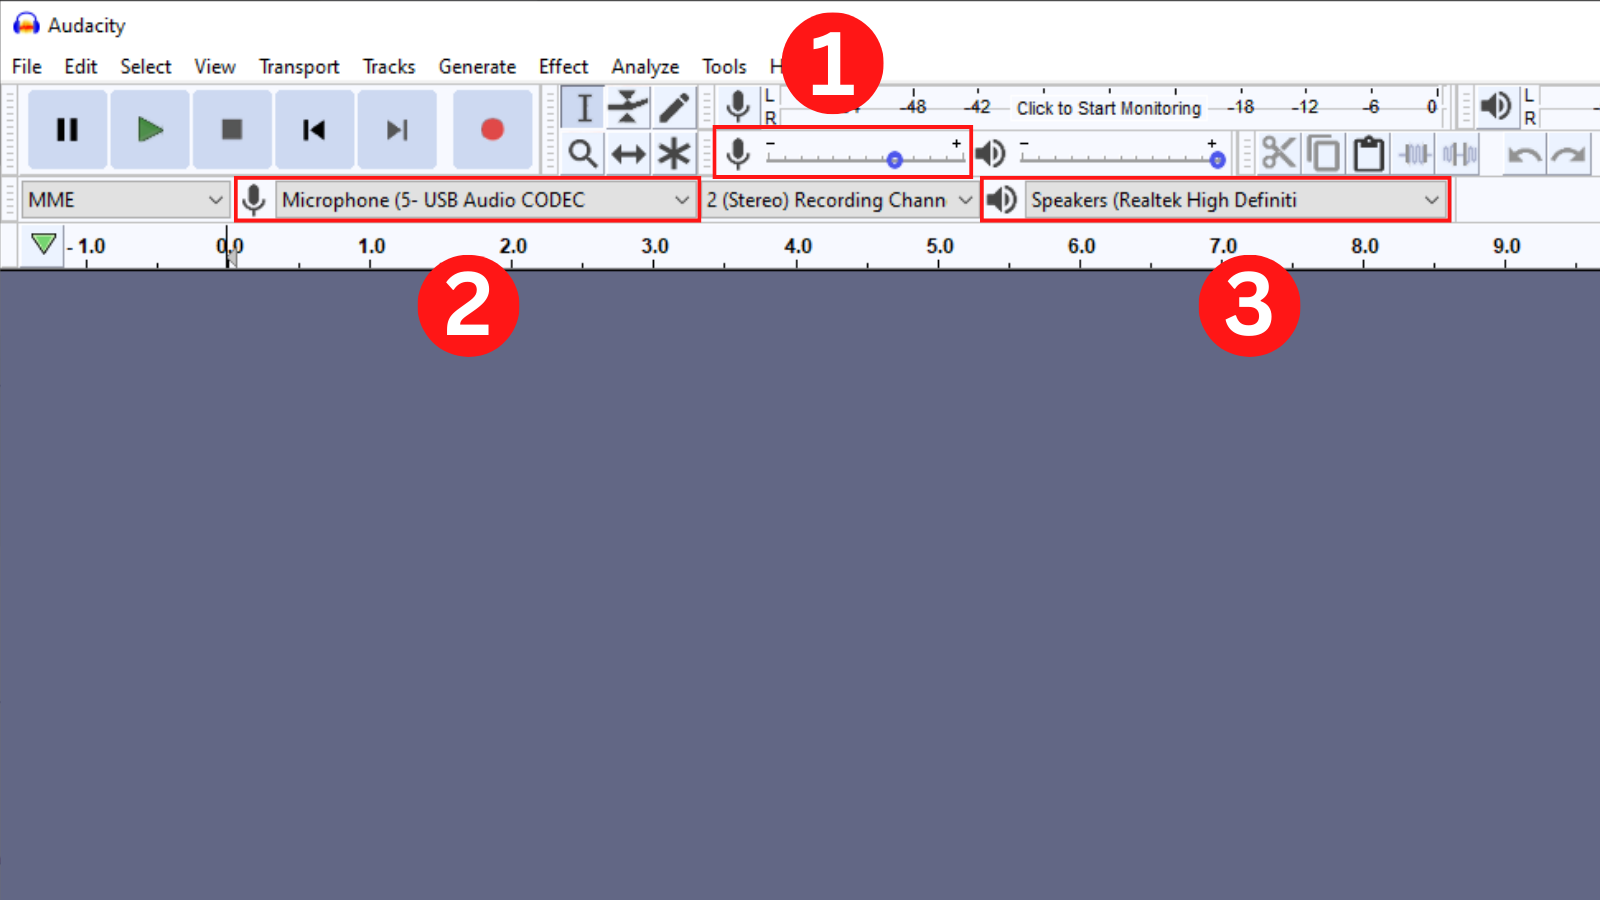
The slider in 1 allows you to adjust the recording volume. If you sing and find that the audio is low you can adjust this. This setting is also handy if you are using a microphone connected directly to your computer as you do not have an audio interface.
Highlight number two is the microphone being used. Make sure to select the right input. Lastly, number three is the playback option. If you are using headphones, always ensure they do not leak sound that might be picked up by the mic.
Best Settings After Recording
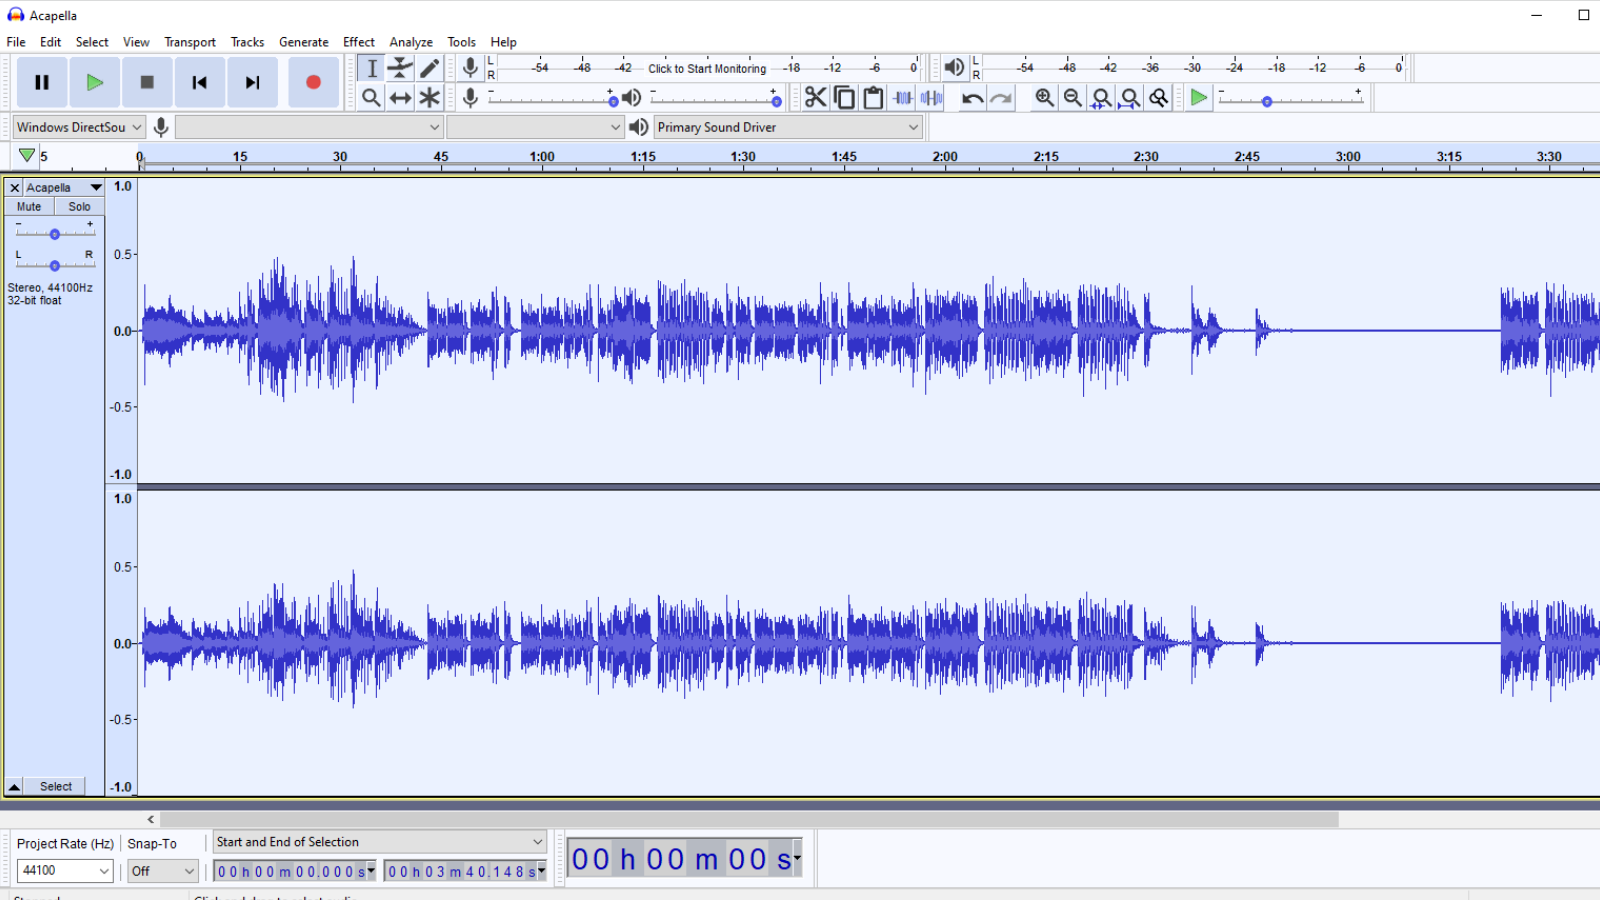
Import the acapella file into audacity using Ctrl + Shift + I. Once the file is opened in Audacity double click on the waveform or use the keyboard shortcut Ctrl + A to select all. The image below represents my audio wave.
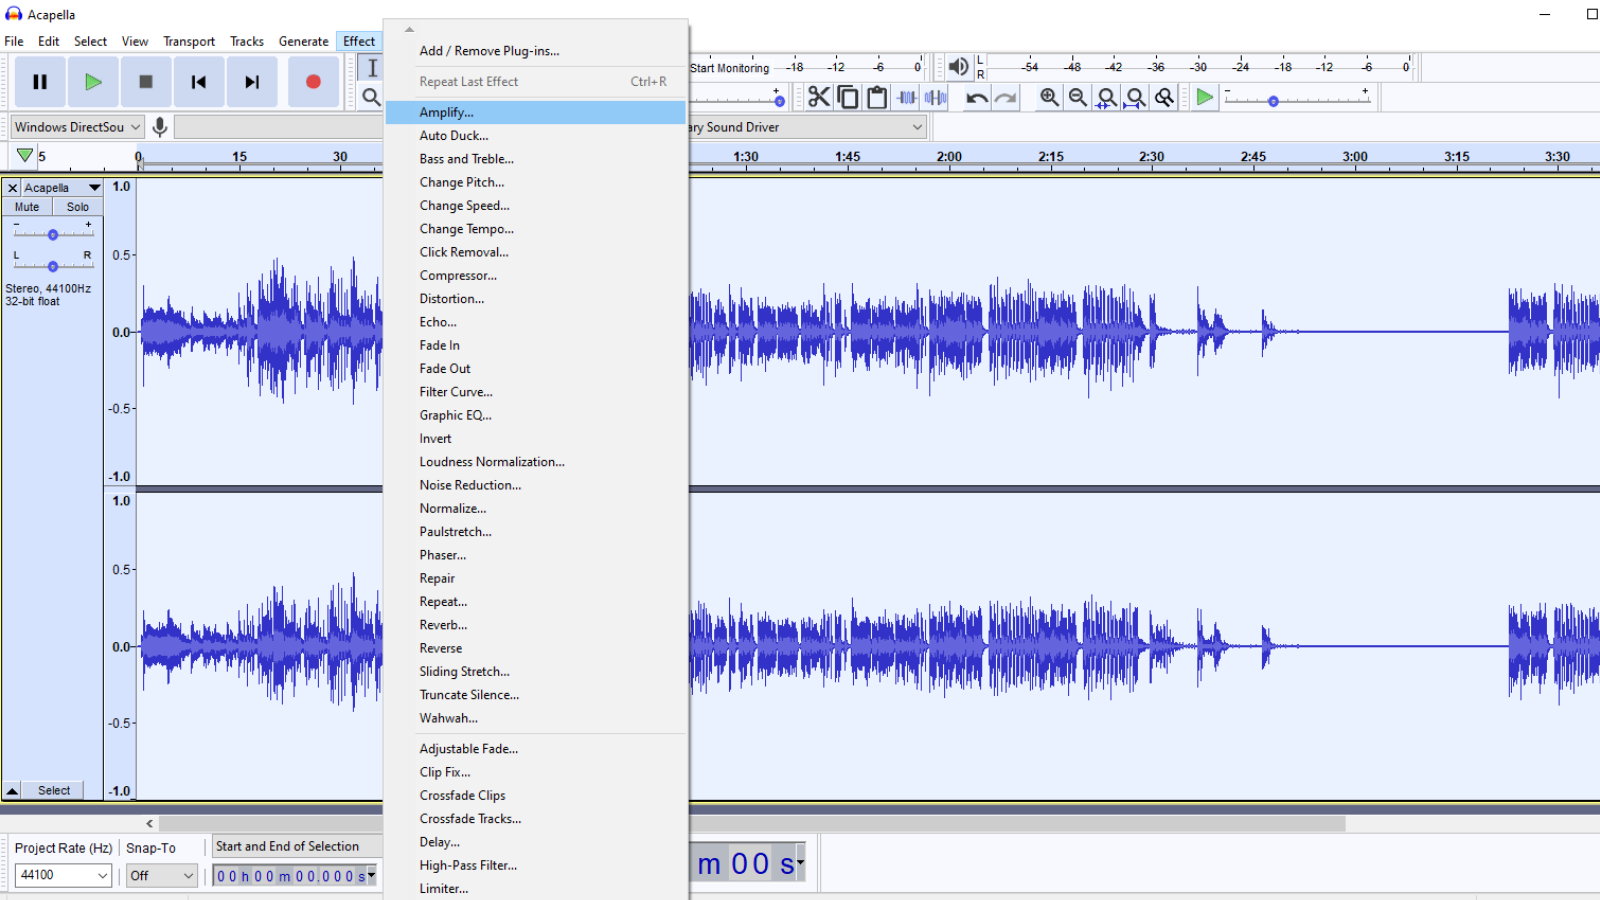
The levels on my recorded vocals are a bit low therefore amplifying the recording will be my initial step. If you got your levels right during the recording session this step will not be necessary for your overall process. To amplify, click on the Effects option in the menu tab. From the drop-down list click on the Amplify option.
Clicking on the Amplify option will open the pop-up box in the image below.
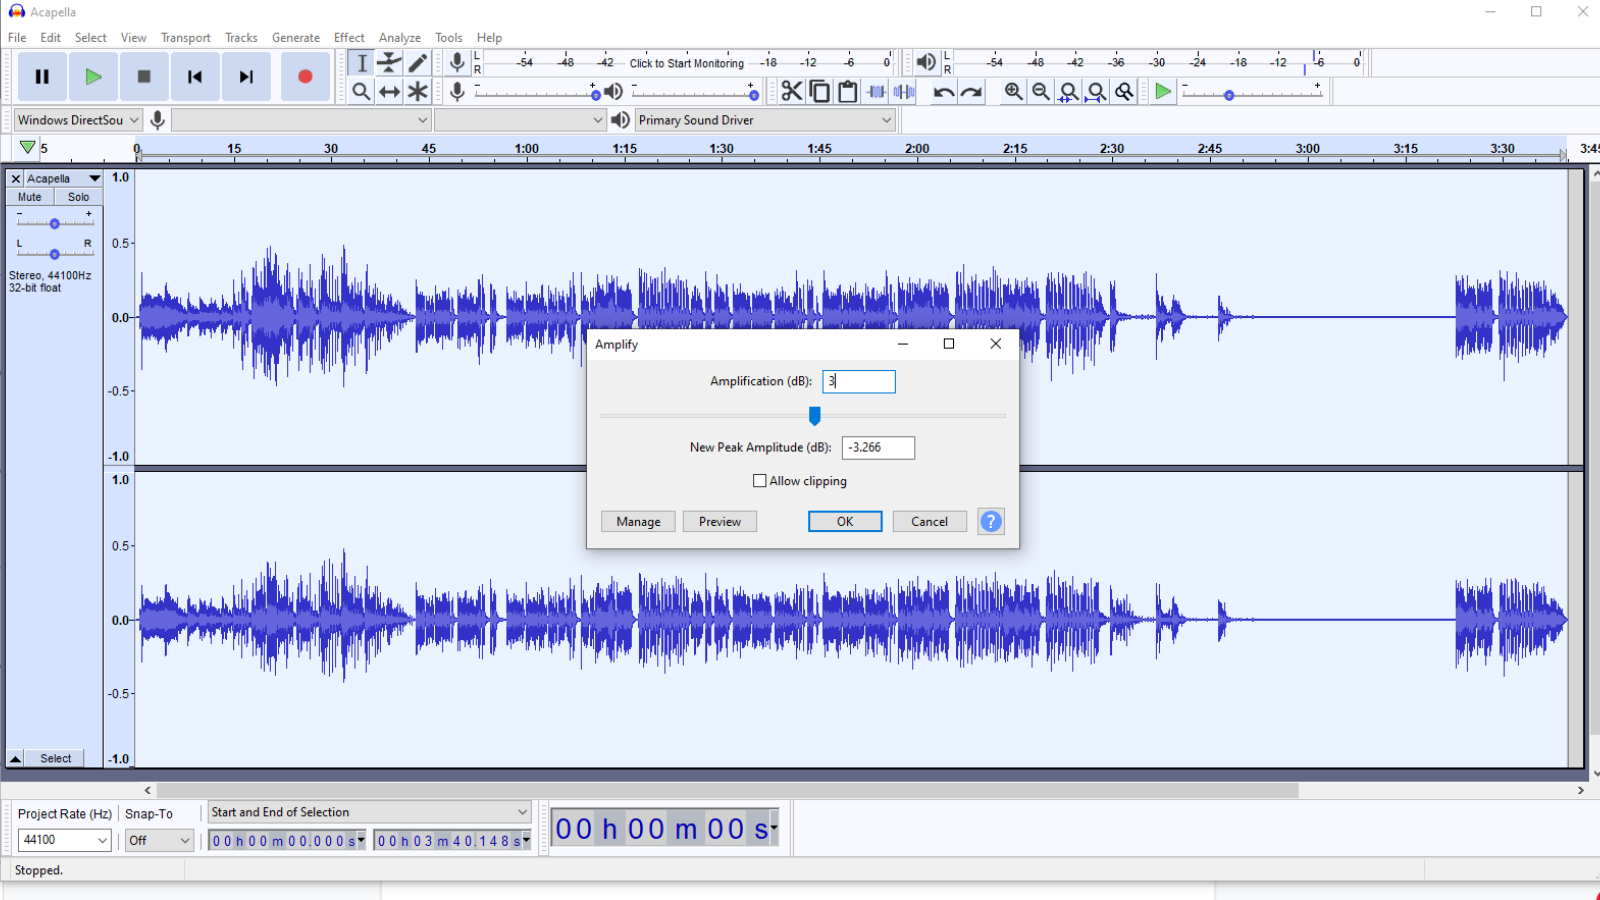
In the first entry named Amplification (dB) I have keyed in 3. You can also use the slider below to make these changes.
Positive values will make your vocals louder while negative values will make the file quieter.
The New Peak Amplitude value changes automatically depending on the value in the first entry. A key point to note is that the value in this entry should not be greater than 0 dB. A value that exceeds 0 dB means that you are applying too much amplification which results in clipping.
In such a case the OK button will be greyed out. Therefore ensure that the figure that you key in the first entry does not result in a positive value in the second entry. 3 dB is my ideal amplification change. You can go a bit higher if your recorded audio was quieter.
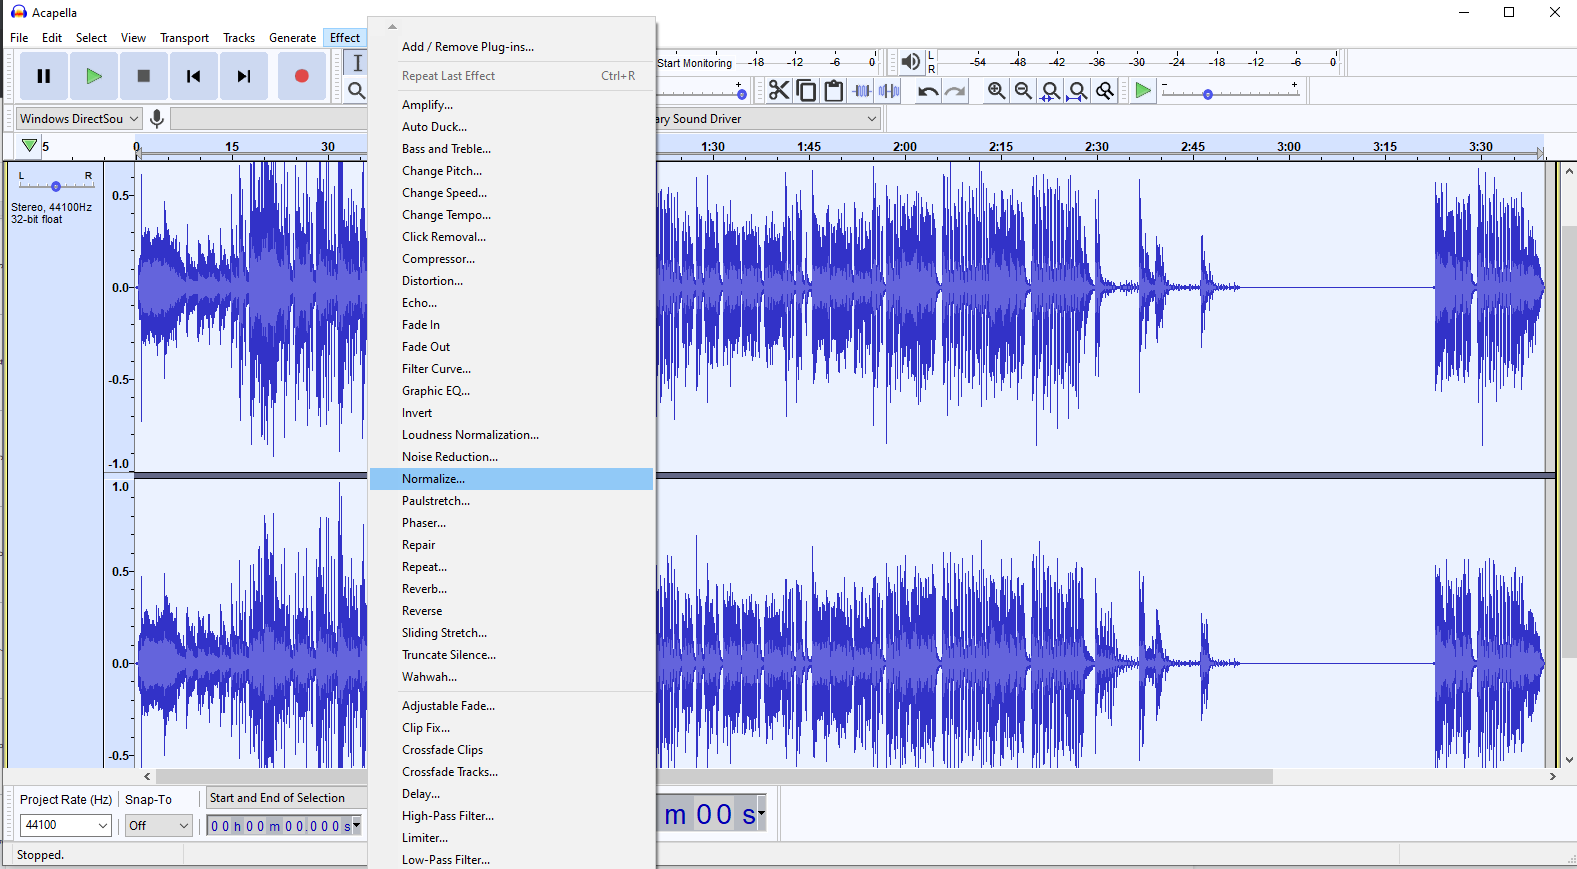
The next process is to normalize the audio. Whenever recordings are done, inconsistencies tend to arise. In such a case, the audio file will have sections that are louder than others. To rectify this, you will normalize the file to give it a standard loudness from start to finish. Click on the Effects option in the menu tab followed by Normalize option from the dropdown list.
By following the above procedure, you will get the pop-up box below.
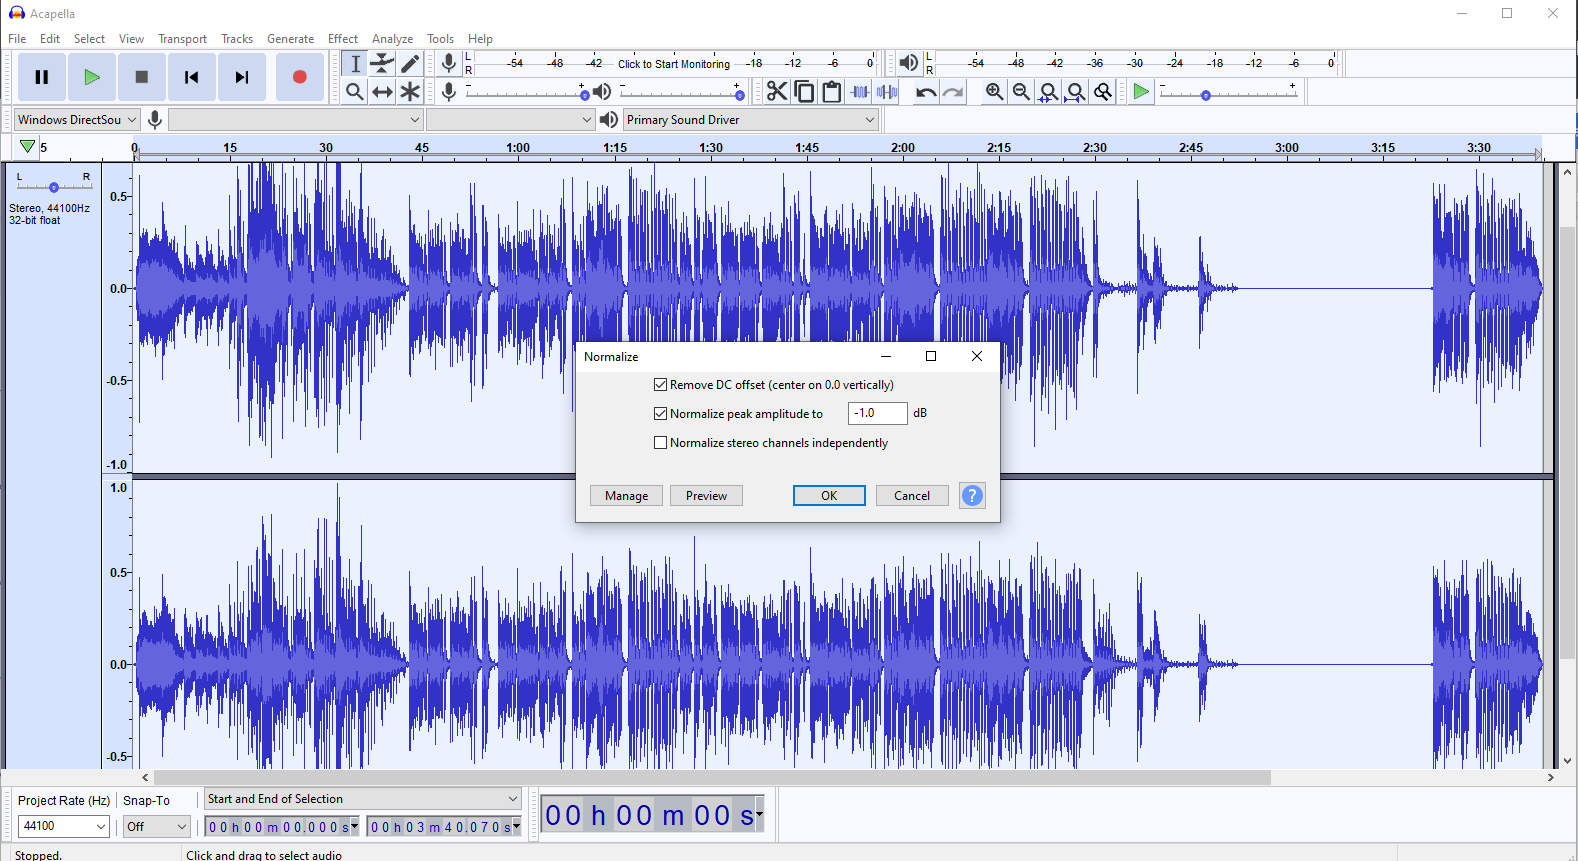
Make sure the first two entries: Remove DC offset (center on 0.0 vertically) and Normalize peak amplitude to are checked. In the second option, there is a blank dB figure slot. The default figure is -1.0 dB. If you key in positive figures, the preview and OK buttons will be disabled as the maximum input required is 0. If your audio has lower amplitudes you can use a more negative figure like -3 dB.
Just a quick tip, if you happen to be working with a couple of acapella files you can select all of them and follow the process outlined above and the adjustments made in the pop-up box will be made on all files.
Click OK to apply the changes.
After normalizing the audio compress it to reduce the space between the softest and loudest parts of an audio signal. This step is the cherry on top of the normalizing process done immediately prior.
Click on the effects option in the menu tab followed by clicking on the Compressor option from the dropdown list.
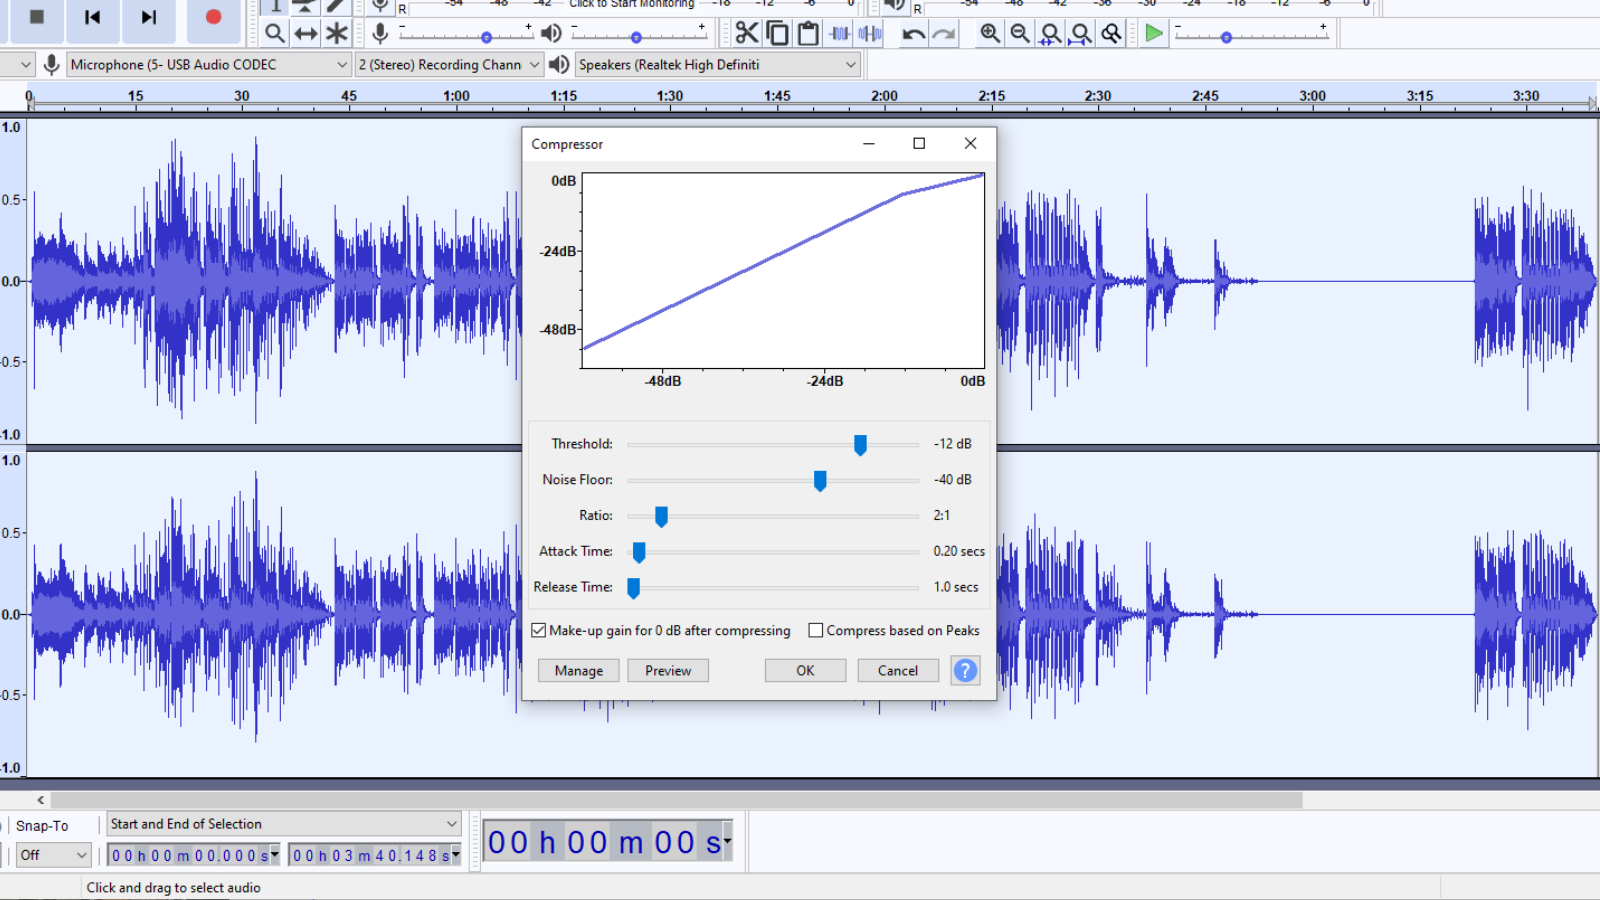
Use the default settings then press OK. The compression process additionally does a great job of attenuating the noise that will be in the file.
The last step will be equalizing the vocals. From the effects in the menu tab, click on the Filter Curve option.
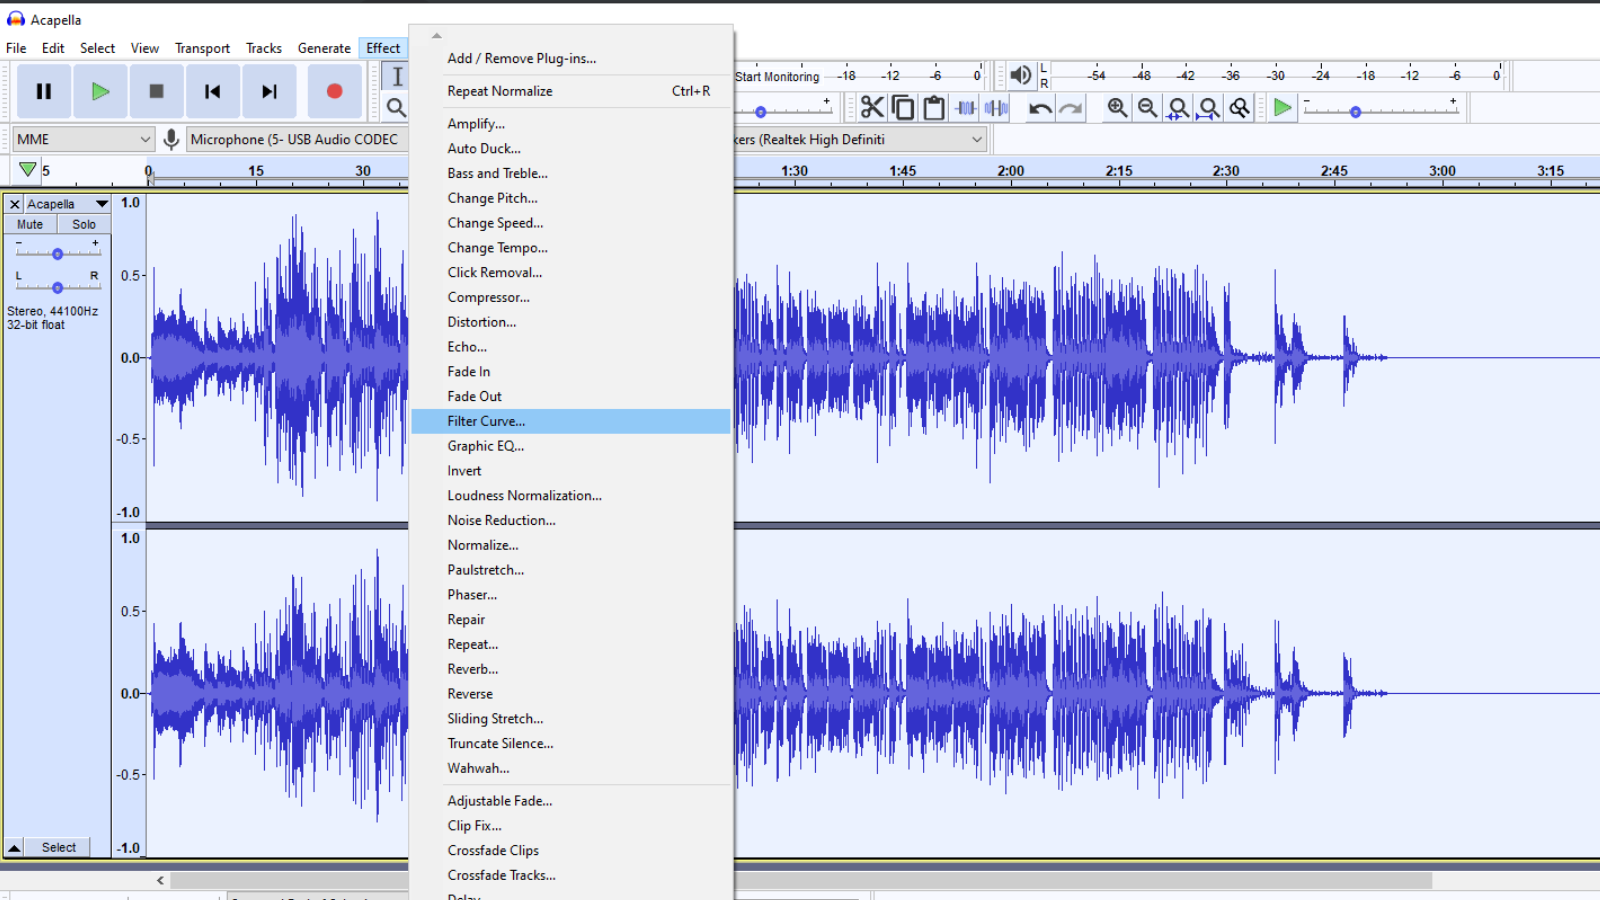
Clicking on this option will open this pop-up box with a graph.
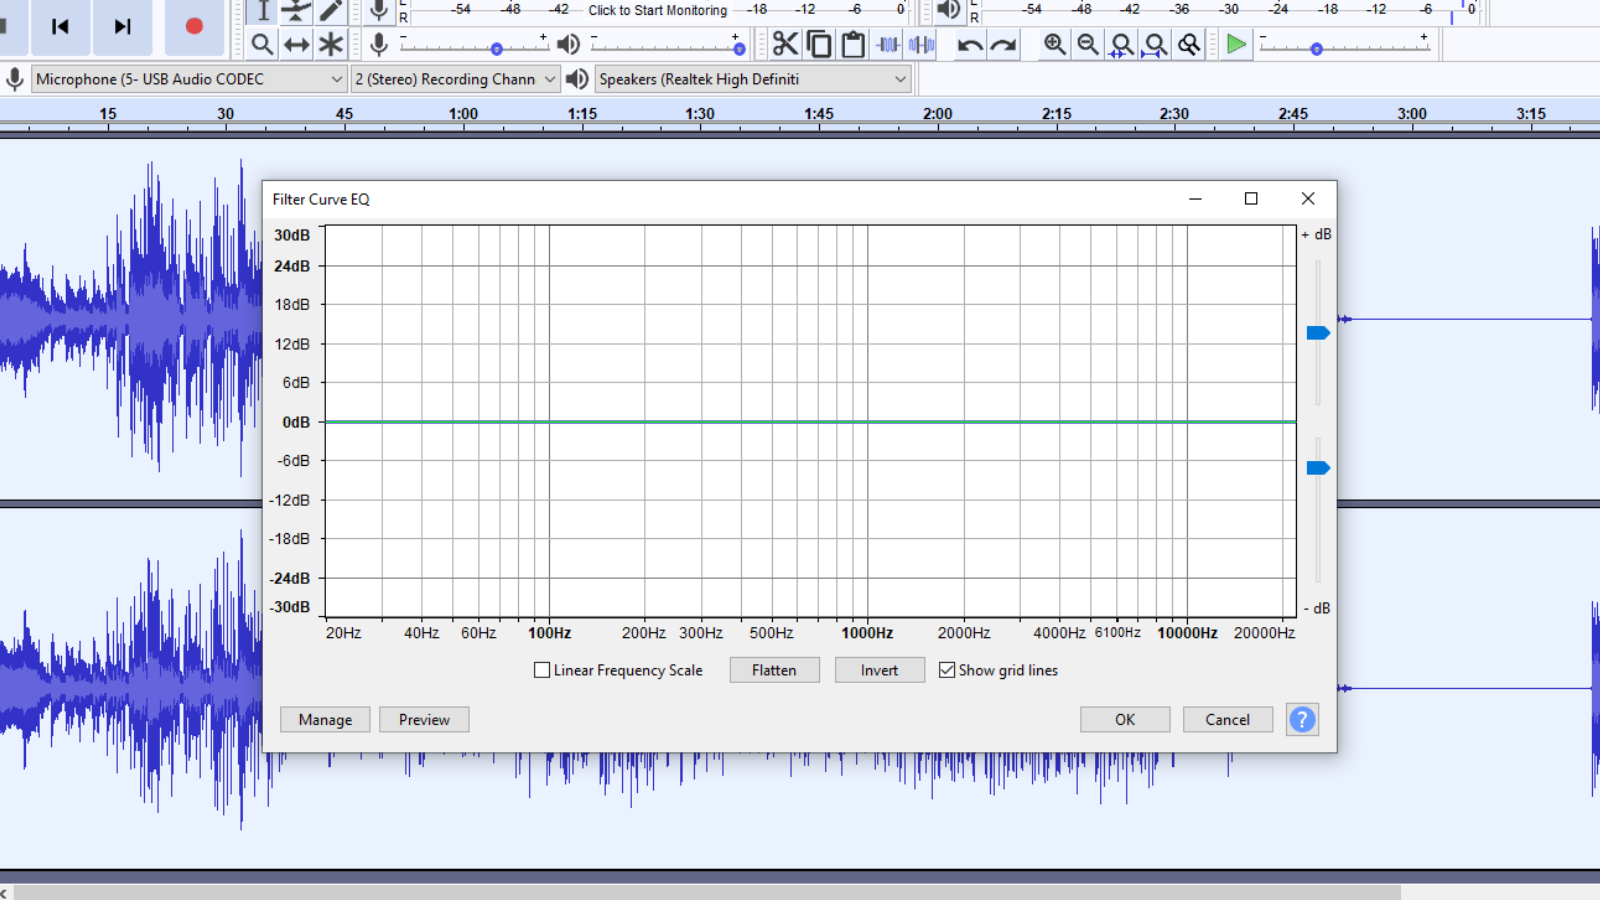
The first thing to do in this step is to kill the rumble in your audio that exists below 100Hz. This will pass louder frequencies and attenuate lower frequencies. Below are readjustments that I have made to the graph to achieve this.
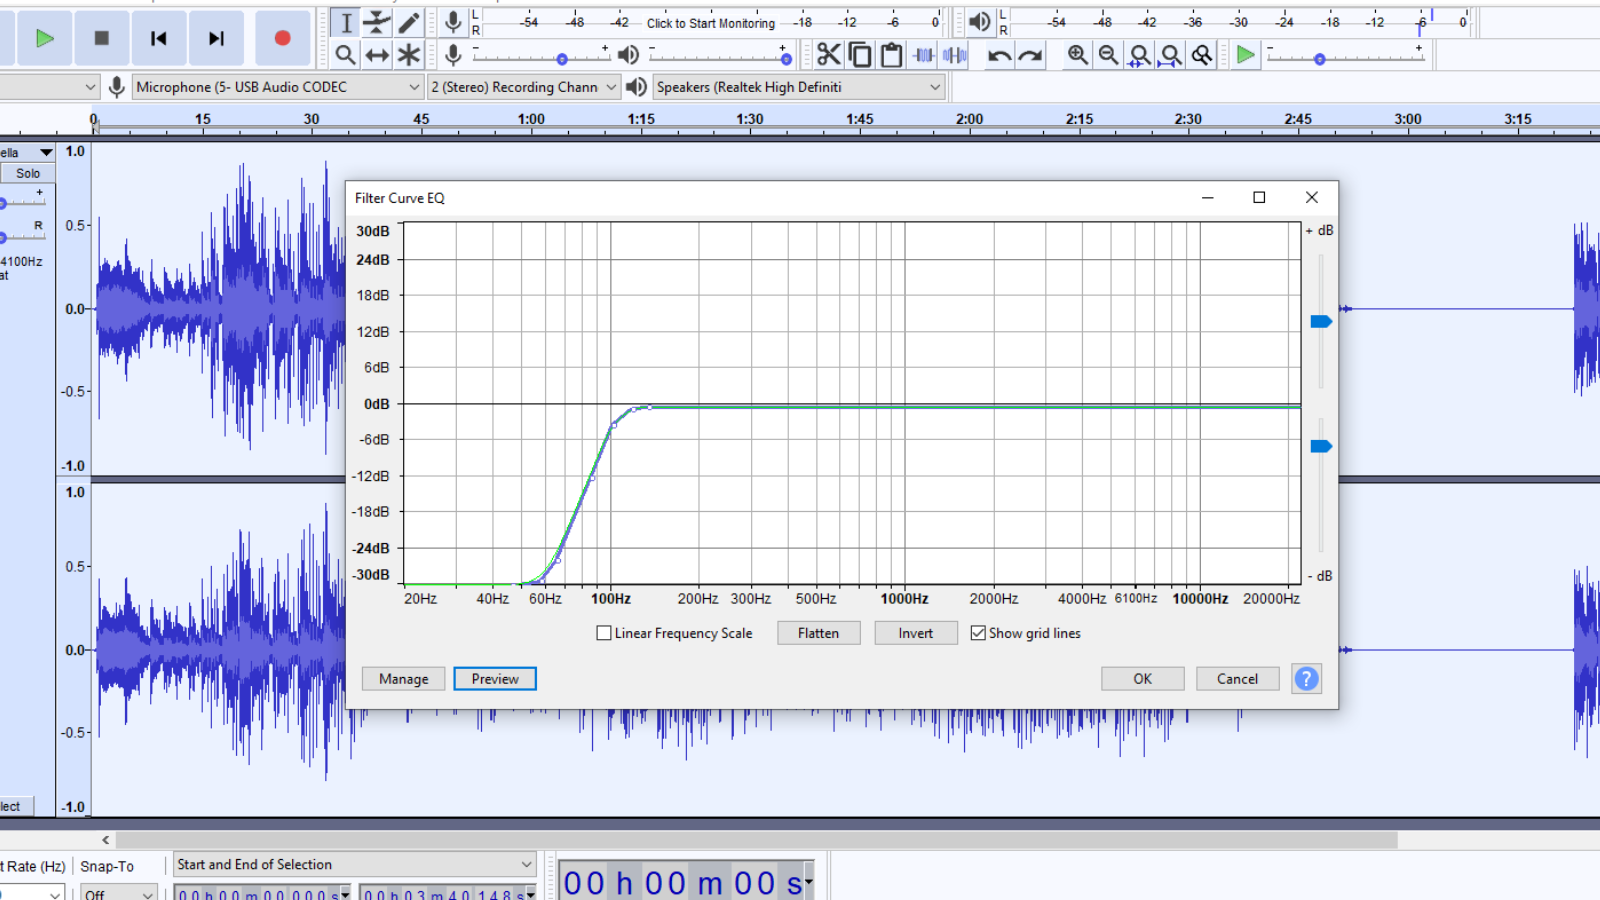
After making these changes click on Ok to apply this effect.
Once again reopen the Filter Curve EQ pop-up box. The box will reopen with the previous adjustments that you made. Reset the line by clicking on the Flatten button in the pop-up box. The intent this time being raising the treble on the high frequencies to make the recording fuller. These frequencies exist beyond the 3000-4000Hz mark. Find these adjustments in the image below.
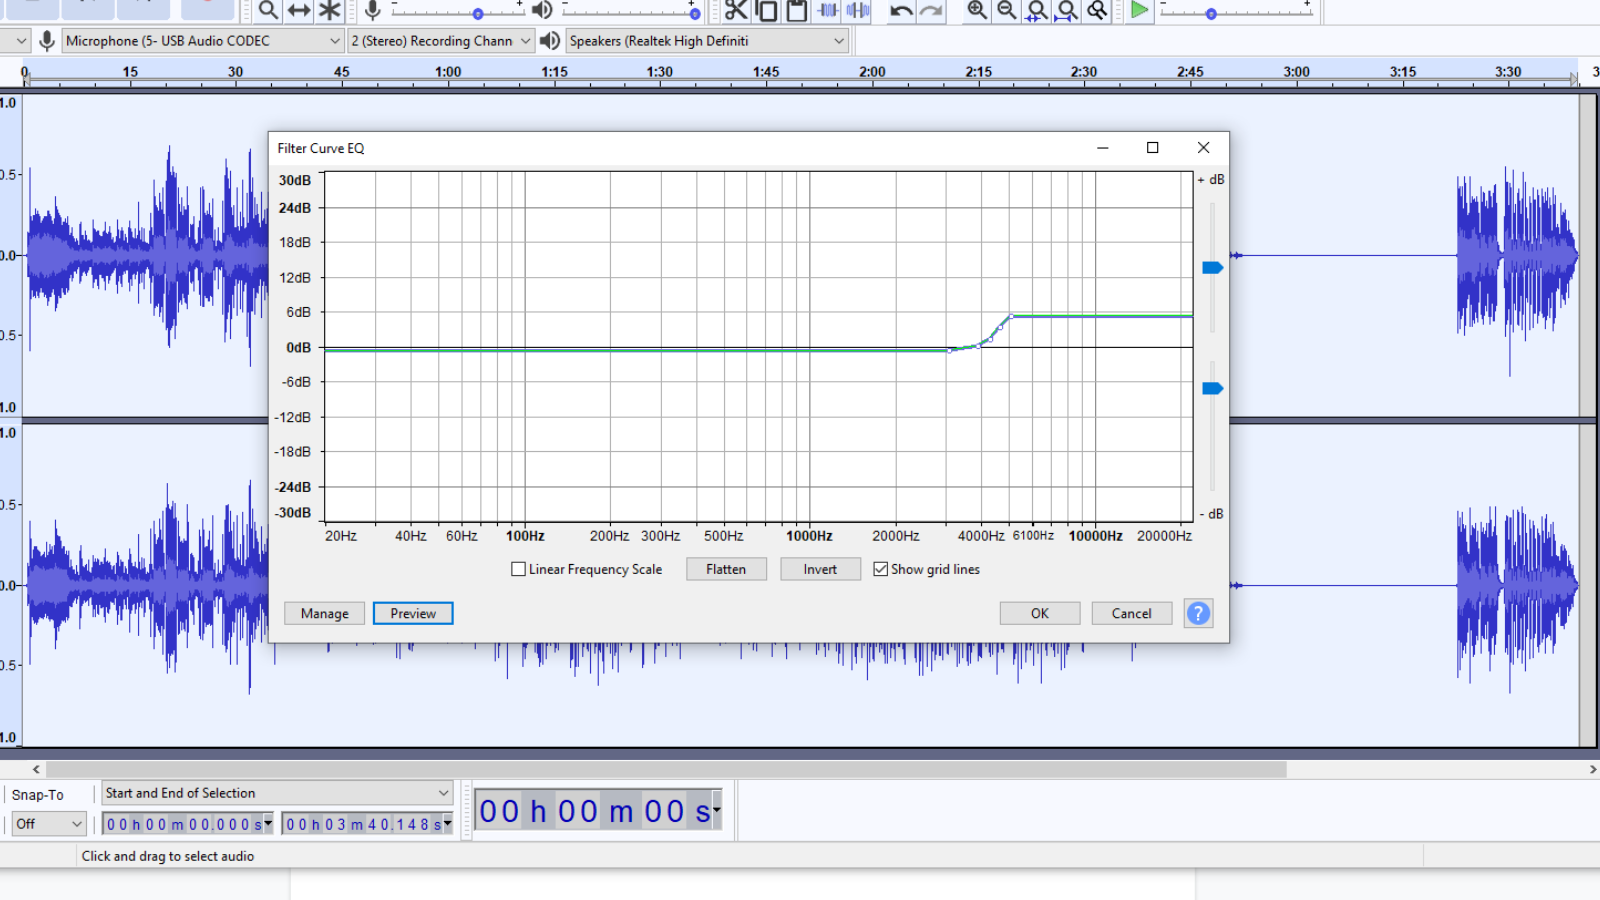
After adjusting the graph click OK to apply these changes.
Conclusion
Producers in professional recording studios will go ahead and add additional effects like reverb and autotuning the vocals. Audacity is limited in doing what other digital audio workstations are capable to do to your vocals. Some additional edits can be achieved by the use of plugins. The process outlined in this article is a minimum that can do bits of transformation to your unrefined audio giving it a revamp and making it sound better.

![Audacity Did Not Recognize the Type of this File [SOLVED]](https://ProRec.com/wp-content/uploads/2022/08/image-407-180x180.png "Audacity Did Not Recognize the Type of this File [SOLVED]")

