Rendering Settings
There is a moment in every project when you need to start rendering. Maybe you need an MP3 file to send to a friend to get some feedback, or you are ready for a final export that will be sent to a mastering engineer. Maybe you need to render a couple of stems for remixing, or maybe you need to render out 200 clips for a big sound design project. No matter how big or how small the rendering task is, here is everything you need to know about rendering in REAPER and how to take advantage of most of the tools available.
The Rendering Window
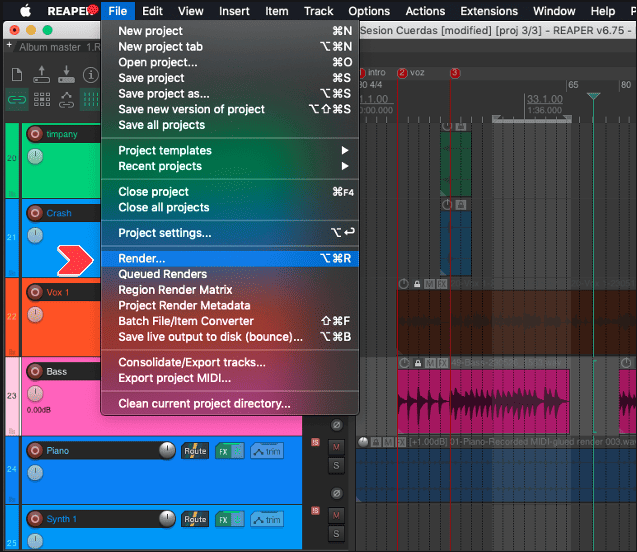
The first thing you need to know is how to open the rendering window, this can be easily done by going to the “File” menu and clicking on “Render”, or by using the shortcut “Ctrl+Alt+R” in Windows or “Cmd+Alt+R” on a Mac.
With the “Render to file” window open now we can start the process of selecting the kind of files we want to create. First, let’s take a look at the different options we have available for us in the “Source” menu, here we can tell REAPER what we want to render from the project.
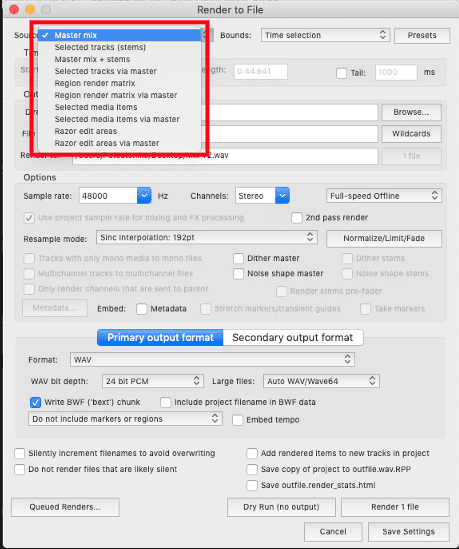
The most run-of-the-mill option here is by default “Master Mix”. Basically, REAPER will render the sum of all the Tracks, including all of the processing done by effects you have on the Master track. This option is probably what you are gonna use most of the time for things like final mixes, masters, or previews of projects be it in the music production space, or otherwise. I consider this the general purpose “Delivery” option.
Another option to take into consideration due to its usefulness is the “Selected Tracks”. with this one REAPER will give you one or several files, one for each track that you have currently selected. Note that the signal is NOT gonna pass through the master track’s effects, if you want to add those you need to choose “Selected tracks via master”. And if you are looking for efficiency you can choose “Master mix + Stems”, this way you can get both your stems and your master mix all in one go.
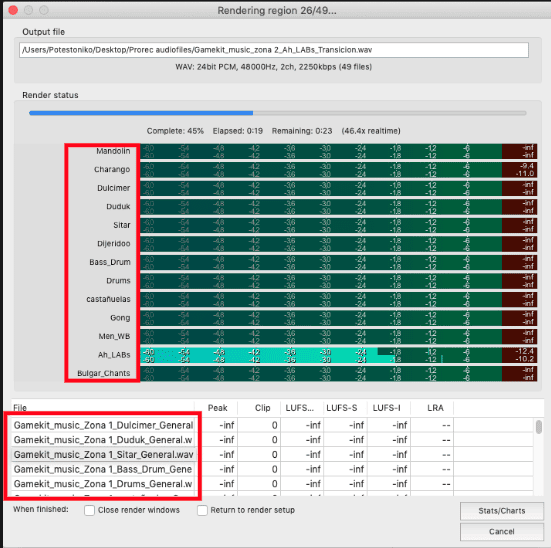
Now this next option is kind of niche, but indeed very powerful, “Selected Items”. With this option, you can render the individual items you have selected throughout the project, with their respective effects applied. This option is great when you are creating sound libraries, or big sound design projects, such as video games.
Bounds
Now that we have selected what source we want to render, we need to specify the time boundaries, as it’s not always that we need to render the whole project. Sometimes you need just a section, maybe just the chorus, or maybe just the end. click on the Bounds menu and take a look at the options.
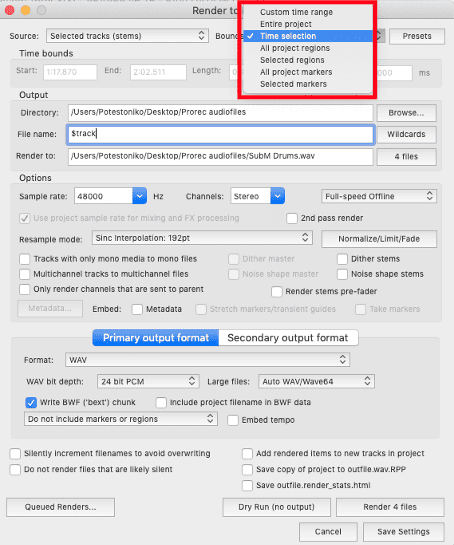
For starters, the two main options you are most likely to use are, “Entire project” which is selected by default, and “Time selection”. by selecting the “Entire project” REAPER will render out from the beginning of the timeline up to the end of the last item plus a little tail that you can modify in the box directly below.
With the “Time selection” option, REAPER will only render out the section of the timeline that you have currently selected on the project. Here the “Tail” option is off by default, but you can click on the tick box below to enable it again and add how much tail you want in milliseconds.
Primary and secondary outputs
You have selected the source, and also the time boundaries, now it’s time to select the format you need. REAPER has a wide variety of formats to choose, which include the traditional Audio formats, ranging from .mp3 for personal use and quick sharing, to the standard .wav file. But also, includes video formats, like .Mov or .mp4.
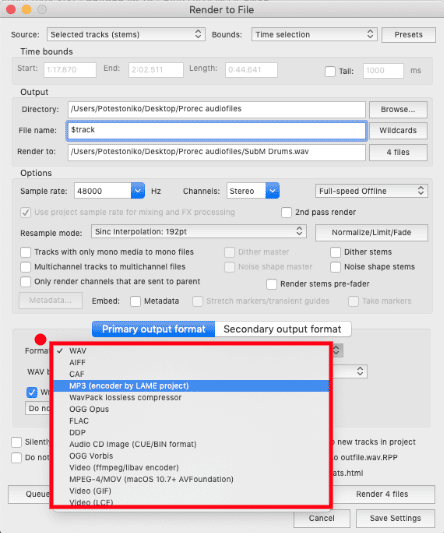
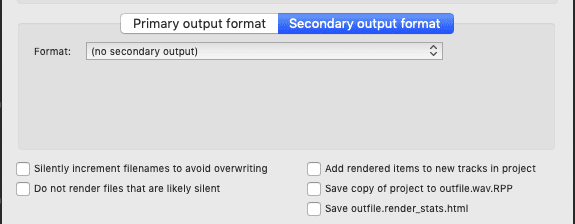
REAPER also allows you to render or export the same file in two different formats. If you click on the “secondary format” tab, you will be able to select a whole new format for your render, cutting down on the time needed to set up a render, and actually get the file out. This is awesome when you need to get your traditional high-definition WAV or FLAC file for professional use, while at the same time, getting an MP3 for quick reference with your artist.
Name and directory
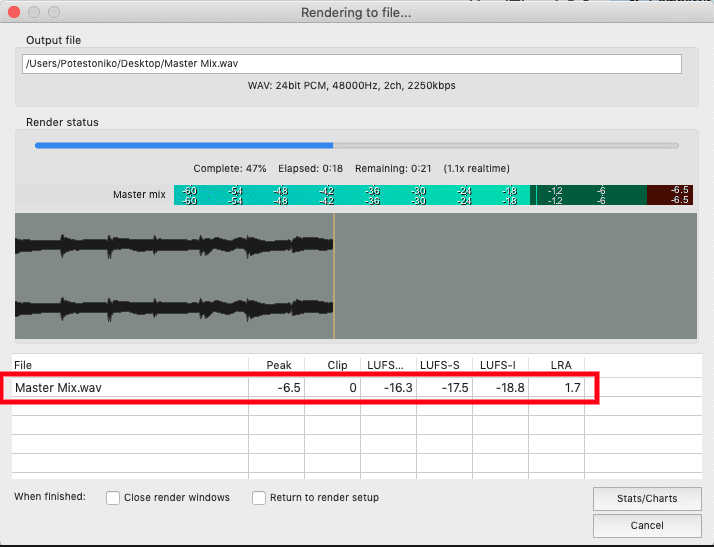
You may notice that it is time to name our files. This can be done in the “output” section of the window, where you can specify both the route where you want the files to be created, and the name of the file, but what happens if you are rendering multiple files? you may not want to have all of them share the same name, just to change them manually after the fact. no, its time to talk about one of the “Wild Cards”
These are placeholders that can be filled with specific information from the project. From selected track names to the time and date the file was created. They can be either written manually if you already know them by heart, but if you don’t, there is no reason to worry, you can click on the “Wild card” button next to the “File name” box. Here you can select from a wide array of options. “Wild Cards” can be mixed and matched in endless ways, to create highly specific, and context dependant names.
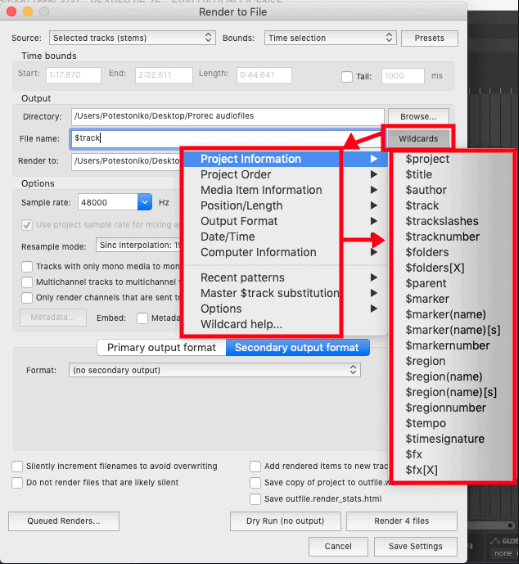
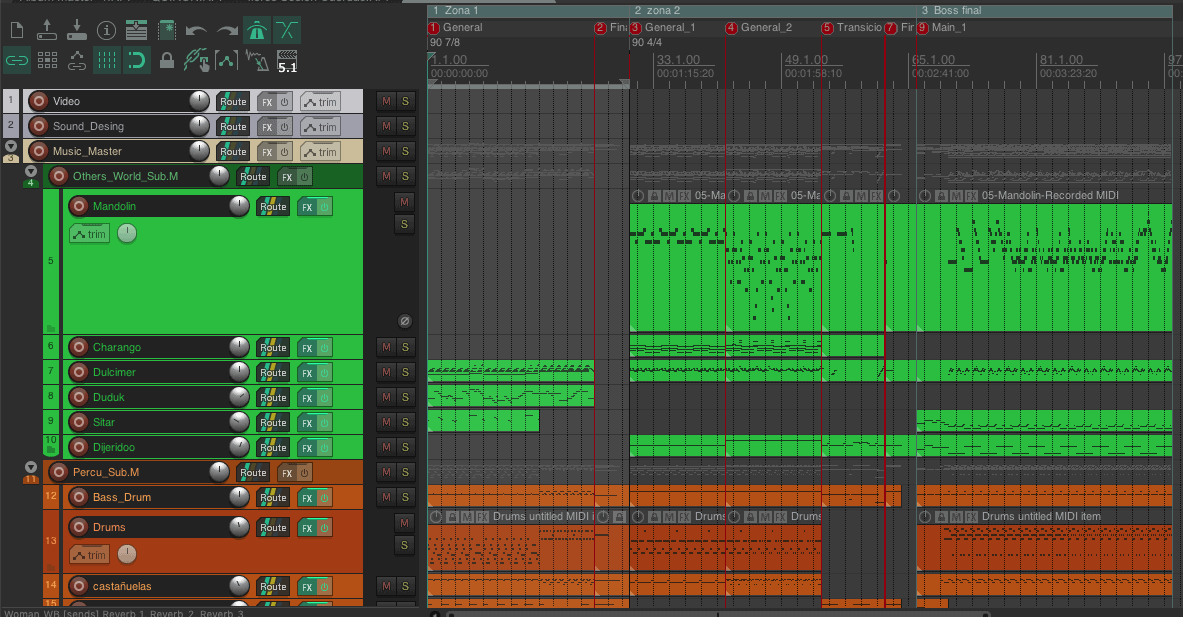
For example, If I’m going to render a batch of stems for multiple songs, in this case, it’s music for a videogame, where each region is a different song for a different area of the game.
What I would do is select the option, for rendering items, and name them accordingly to their track, region, and marker using this combination of wild cards “Game_music_$region_$track_$marker”. This will ensure that every item is named in an orderly fashion, and save me time while rendering.
Conclusion
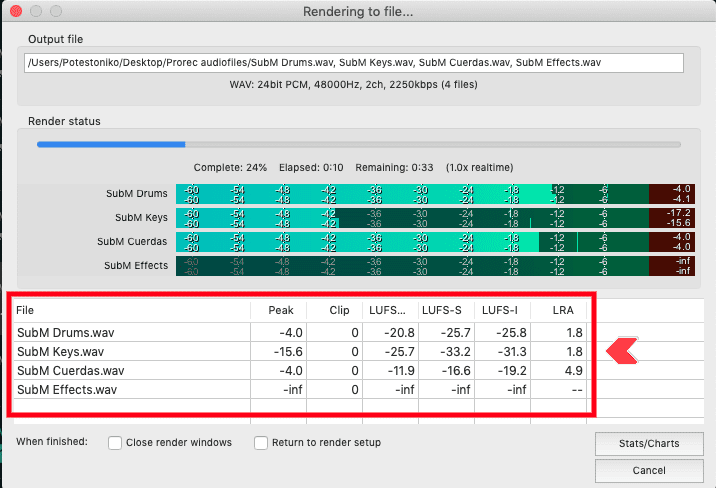
Rendering in REAPER is a highly efficient process, with a great set of tools that were specifically designed for saving you time, and allowing you to spend it where it is most important, the creative effort. Now it’s time for you to start rendering your projects and showing your creations to the world, go ahead and as always, go crazy!
![How to Update REAPER [STEP by STEP]](https://ProRec.com/wp-content/uploads/2023/04/reaper-current-version-180x180.png "How to Update REAPER [STEP by STEP]")
![Is REAPER a Good DAW? [Honest Opinion]](https://ProRec.com/wp-content/uploads/2022/09/image-271-180x180.png "Is REAPER a Good DAW? [Honest Opinion]")
