Recording music is all about getting the best possible sound in a way that it makes a memorable impression. And as a producer, you want to do all you can to ensure it’s a positive one. Sound effects give your tracks more clarity and ambiance. Equalizers and compressors work well to contribute to the quality of your music and give it a more “commercial” sound. They help make your tracks sound more balanced, with each instrument settling well into the overall mix.
In this article, I will show you what you can do with equalizers, compressors and limiters in Adobe Audition. I will go over how and when to use them, and how you can make these interrelated sound effects work together to impact the overall sound quality.
Equalizer
An equalizer gives your sound more clarity and presence. It is a tone control system that lets you adjust the bass, treble, and midrange by controlling the volume of certain frequency ranges.
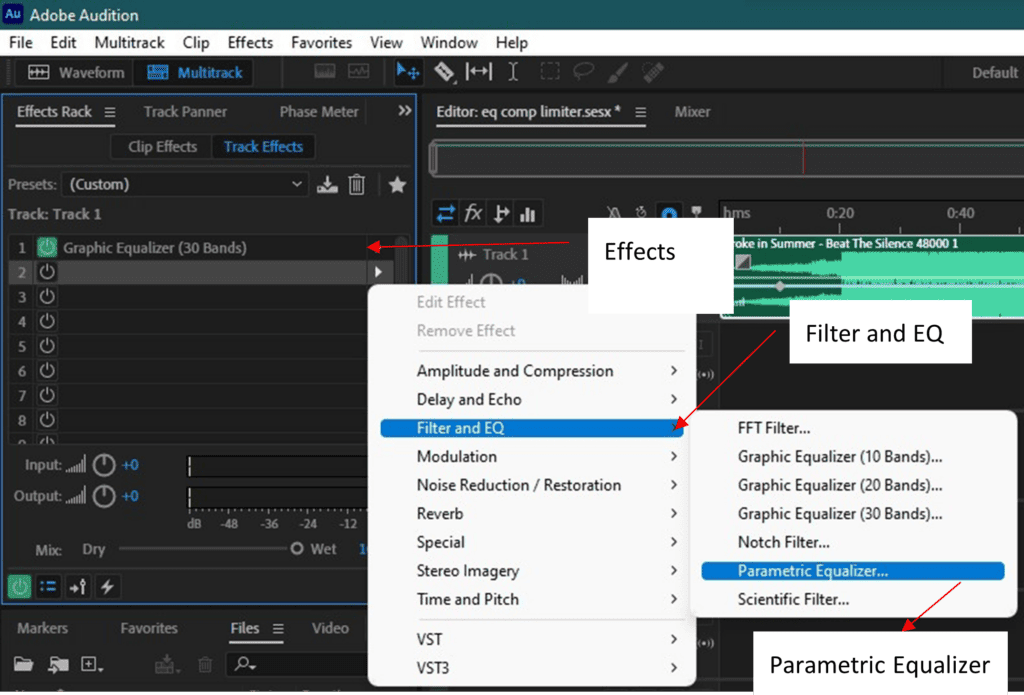
To access the EQ, go to the effects rack, select any slot and choose Filter and EQ option from the popup menu.
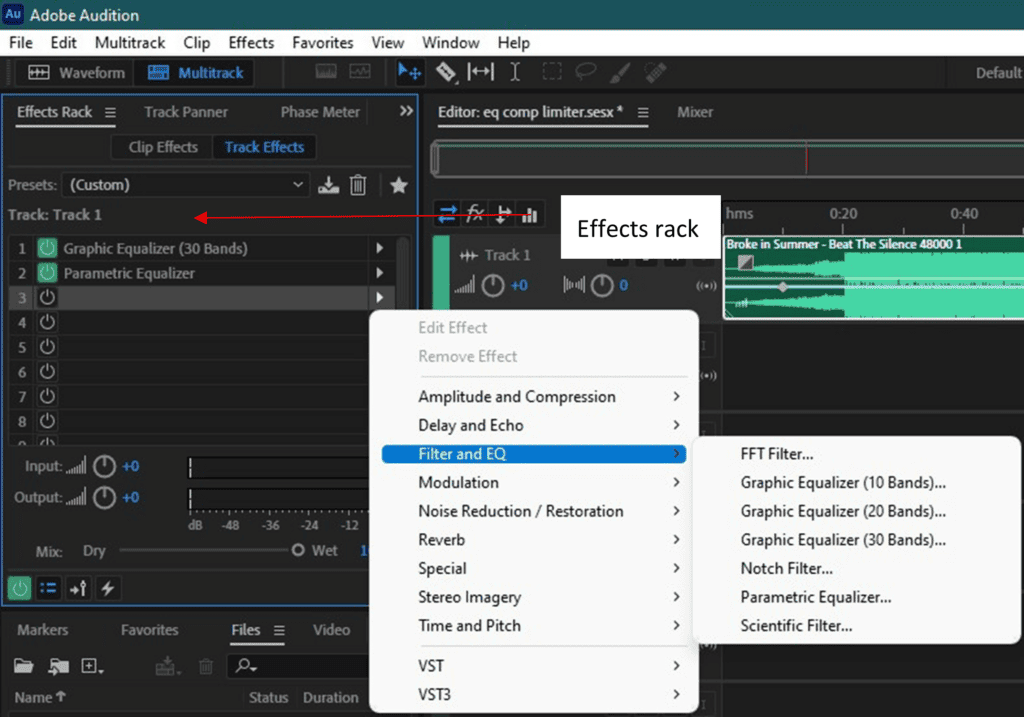
You will have to choose the type of EQ you wish to use (more on this later). For the purpose of this example, I will choose the Parametric Equalizer option.
Effects rack > Filter and EQ > Parametric Equalizer
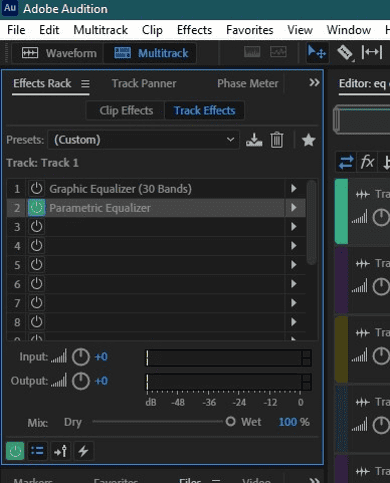
Make sure you have the power button turned on! You may also turn it off if you wish to bypass the effect.
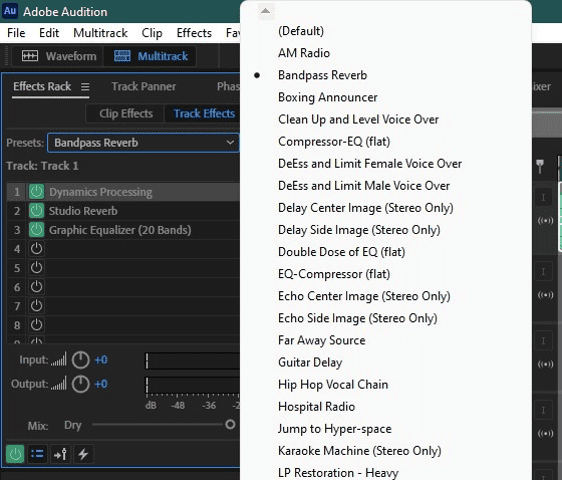
Adobe Audition provides presets for various different effects.
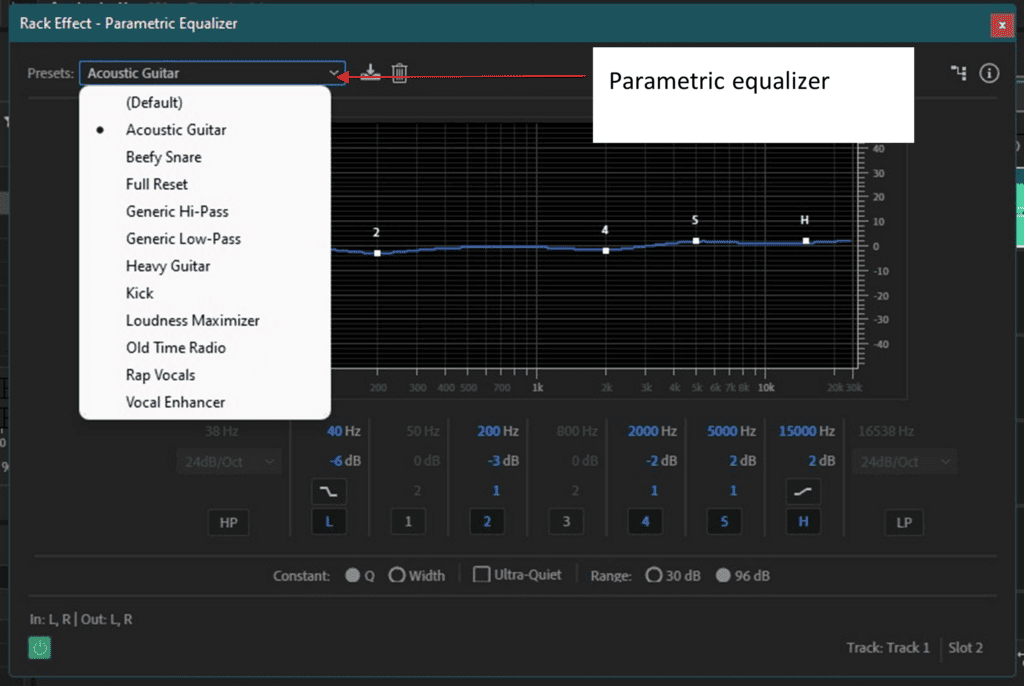
Presets are built-in effects settings that come with Adobe Audition. They adjust settings as desired and also let you save and use your stored settings/presets. For example, a plate reverb setting can be used to duplicate the bright sound of a metal-foil plate, and surround reverb simulates the sound of a cathedral, auditorium or a concert hall. Audition also comes with rack presets with various effects and different settings.
To use EQ presets, click on the drop-down menu and select your favorite preset. To store the current settings to your saved presets, click the New Preset button. To customize an existing preset, select it, change the settings, and save the new preset.
Why use EQ ?
Suppose an instrument sounds too bright, edgy or sharp. Try turning up low frequencies (40 Hz to 100 Hz), to add warmth to the track. Or what if the vocals sound a bit dull? Turn up the midrange EQ knob, with an emphasis around 250 to 600 Hz until the voice sounds right. Sometimes the music sounds a little muddy, full or bassy. A bump in the High Frequency EQ knob (say, 5 to 10 kHz) and a roll-off around 80 Hz will reduce bass buildup and make the sound more natural.
While using EQ, avoid excessive boost because it can lead to distortion. Improve the tonal balance by boosting quiet sounds and suppressing loud ones, until you hear a more appealing blend and a clearer mix.
Types of Equalizers in Adobe Audition
Adobe Audition has two different types of Equalizers. The first one is called the graphic equalizer, and the second one is the parametric equalizer. Both have separate use cases. I will go over each of them in detail below.
Graphic Equalizer
A graphic equalizer is usually placed in the master track of the mixing console and is used to adjust the overall mix rather than eq individual tracks.
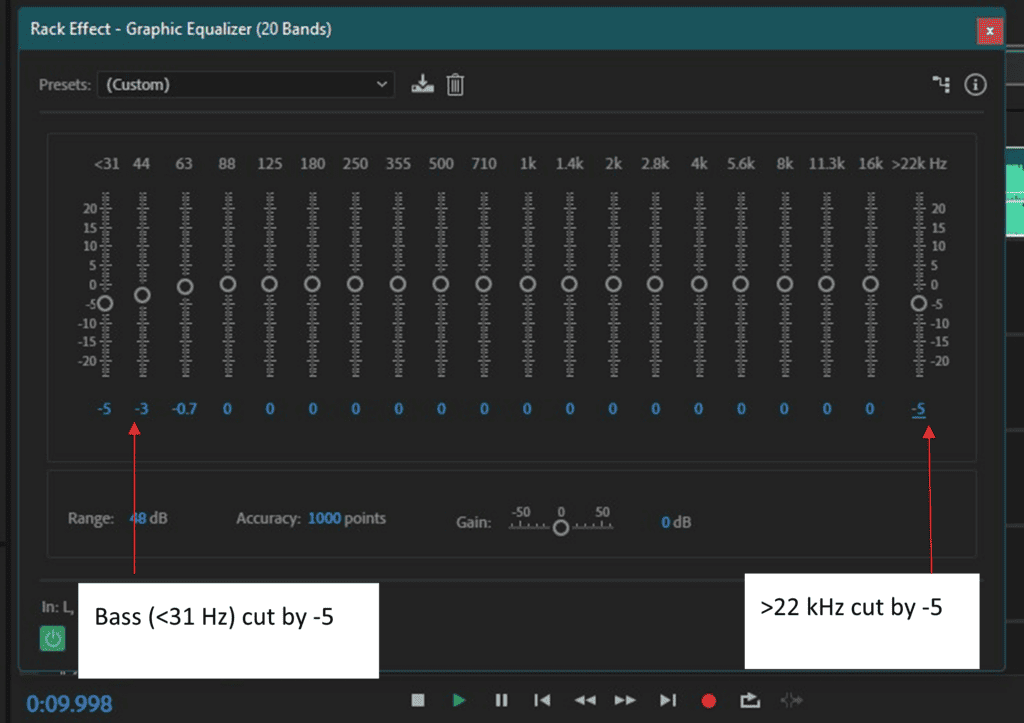
Graphic eq has a row of slides (10, 20 or 30) that work on 10 to 30 frequency bands. Adjusting the slide at a certain frequency corresponds with a boost or cut at the specific frequency. For example, let us cut the low frequencies (below 31 Hz) by –5 dB, 40 Hz by –3 dB and frequencies above 25 kHz by -5 dB.
Parametric Equalizer
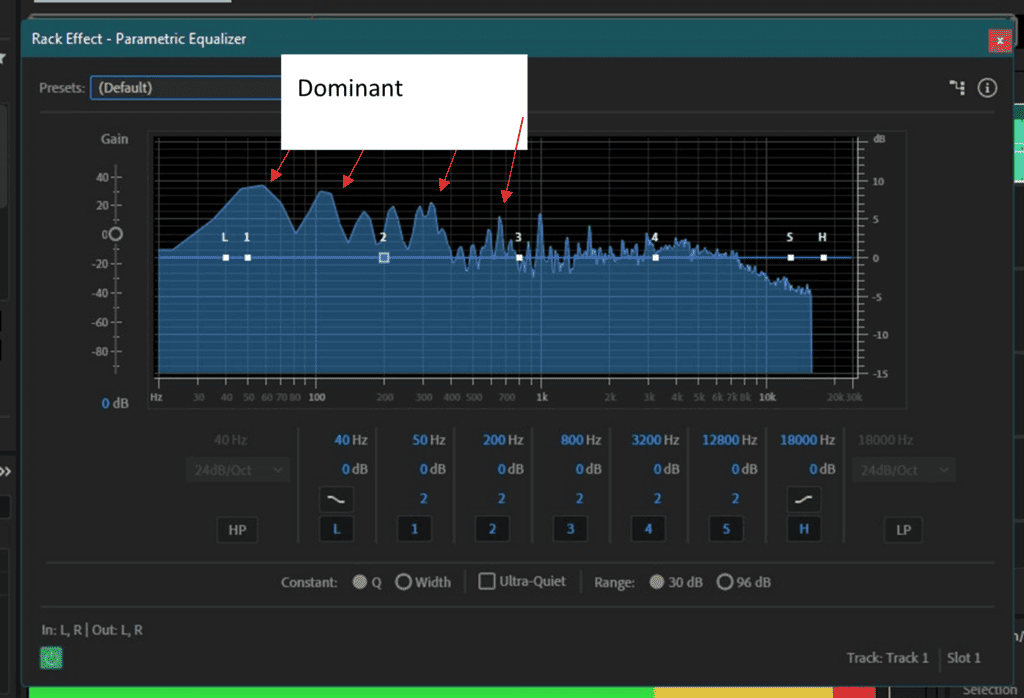
Parametric equalizers allow adjusting of frequencies using three main parameters: center frequency, gain (a boost or cut in dB) and bandwidth (or Q). You can change the eq setting by using different values for frequency, gain and Q or by dragging the mouse over control points on the graph.

With the parametric eq you can view the Frequency Spectrum of your audio track in real time and see which frequencies dominate the sound and identify imbalances in the audio in order to correct them.
A 41-Hz high pass/low cut filter cuts off frequencies below 41Hz. The gain is set at -7.7dB at 41Hz and this removes low-pitched frequencies, especially if the track sounds too full and bassy, as well as noises such as rumbles or pops and sub bass frequencies.
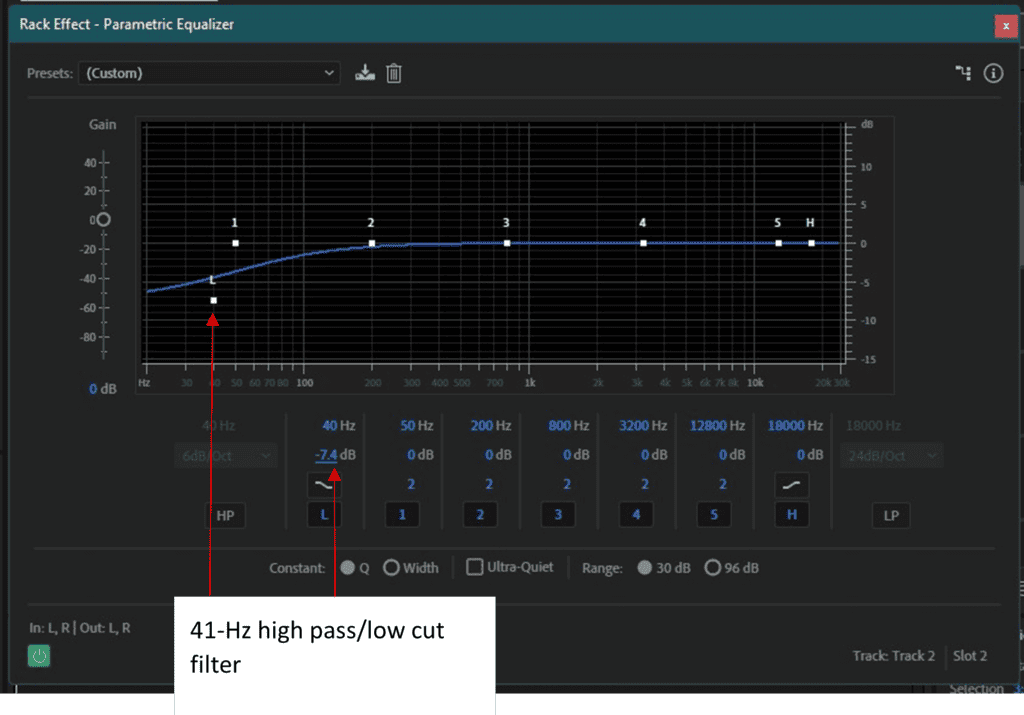
On the other hand, if you wish to hear more sub bass frequencies below 40 Hz and to get a fuller sound, more gain is added in this region. Likewise, a low pass/high cut filter applied on the high end of the frequency spectrum (over 18 kHz) cuts off high frequencies and removes unwanted noise such as hissing.
Another technique used for EQ especially with parametric equalizer is sweeping. When you do not know what frequency to eq on your track, select any frequency on the control graph, and sweep across the frequency spectrum until you find a center frequency that you wish to cut or boost to make the track sound right.
For example, a guitar track may sound too harsh at 1 kHz. Cut the frequency until you get the desired tone, and the guitar sounds natural and keep varying the center frequency to give the track good tonal balance.
Compressor
A compressor is used to reduce the dynamic range of an audio track by boosting or attenuating an audio signal. It reduces the gain (attenuation) when the input signal gets too loud; or boosts gain (amplification) when the level gets too quiet. It acts as an automatic volume control, by adjusting the the level of vocals or instruments so that they are more constant and produce a better sound quality, and it prevents clipping.
Let us look at some of the settings on the compressor:
The Ratio setting is the difference in gain/level (volume) between the original sound before it passes through the compressor and the output after compression.For example, a 2:1 ratio means that when a 2dB input signal goes into the compressor, the output difference of the audio level changes 1 dB (the compressor reduces gain so that the output is only 1 dB). Ratios range from 1:1 to 30:1. The higher the level (volume) of the input audio, the higher the ratio that is applied to the audio.
Threshold: compression occurs after the threshold level is exceeded. The threshold is set high (about -5dB) to compress only the loudest notes, or low (-10 or -20dB) to compress the entire signal.
Attack and Release parameters change the temporal behavior. Attack time is simply how much time it takes (in milliseconds) before the compressor kicks in to compress the audio. A longer attack time will reduce the sound’s overall volume (gain), but with a slightly longer response time on the input level of the audio. This spreads the sound and makes it a bit fat. For example, an attack time of 100 ms represents how much time the compressor will take to respond and adjust and balance levels (such as 3 dB lower) when the threshold is reached.. Release time determines the amount of time the compressor will ‘hold’ after the audio is compressed.
Gain parameter is used to increase the output level of the compressor after compressing the signal.
Setting Up the Compressor in Adobe Audition
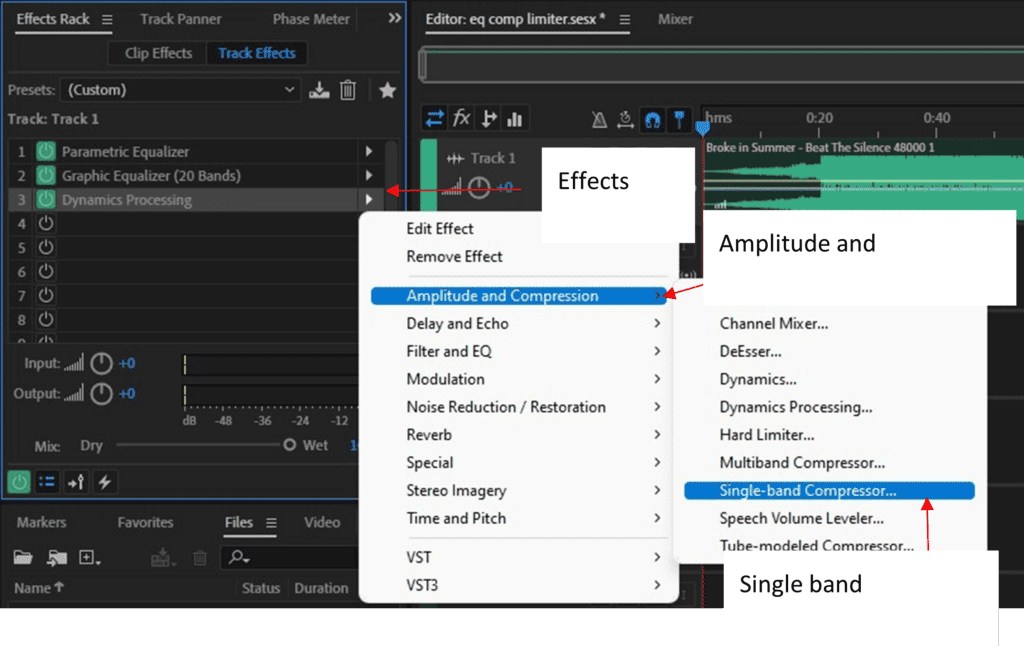
Click on any slot in the effects rack, which brings up a pop-up menu. Then choose Amplitude and compression and select the compressor effect.
Effects rack > Amplitude and compression > Single Band Compressor
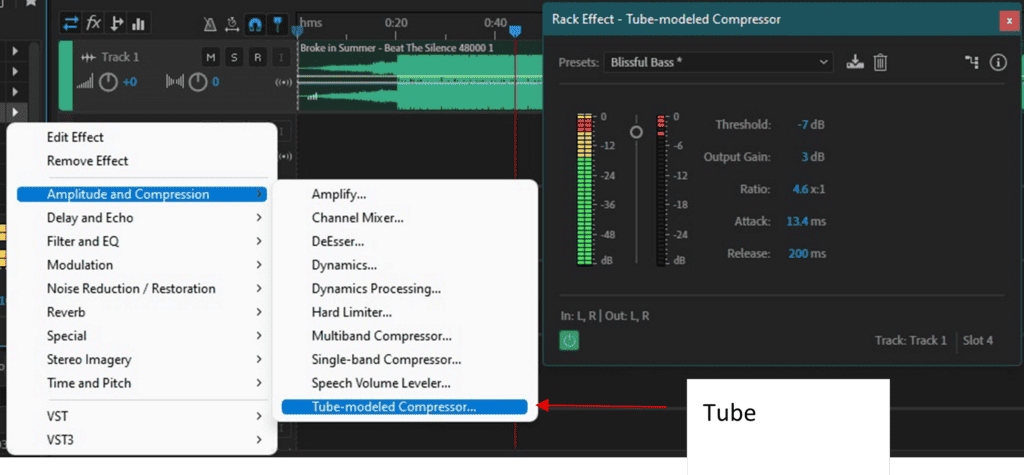
There are other diverse types of compressors, you can use a multi-band compressor which applies compression to different frequency bands separately, or a tube-modeled compressor for a more vintage feel and to add some distortion to your sound.
Effects rack > Amplitude and Compression > Tube-modeled Compressor
The most preferable compressor setting depends on the various instruments and vocals and musical style though you can try some typical settings:
Ratio 2:1 to 3:1, threshold -11 to –16dB, 400 msec release, make-up gain 2dB
Ratio 4:1, threshold -9 to –12dB, attack 1 msec, release 100 msec, make-up gain 1.5dB
Ratio 4:1 to 8:1, threshold -16 to –18dB, attack 20 msec, release 200 msec, make-up gain 3dB
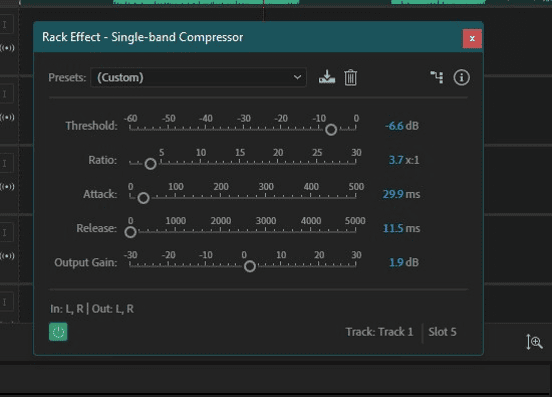
Ratio 4.2:1, threshold -7.7dB, attack 16.6 msec, release 11.5 msec, make-up gain 2.1dB
Limiter
A limiter keeps signal peaks from going above a certain set threshold by attenuating (cutting) the audio peaks that exceed the threshold. A limiter affects only the highest peaks to increase overall gain and avoid distortion/clipping. To achieve this, limiters have a fast attack time (or look-ahead time)—1 microsecond to 1 millisecond. Any level higher than 5 ms will cause distortion to occur.
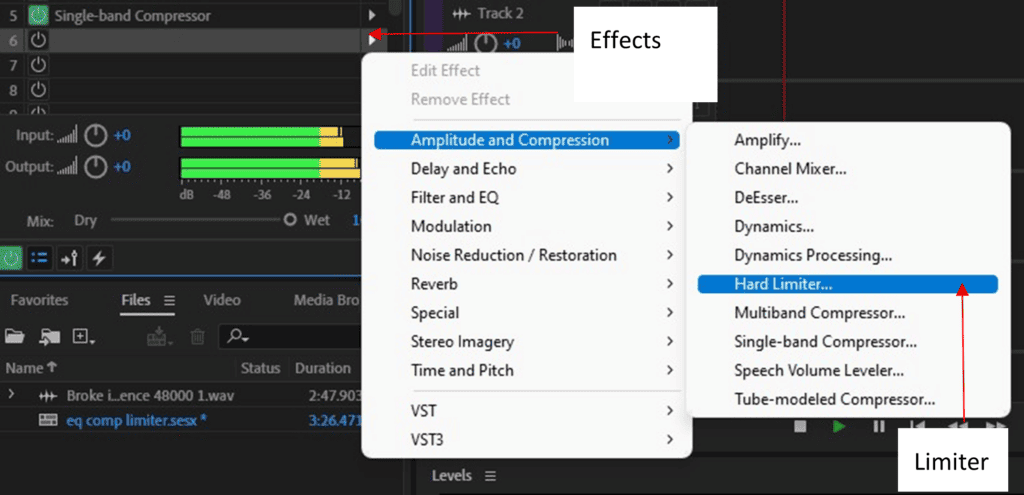
To use the Hard limiter effect in Adobe Audition, click on any slot in the effects rack, which brings up a pop-up menu. Then choose Amplitude and compression and select Hard Limiter.
Effects rack > Amplitude and Compression > Hard Limiter
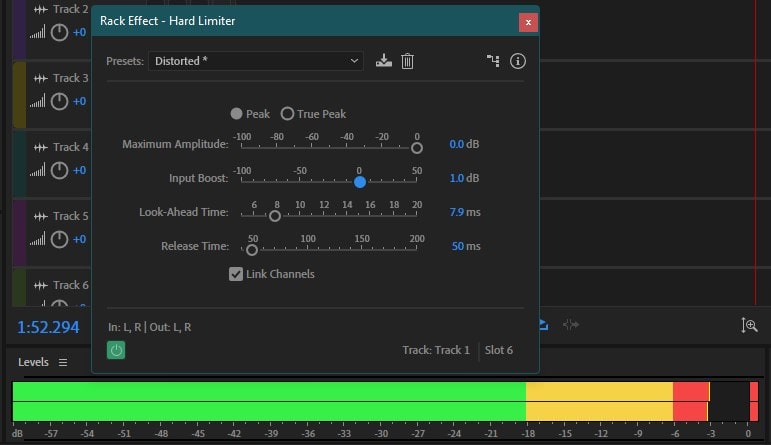
Hard Limiter has the following settings:
Maximum Amplitude: Sets the threshold for the limiter. The Maximum Amplitude (threshold) is set high, say at 0dB. For input levels up to the Maximum Amplitude, the output level matches the input. For input levels above threshold, the output level stays the same as the Maximum Amplitude.
Input Boost:Turns the level up (in the boost case) or down (in the cut case) at the stage before the limiter kicks in to make the audio a bit louder.
Look-Ahead Time: Checks the upcoming audio for peaks and sets the attack time to limit the audio just before the onset of clipping. Audio enters a limiter, and the limiter measures that audio signal and reduces the level.
Release Time: Determines how quickly limiting stops after audio drops below the threshold after loud peaks. Sets the time for the audio to return to an equal level so that it has the same input-output levels before and after limiting..
Try adjusting the threshold, attack and release settings to determine how fast the compressor acts to boost or cut the audio level, to give your mix more consistency, and for gain reduction which will prevent clipping. A short look-ahead time will make the sounds overly compressed; a long attack time brings the effect of closeness to the sound by giving the sound some spread. A higher Input Boost will give a more transient and high impact sound while a short release time brings up the quiet parts of the track. Also Audition provides a variety of presets to use on a limiter.
Final Words
You’ll want to produce music that’s exciting and touching because your thoughts and feelings echo with those in the song. The sound of a compressor, limiter, and EQ in a recording can make it more musical, conveying the emotion expressed in the song. It makes it easy to hear into the music since the music has a sense of space or room around the instruments. With compression, your song sounds like it’s flowing in one continuous piece and EQ makes it sound clear so it’s easy to hear tiny details in the music. To get some edge, punch and clarity, a limiter comes in handy. With effects you’ll get much more out of the music.
![Adobe Audition Only Recording Left Side [FIXED]](https://ProRec.com/wp-content/uploads/2022/08/image-17-180x180.png "Adobe Audition Only Recording Left Side [FIXED]")


![Adobe Audition MME Device Internal Error [FIXED]](https://ProRec.com/wp-content/uploads/2022/09/image-112-180x180.png "Adobe Audition MME Device Internal Error [FIXED]")